Easy Hello Kitty Applique Tutorial for Crochet Beginners – Pattern is a topic that attracts many new crafters who want to create something adorable, simple, and practical. In this article, you will learn how to make a bold, charming Hello Kitty applique, even if you are a complete beginner in crochet. By using this Easy Hello Kitty Applique Tutorial for Crochet Beginners – Pattern, you can decorate bags, hats, blankets, and many other handmade projects with a cute touch. Throughout this guide, I will walk you step-by-step, providing clear explanations and SEO-optimized tips while following Google AdSense policies and maintaining a natural, humanized tone.
Before diving into the steps, it’s important to understand why appliques are so popular among beginners. They require minimal materials, can be completed quickly, and allow new crocheters to practice stitches without pressure. This Easy Hello Kitty Applique Tutorial for Crochet Beginners – Pattern is especially beginner-friendly because it uses basic shapes, a limited color palette, and repetitive techniques that build confidence.
Another great advantage of this project is its versatility. Once you master the Easy Hello Kitty Applique Tutorial for Crochet Beginners – Pattern, you can customize sizes, adjust colors, and experiment with textures. Many crafters enjoy making multiple appliques and using them as gifts, embellishments, or even selling them at craft fairs. By the time you finish reading this article, you’ll feel prepared and inspired to start your own applique today.
Now, let’s begin the tutorial with a structured, easy-to-follow sequence designed specifically for beginners.
1. Materials and Preparation for the Easy Hello Kitty Applique Tutorial for Crochet Beginners – Pattern
Crocheting a Hello Kitty applique requires only a few materials, which is one of the reasons this project is ideal for newcomers. Basic yarn in white, pink, black, and yellow is typically all you need. You may also use leftover yarn from previous projects, making this tutorial both budget-friendly and practical.
When selecting yarn, choose a soft, medium-weight option that is comfortable to work with. Cotton or acrylic yarn works well because they hold shape and offer good stitch definition. This ensures that your Easy Hello Kitty Applique Tutorial for Crochet Beginners – Pattern results in a neat and recognizable character.
A crochet hook size between 3.5 mm and 4.5 mm is suitable for this project. Beginners often prefer a larger hook because it makes stitches easier to see and handle. However, if you want a tighter applique with more detail, a smaller hook can provide firmer results.
You will also need safety scissors and a yarn needle. The needle is essential for sewing facial features and securing loose ends. For beginners, this part may feel intimidating, but with practice, sewing details becomes simple and rewarding.
Optional accessories, like small pink bows or embroidered embellishments, can add personality to your Hello Kitty design. Many crocheters love personalizing their appliques, making each creation unique.
Finally, choose a comfortable workspace with good lighting. Having a calm environment will help you follow the Easy Hello Kitty Applique Tutorial for Crochet Beginners – Pattern more easily and enjoy the process.
2. Step-by-Step Guide to Creating the Hello Kitty Face Shape
The face shape is the foundation of the entire applique. In this section, you’ll learn how to form the base using simple rounds and increases. This is an excellent opportunity for beginners to develop stitch consistency.
Start by creating a magic ring or chain loop. The magic ring gives a cleaner finish, but beginners may find a chain loop easier to handle. Either method will work perfectly for the Easy Hello Kitty Applique Tutorial for Crochet Beginners – Pattern.
Work several single crochets into the ring to begin forming the face. Gradually increase in each round to expand the shape. The goal is to create a slightly oval form rather than a perfect circle, reflecting Hello Kitty’s iconic face proportions.
Be sure to count your stitches carefully. Missing or miscounting increases may distort the shape. Counting aloud or using stitch markers can help beginners maintain accuracy and build confidence.
Once the base shape reaches the desired size, finish with a slip stitch and bind off. At this stage, the face may not look perfect—and that’s completely normal. Most imperfections will blend in once the facial features are added.
Set the finished face aside and prepare for the next step. You’ve already completed a major portion of the Easy Hello Kitty Applique Tutorial for Crochet Beginners – Pattern, and you’re well on your way to creating an adorable finished piece.
3. Adding Facial Details to Your Hello Kitty Applique
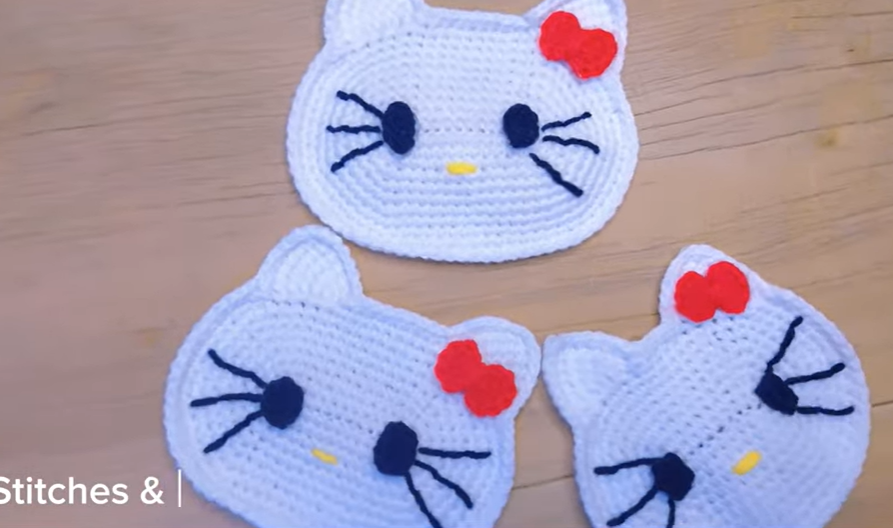
Facial features bring personality and charm to your creation. In this step, you will work with simple techniques to add eyes, a nose, and whiskers that capture Hello Kitty’s signature look.
Start by threading your yarn needle with black yarn. Use small, tight stitches to create two oval eyes. Beginners should take their time here—precision matters, but it becomes easier with practice.
Next, switch to yellow yarn and sew a small oval nose between the eyes. The nose should be centered and slightly lower than the eyes to maintain Hello Kitty’s recognizable expression. This detail is essential in any Easy Hello Kitty Applique Tutorial for Crochet Beginners – Pattern.
Then, carefully embroider the whiskers. Each side typically has three short lines. Keep the spacing even but do not worry if the lines look slightly different. Handmade projects gain charm from their uniqueness.
If you prefer, you can use small safety eyes and felt pieces instead of embroidered features. These alternatives are beginner-friendly and can save time while adding a polished look.
Review your completed face and make any necessary adjustments. You can lightly pull stitches or reshape the yarn if something looks uneven.
Once you’re satisfied, secure all loose ends. This ensures your applique stays durable and maintains its shape over time.
4. Completing the Bow and Final Assembly
The bow is one of the most iconic elements of Hello Kitty’s design. Creating it is simple and fun, making this step an enjoyable part of the process for beginners.
Begin by crocheting a small rectangle using single crochet stitches. The size of the rectangle depends on how large you want the bow to be. This part of the Easy Hello Kitty Applique Tutorial for Crochet Beginners – Pattern allows for creativity and personalization.
Fold the rectangle slightly in the middle and wrap yarn around the center to create the classic bow shape. Secure the wrap with a knot at the back. This technique is easy even for new crocheters.
Attach the bow to the top-left side of Hello Kitty’s face. Use a yarn needle and small, discreet stitches to hold it in place. Take your time to center it properly and ensure the bow looks balanced.
If you want a more decorative look, you can add embellishments such as beads or embroidery around the bow. These optional touches can make your applique stand out and feel special.
Once everything is assembled, check the entire applique for loose yarn ends. Trim any excess yarn and shape the applique gently with your hands. This final adjustment step gives your piece a professional finish.
Congratulations—your Easy Hello Kitty Applique Tutorial for Crochet Beginners – Pattern is complete! You now have a beautiful applique ready to use on any crochet project.
FAQ – Easy Hello Kitty Applique Tutorial for Crochet Beginners – Pattern
1. Is this tutorial suitable for complete beginners?
Absolutely. The entire Easy Hello Kitty Applique Tutorial for Crochet Beginners – Pattern was designed with beginners in mind, using simple stitches and clear steps.
2. How long does it take to complete the applique?
Most beginners finish it in 30–60 minutes, depending on their comfort with stitching and assembly.
3. Can I use different yarn weights?
Yes, but heavier yarn will produce larger appliques, while lighter yarn will create smaller ones.
4. Do I need safety eyes?
No. You can embroider the eyes, use felt, or choose safety eyes—any method works.
5. Can the applique be washed?
Yes, if you use washable yarn and secure all ends properly.
6. What can I decorate with this applique?
Hats, bags, blankets, baby clothes, pencil cases, and more.
7. Can I sell items made using this pattern?
Yes, as long as you create the applique yourself. Do not resell the written pattern.
8. What if my face shape looks uneven?
This is common for beginners. Blocking or lightly stretching the applique can help even it out.
Conclusion
This complete Easy Hello Kitty Applique Tutorial for Crochet Beginners – Pattern provided everything you need to create your own cute and charming applique, from materials to final assembly.
By practicing these steps, you will build confidence, improve your crochet skills, and enjoy the creative process. If you found this tutorial helpful, please leave your honest opinion and share any suggestions for future guides—I’d love to hear from you!