If you are looking to create a timeless, cozy piece for your home, the Grandma’s Square Blanket – Crochet Pattern is a perfect project to take on.
This traditional crochet pattern, known for its classic charm, creates a beautiful blanket composed of square motifs.
Not only does it offer a visually appealing design, but it also holds sentimental value, often passed down through generations.
Whether you’re a seasoned crocheter or just starting out, this pattern offers a great opportunity to practice and refine your skills.
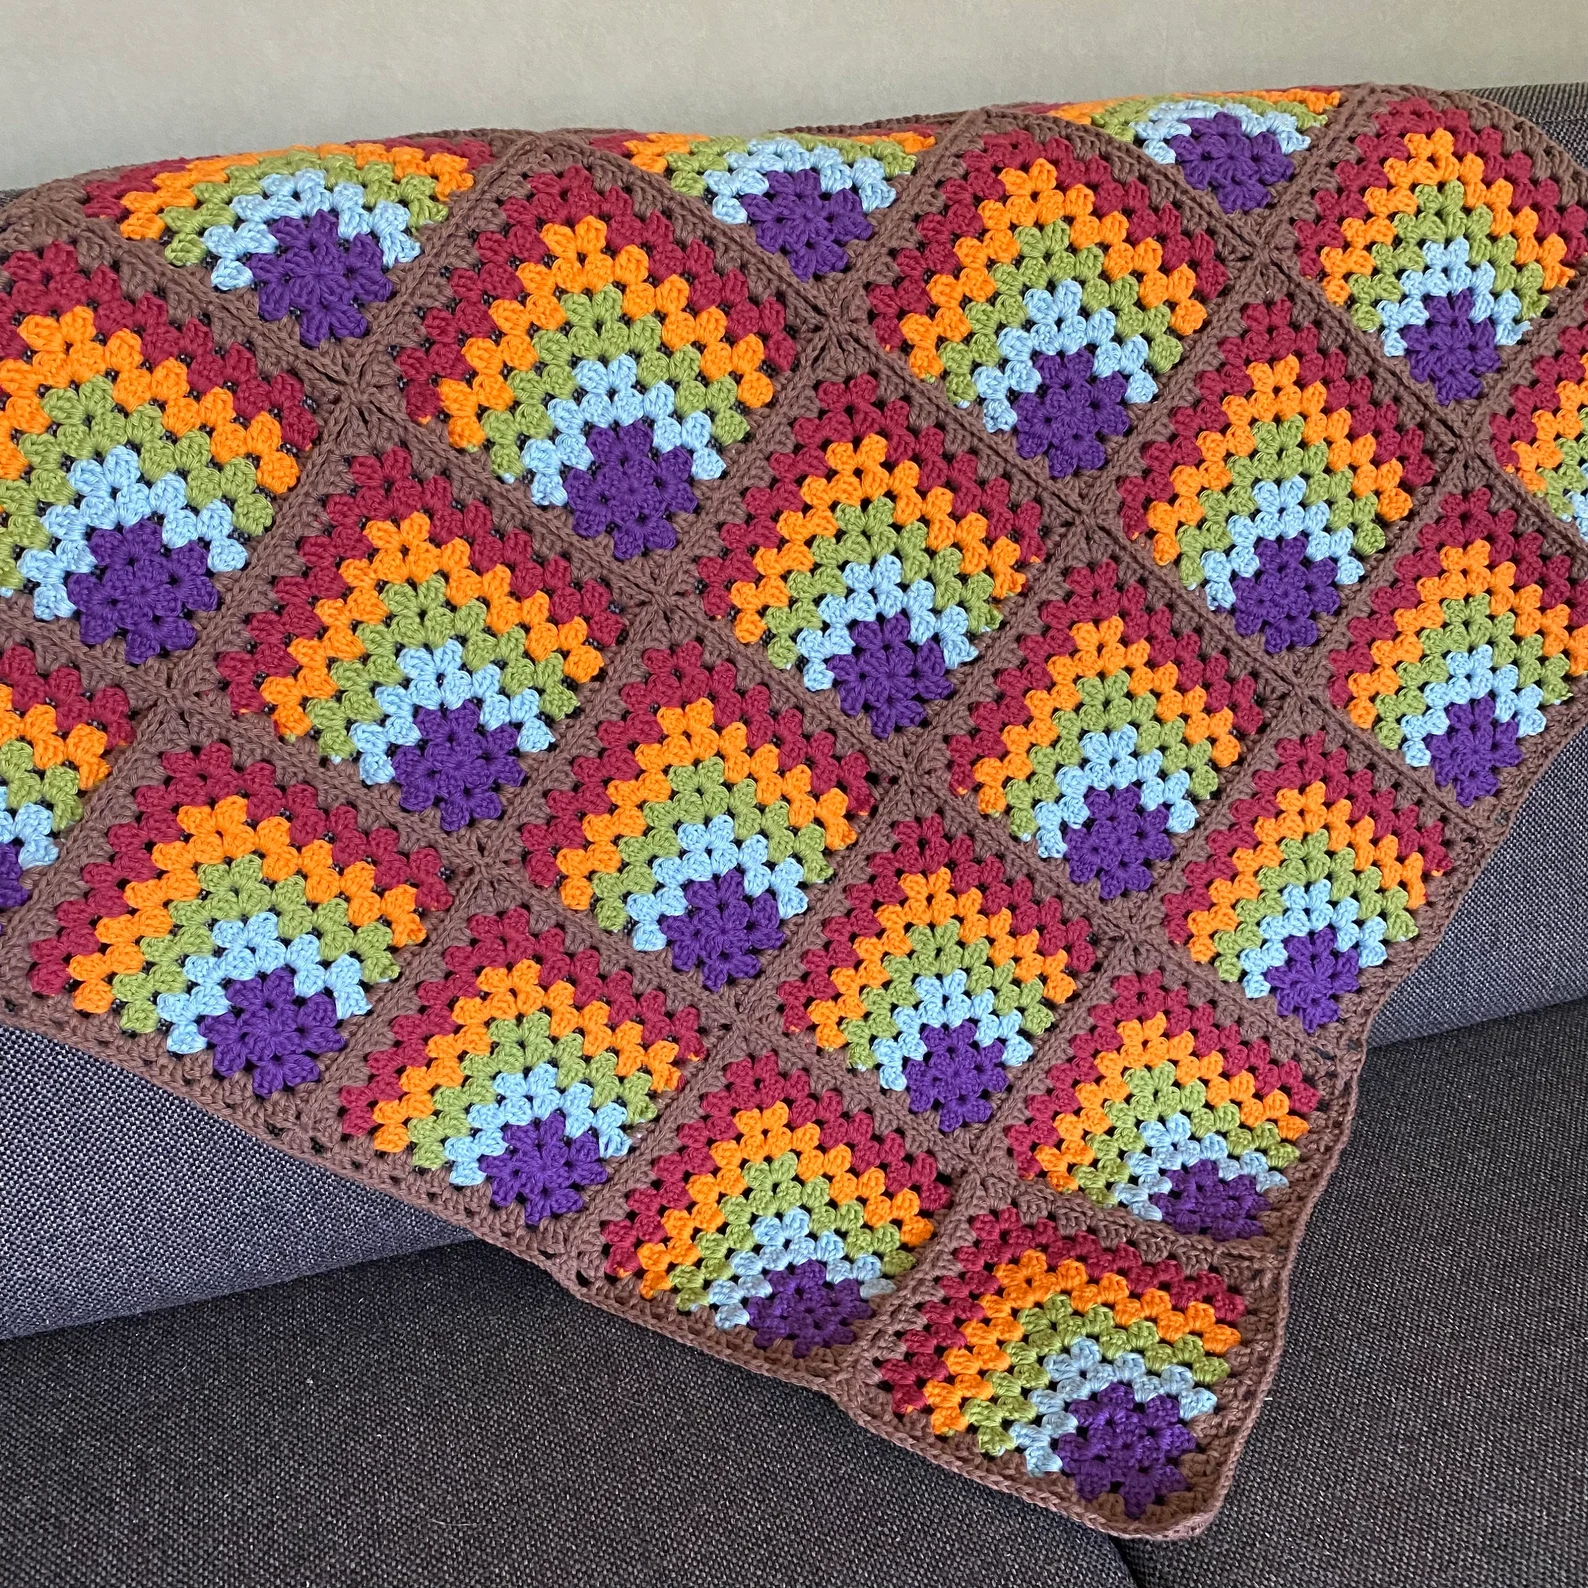
The Grandma’s Square Blanket is a popular crochet pattern because of its simplicity and versatility. The square motifs that make up the blanket are typically joined together to form a larger piece, making it customizable in terms of size and color. This pattern allows you to experiment with different colors, creating a blanket that matches your home decor or reflects your personal style.
In this article, we’ll walk you through the process of creating your very own Grandma’s Square Blanket. We’ll cover everything from the materials you need to the steps involved in crocheting the squares, joining them together, and finishing the blanket. You’ll also find tips for customizing the pattern to make it truly your own, as well as answers to some frequently asked questions about crocheting this timeless blanket.
1. Materials Needed for Grandma’s Square Blanket
Before you can start crocheting your Grandma’s Square Blanket, it’s essential to gather all the materials you’ll need. Having the right supplies will make your crocheting process smooth and enjoyable, allowing you to focus on creating the beautiful squares.
Yarn: For this blanket, you will need a medium-weight yarn, such as worsted-weight yarn. The amount of yarn needed will depend on the size of your blanket, but generally, you’ll need several skeins of yarn in different colors. Choose colors that complement each other to create the design you envision. The beauty of this pattern lies in its versatility, so you can go bold with vibrant colors or opt for soft pastels.
Crochet Hook: The recommended size for the crochet hook is usually around 5mm (H-8), but it may vary depending on your yarn choice and personal preference. Be sure to check the yarn label for the suggested hook size. A crochet hook that is too small can make your squares too tight, while one that’s too large can cause them to be too loose.
Scissors: You’ll need a good pair of scissors to cut the yarn after each square is completed. Make sure to use sharp scissors to avoid any frayed ends.
Tapestry Needle: A tapestry needle is essential for weaving in the loose ends once you’ve finished your squares. This needle has a large eye, which makes it easier to thread the yarn.
Stitch Markers: Stitch markers are optional but helpful for keeping track of your rounds as you crochet each square. They will help you stay organized and ensure that your squares are even.
Measuring Tape: Use a measuring tape to check the size of each square as you crochet. This will help you ensure that all the squares are uniform in size, which is crucial when joining them together.
With these materials ready, you can start working on your Grandma’s Square Blanket – Crochet Pattern and create a beautiful piece to cherish.
2. How to Crochet the Squares
Crocheting the individual squares is the first step in making your Grandma’s Square Blanket. Here is a step-by-step guide on how to create the classic granny square:
Step 1: Make the Magic Ring
To begin, create a magic ring by making a loop with your yarn. Then, insert your hook into the ring, yarn over, and pull the yarn through. This creates the foundation of your square.
Step 2: Crochet the First Round
Once the magic ring is in place, chain three (this will count as your first double crochet stitch). Then, work two double crochet stitches into the ring. Continue to crochet two double crochets into the ring, making a total of twelve double crochets in the first round. Finish the round by joining with a slip stitch to the top of the first chain-three.
Step 3: Work the Second Round
For the second round, chain three (again, this counts as a double crochet). Then, work one double crochet into the next stitch, followed by two double crochets in the next stitch. Continue this pattern around the circle, alternating between one and two double crochets. Join the round with a slip stitch.
Step 4: Continue Adding Rounds
You will continue adding rounds in the same way, increasing the number of double crochet stitches in each section. Each round will make the square larger. Continue until the square reaches your desired size, typically around 6 to 8 inches per side.
Step 5: Finish the Square
Once you’ve reached the desired size for your square, finish off the yarn by cutting it and pulling it through the final loop. Use a tapestry needle to weave in the ends, ensuring the yarn is secured.
Step 6: Repeat
Repeat the process to crochet as many squares as you need for your blanket. Depending on the size of your blanket, you may need anywhere from 20 to 100 squares or more.
3. Joining the Squares Together
After you’ve crocheted all the squares for your Grandma’s Square Blanket, it’s time to join them together. There are several methods to do this, but one of the most popular is the whip stitch method.
Step 1: Arrange the Squares
Lay out all the squares in the desired pattern. You can choose to arrange them in a grid pattern, diagonally, or any other layout that appeals to you. Make sure the squares are aligned and evenly spaced.
Step 2: Join the Squares
Using your crochet hook or a tapestry needle, begin joining the squares together. Start by placing two squares right sides together and whip stitch along the edges, connecting the two squares. Continue joining the squares in rows, and then connect the rows together.
Step 3: Secure the Joints
Once the squares are all joined, make sure the yarn ends are securely fastened and woven in. This will prevent any loose ends from coming undone over time.
Step 4: Border the Blanket
After all the squares are joined, you can add a border around the entire blanket. This is optional, but it can add a nice finishing touch to the design. A simple single crochet border is often used, but you can get creative and add other stitch patterns if desired.
4. Customizing Your Grandma’s Square Blanket
The Grandma’s Square Blanket is a highly customizable crochet pattern. Here are a few ideas to personalize your blanket and make it uniquely yours:
1. Choose Different Colors
Experiment with various colors for the squares. You can use a mix of bright colors for a playful look or opt for more muted tones for a classic, elegant design. You could also create a gradient effect by gradually transitioning from one color to another.
2. Add Texture
Consider adding texture to your squares by using different crochet stitches, such as bobble stitches, shell stitches, or puff stitches. These variations will make your blanket stand out and add dimension.
3. Play with Square Sizes
You don’t have to stick to one size of square. Mixing smaller and larger squares can create a more dynamic and interesting design. You could even add round or hexagonal motifs for a more eclectic look.
4. Create a Unique Border
Instead of the typical single crochet border, you can experiment with other stitch patterns to create a border that complements the overall design of your blanket. Try a scalloped edge, picot stitch, or even a lacy design.
5. Add Applique or Embellishments
For an extra special touch, add appliqué motifs to your squares. Flowers, hearts, or even initials can be stitched onto the squares to personalize the blanket even further.
6. Try Different Textures and Fibers
If you want to add some extra luxury to your blanket, try using yarns made from different fibers, such as alpaca, merino wool, or cotton. This can change the look and feel of the blanket, giving it a more sophisticated touch.
FAQ About the Grandma’s Square Blanket – Crochet Pattern
1. How many squares do I need to make for a full blanket?
The number of squares required will depend on the size of the blanket you want to make. Typically, a small throw might require around 20-30 squares, while a full-size blanket may require 80 or more squares.
2. Can I use different yarn weights for this pattern?
Yes, you can experiment with different yarn weights, but be sure to adjust your crochet hook size accordingly. Lighter yarn weights, such as sport or DK, will produce a more delicate and lightweight blanket.
3. How do I make sure my squares are the same size?
The key to getting uniform squares is consistency in your crochet tension and following the pattern’s stitch counts carefully. Use a measuring tape to check your squares as you go.
4. How can I make my blanket larger or smaller?
To make your blanket larger, simply crochet more squares. For a smaller blanket, reduce the number of squares or crochet fewer rounds for each square.
5. What is the best way to join the squares?
The whip stitch method is the most commonly used method for joining the squares, but you can also try other techniques, such as the slip stitch join or the whipstitch join using a crochet hook.
Conclusion
The Grandma’s Square Blanket – Crochet Pattern is a wonderful project for anyone looking to create a cozy and meaningful piece for their home. With simple instructions, the pattern allows for plenty of creativity and customization. Whether you choose to use bold colors, unique textures, or intricate borders, this pattern is sure to result in a beautiful, personalized blanket. We hope this guide helps you create a blanket you’ll cherish for years to come. Don’t forget to share your progress and leave any suggestions or questions in the comments below!