If you’re a fan of crochet and looking for a stylish way to protect your books, creating a Granny Square Book Cover – Pattern is the perfect solution.
This charming and practical accessory blends the timeless beauty of traditional crochet with the functionality every reader needs.
Whether you’re crafting it for yourself, as a gift, or to sell in your handmade shop, this Granny Square Book Cover – Pattern offers both creativity and purpose.
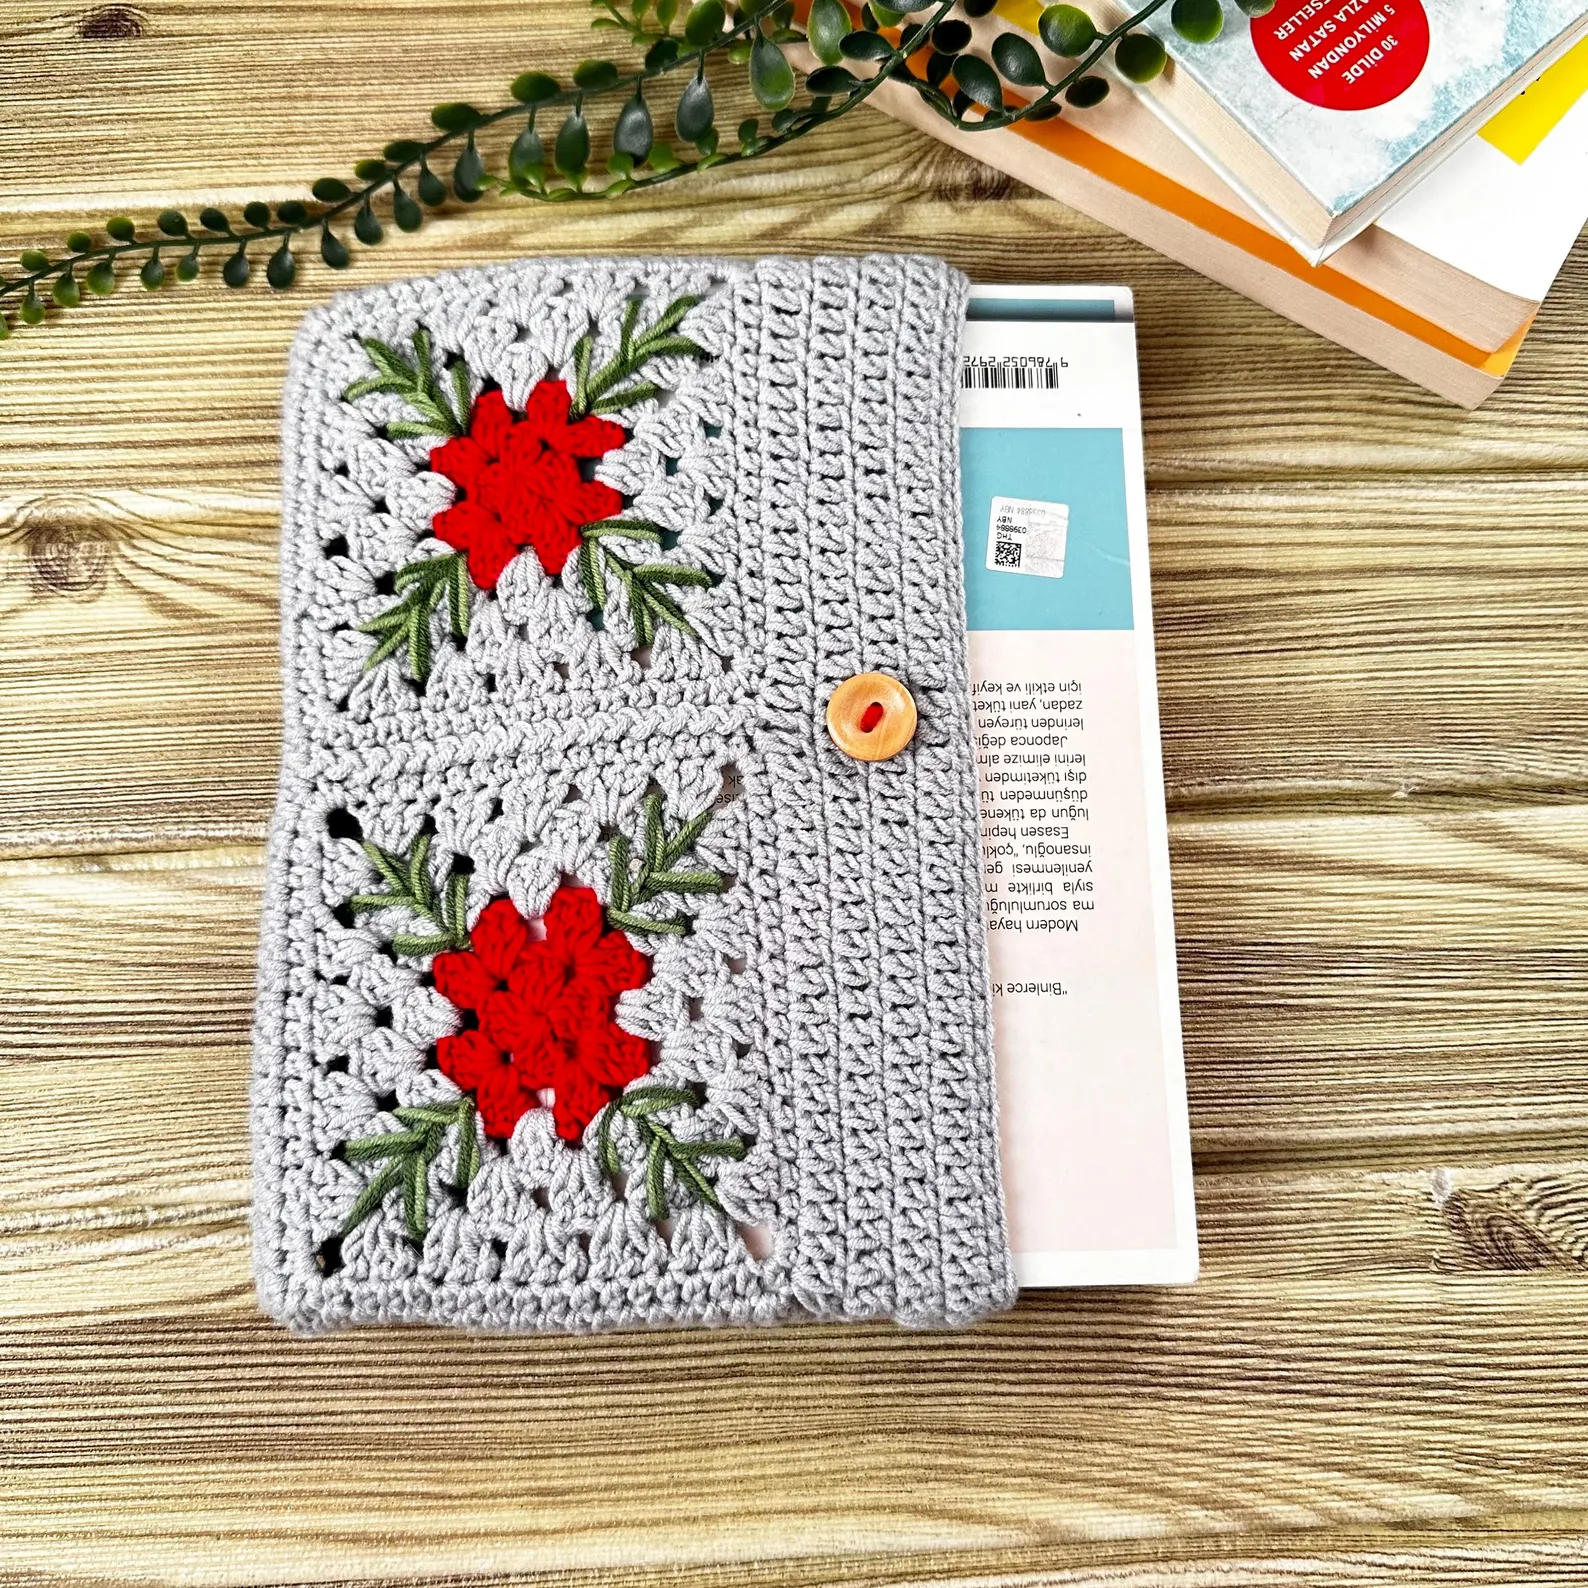
The granny square has stood the test of time in the crafting world. With its nostalgic appeal and endless design possibilities, it’s a favorite among crochet lovers of all skill levels. Using these vibrant squares to craft a book cover not only protects your favorite reads but also adds a touch of personality to your bookshelves, bags, or coffee tables.
In this article, you’ll find everything you need to start your own Granny Square Book Cover – Pattern project. We’ll cover materials, step-by-step instructions, design ideas, tips for customization, and much more. Whether you’re a beginner or a seasoned crocheter, this guide will inspire you to grab your hook and yarn right away.
1. Choosing the Right Materials
The first step in crafting your Granny Square Book Cover – Pattern is selecting the right materials. The quality and type of yarn and hook size can greatly affect the final outcome of your project.
Start by choosing a soft, durable yarn. Cotton yarn is often a favorite for book covers because it’s breathable, easy to work with, and provides a clean finish. You can also experiment with blends if you want something more textured or cozy.
Next, pick a hook size that complements your yarn. Most patterns recommend using a hook slightly smaller than usual to create a tighter stitch, helping your cover hold its shape. A 3.5 mm to 4.0 mm hook usually works well.
Don’t forget about lining. While it’s optional, a fabric lining can protect the inside of the book and help the cover stay in place. You can sew this by hand or with a machine for a cleaner look.
You’ll also need a tapestry needle for weaving in ends, scissors for trimming yarn, and optional embellishments like buttons or ties if you want to secure your cover.
Choose colors that resonate with your personal style or match the theme of the book. Contrasting or harmonious colors can add a beautiful touch to your Granny Square Book Cover – Pattern.
Lastly, print or sketch your pattern. Having a clear layout or plan helps you stay organized and visualize the final product, especially when dealing with multiple squares and color combinations.
2. Creating the Granny Squares
Now that your materials are ready, it’s time to dive into the creation process. The classic granny square is simple to make and forms the backbone of your Granny Square Book Cover – Pattern.
Start by chaining four stitches and joining them to form a ring. This is the center of your square. Then, chain three (which counts as your first double crochet), and work double crochets into the ring with chain spaces to form the first round.
Build out your square by adding rounds with chain spaces in each corner. The key is to maintain symmetry so that the square lies flat and neat.
Each round can be done in the same color or different colors for a vibrant patchwork look. Switching colors adds personality and can be used to match specific book aesthetics.
Once you’ve made several squares—enough to cover both sides and spine of your book—you’ll start joining them. You can use slip stitches, whip stitch, or crochet them together, depending on your preferred finish.
Make sure to block the squares before assembly. Blocking helps even out the stitches and shapes your squares to the exact size needed, ensuring a professional look.
Measure the total width and height of your open book to determine how many squares are needed. You might need to adjust your pattern based on book size or add smaller filler squares.
3. Assembling the Book Cover
This is where your Granny Square Book Cover – Pattern really comes together. Proper assembly will ensure your book cover is snug, protective, and visually appealing.
Begin by laying out your squares on a flat surface in the arrangement you want. Double-check the dimensions to ensure a good fit around your book when it’s closed.
Join the squares in horizontal rows first, then connect the rows vertically. Make sure to align the stitches cleanly to maintain the integrity of the pattern.
Add a border around the entire piece using single crochet or another decorative stitch. This border not only enhances the look but also provides structure to the book cover.
Fold the piece around your book to form front, back, and spine areas. You can sew or crochet the side flaps inward to create pockets that hold the book covers securely.
For a more functional design, consider adding a closure. A simple loop and button setup or a tie string can keep the book closed when carried in a bag.
Lastly, double-check all seams and loose threads. Finish by weaving in ends and adding any extra embellishments like appliqués, patches, or embroidery for a unique touch.
4. Tips for Customizing Your Book Cover
Once you’ve mastered the basics, the Granny Square Book Cover – Pattern becomes a canvas for creativity. Customization is where your personality shines through.
Experiment with different square sizes and shapes. Though the classic granny square is the most popular, there are many variations, including hexagons and triangles, that can give your book cover a unique edge.
Try using thematic colors or patterns. For example, pastel tones for romance novels, earthy hues for nature books, or vibrant primaries for children’s books.
Incorporate textured stitches in some of your squares. Bobble stitches or puff stitches can add tactile interest and a 3D effect to your design.
Add practical elements such as bookmarks or pen holders. Crochet a small strap that attaches inside the spine or slip a loop through one of the squares.
Personalize your project with monograms or initials. Use surface crochet or simple embroidery to stitch letters onto the front cover square.
Repurpose the pattern for other items. The same technique used in the Granny Square Book Cover – Pattern can be adapted for e-reader covers, journals, or even tablet sleeves.
FAQ – Frequently Asked Questions
Q: What size should each granny square be for a book cover?
A: Each square typically measures around 4 inches, but this can vary depending on the size of the book. Measure your book first, then determine how many squares are needed.
Q: Can I make this pattern if I’m a beginner?
A: Absolutely! The Granny Square Book Cover – Pattern is beginner-friendly and a great way to practice basic crochet techniques.
Q: What’s the best yarn for a granny square book cover?
A: Cotton yarn is highly recommended for its durability and stitch definition. It’s also easy to clean and holds shape well.
Q: Do I need to line the book cover with fabric?
A: Lining is optional, but it adds structure and protects the book’s surface. It also helps prevent the cover from stretching over time.
Q: How do I keep the book cover from slipping off?
A: Creating inner flaps or pockets using additional granny squares or fabric can hold the cover snugly. Adding a closure like a button also helps.
Q: Can I wash the book cover?
A: Yes, especially if you use cotton yarn. Hand wash gently in cold water and lay flat to dry to preserve shape and color.
Conclusion
The Granny Square Book Cover – Pattern is a beautiful fusion of tradition and functionality. From choosing the right materials and crafting granny squares to assembling and customizing your book cover, this project is both rewarding and practical. It allows crocheters of all levels to express their creativity while producing a useful item that stands out.
If you enjoyed this tutorial, please consider leaving a sincere opinion and suggestions for future topics. Your feedback helps improve the content and inspires more creative projects. Happy crocheting!