Kitten hat crochet – Pattern projects are some of the most adorable and enjoyable items you can make, especially if you love playful designs and cozy handmade accessories. Right from the beginning, it’s important to note that a Kitten hat crochet – Pattern is a fully family-friendly craft activity that aligns with Google AdSense content policies. This pattern appeals to crocheters of all ages because it blends creativity with practical use. Whether you’re making it for babies, children, teens, or adults, a kitten-themed hat brings warmth, charm, and personality to any wardrobe.
Working on a Kitten hat crochet – Pattern is also an excellent opportunity to practice shaping techniques and stitch consistency. Because hats require increasing, decreasing, and working in the round, this project suits both beginners eager to improve their skills and experienced crocheters looking for a fun, relaxing pattern. The addition of cat ears and optional embroidered details makes the project exciting and customizable.
Another wonderful aspect of creating a Kitten hat crochet – Pattern is how versatile it can be. You can choose from a wide range of colors, textures, and yarn weights to craft a hat that suits the season or the personality of the wearer. Soft pastels work beautifully for baby hats, while bold colors or stripes can make an eye-catching hat for older children and adults. With endless creative possibilities, each kitten hat becomes a unique handmade treasure.
1. Understanding the Structure of a Kitten Hat Crochet Pattern (H2)
A Kitten hat crochet – Pattern typically begins from the top of the head and works downward in rounds. This method makes it easy to adjust the size and create a smooth, seamless shape. The crown of the hat is formed using increases, which gradually expand the circle until it reaches the appropriate circumference.
Once the crown is complete, the main body of the hat is worked without increases. This section determines how tall the hat will be and ensures a comfortable fit. Depending on your chosen stitch—single crochet, half double crochet, or double crochet—the texture of the hat can be dense, stretchy, or softly ribbed.
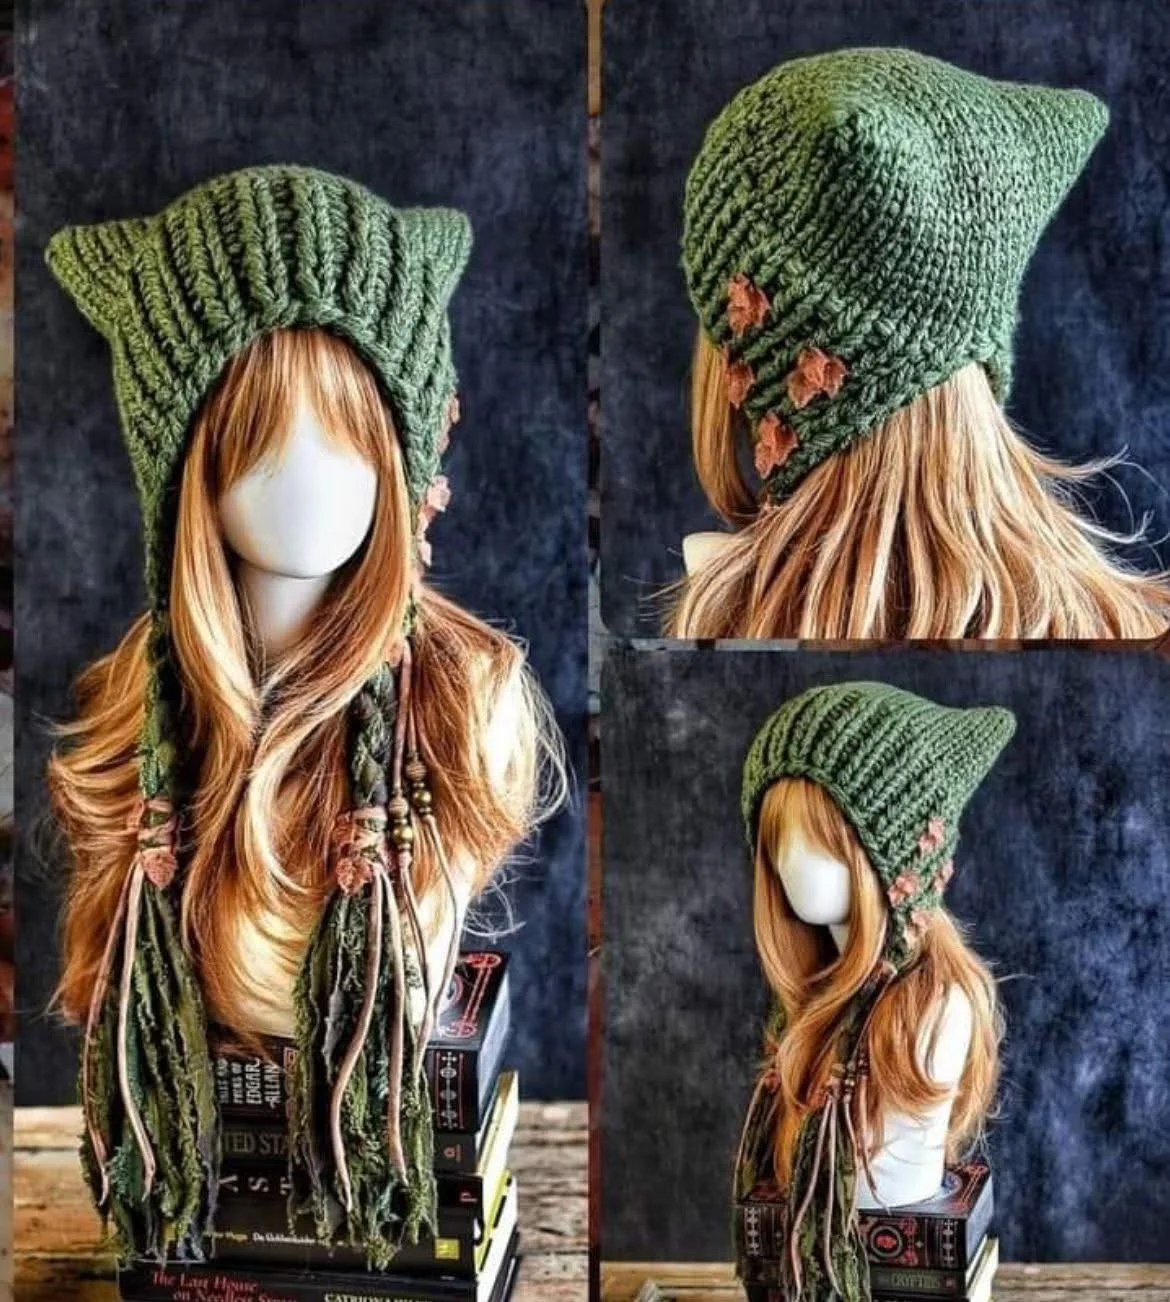
The signature feature of a kitten hat is the ears. These are typically crocheted separately using triangles or rounded shapes, depending on the style you prefer. The ears are then sewn onto the top of the hat, giving it its cute and playful kitten appearance.
Some Kitten hat crochet – Pattern styles include additional details such as embroidered whiskers, a small nose, or even a little bow. These embellishments can be added with yarn, felt, or embroidery thread to give the hat more character.
The lower edge, or brim, of the hat can be customized as well. You can add a ribbed border, a rolled brim, or a simple slip-stitch finish. Each finishing method gives the hat a different look and enhances overall comfort.
Understanding the basic structure makes it easier to customize the hat for different ages and preferences. It also allows you to adapt the pattern using different yarns or hook sizes while ensuring the hat remains comfortable and stylish.
2. Materials and Tools Needed for the Hat (H2)
To create a Kitten hat crochet – Pattern, you’ll need soft, comfortable yarn suitable for hats. Worsted-weight or DK-weight yarns are excellent choices because they provide warmth without feeling too heavy. Cotton blends or acrylic yarns are also popular for children’s hats due to their durability and easy care.
Choosing the right hook size is essential. Most kitten hat patterns use hooks between 4.0 mm and 5.5 mm, depending on the yarn weight. A properly matched hook ensures consistent stitches and a comfortable, stretchy fit for the hat.
A yarn needle is required for sewing the ears onto the hat and weaving in ends. Since hats endure washing and regular wear, securing the stitches firmly is important for durability. Clean finishing enhances the overall look of your Kitten hat crochet – Pattern.
Stitch markers can be extremely helpful, especially when working in the round. They mark the beginning of each round and help count increases and decreases accurately. This is especially important for beginners who may still be getting used to circular crochet techniques.
Optional materials include felt fabric for facial details, safety eyes (for older children and adults only), or embroidery thread for adding whiskers and other decorative elements. These embellishments bring the kitten character to life and make your hat even more charming.
Scissors are also essential for cutting yarn and trimming ends. If you plan to make multiple hats or add colorwork, having sharp scissors ensures clean cuts and smooth transitions between yarn colors.
3. Step-by-Step Overview of Creating the Kitten Hat (H2)
To begin your Kitten hat crochet – Pattern, start with a magic ring or chain circle. This will form the top of the hat. Work several rounds of increases, usually by adding stitches evenly spaced around the circle. Continue until the circle matches the desired head circumference.
Once the crown is wide enough, stop increasing and work even rounds to create the body of the hat. Depending on your stitch choice, this section can take anywhere from 10 to 20 rounds. Make sure to check the hat’s height against the intended wearer so it fits comfortably.
Next, crochet the ears separately. Most kitten ears use simple triangle shapes. You can make them firm by crocheting more tightly or by adding an extra border around the edges. Once the ears are made, sew them securely onto the top of the hat, positioning them symmetrically.
If your Kitten hat crochet – Pattern includes facial features, now is the time to add them. Embroider a small triangle nose, whiskers, or even eyes using yarn or embroidery thread. Avoid using safety eyes for infants; embroidered eyes are always the safest option for babies.
The brim or finishing edge is the final part of the hat. You can leave the edge simple or add ribbing by alternating front and back post stitches. This gives the hat a snug fit and a polished appearance.
Once all pieces are assembled, weave in every end securely. Hats require frequent washing, especially those made for children, so ensure everything is tightly fastened. After finishing, your kitten hat is ready to wear, gift, or photograph!
4. Fun Customization Ideas for Your Kitten Hat (H2)
One of the most enjoyable aspects of a Kitten hat crochet – Pattern is how customizable it is. You can create hats inspired by different cat breeds by adjusting the ear shape or using specific color combinations. For example, gray stripes can mimic a tabby cat, while solid black or white creates a classic kitten look.
You can also experiment with yarn textures. Using fluffy or chenille yarn creates a soft, plush hat with a more whimsical appearance. Cotton yarn gives a lightweight, breathable hat that’s great for spring or fall.
Adding accessories makes the hat even more charming. Sew a small bow near one ear or add a tiny flower to give the hat extra personality. These little touches make each project wonderfully unique.
Color changes offer many creative possibilities. Try working the hat in two-tone stripes, color blocks, or even pastel gradients. These variations add visual interest and make the hat stand out.
You can also personalize the hat by adding initials or names with surface crochet or embroidery. This makes the hat perfect for gifting, especially for birthdays or baby showers.
Finally, themed kitten hats—such as Halloween cats, winter kittens wearing scarves, or holiday-inspired versions—are always fun to create. These variations allow crocheters to switch up the design for different seasons while still using the core Kitten hat crochet – Pattern.
FAQ – Kitten Hat Crochet
1. Is a kitten hat crochet pattern beginner-friendly?
Yes, many Kitten hat crochet – Pattern designs are beginner-friendly, especially those using basic stitches.
2. What yarn works best for kitten hats?
Soft acrylic or DK-weight yarn is ideal for comfort, durability, and warmth.
3. How do I size the hat correctly?
Measure the head circumference and adjust the number of increase rounds accordingly.
4. Are safety eyes safe for baby hats?
No, safety eyes are recommended only for older children or adults. Embroidery is safest for babies.
5. Can I make a kitten hat for adults?
Absolutely! Simply adjust the stitch counts for adult head sizes.
6. How can I make the ears stand firm?
Crochet tightly or add an extra border around the ears for better structure.
Conclusion
In this article, we explored everything you need to create an adorable Kitten hat crochet – Pattern, including how the hat is structured, what materials you need, step-by-step instructions, and creative customization ideas.
These hats are fun, versatile, and perfect for gifting or personal use. I hope this guide inspires you to create your own kitten-themed designs.