Materials Needed
Before diving into the crochet process, gather all necessary materials. You’ll need the following items:
- Yarn: Choose a lightweight cotton or acrylic yarn. A size 10 thread works well for a mini ornament.
- Crochet Hook: A 2.5 mm (or size C/2) crochet hook is ideal for this project.
- Beads: Select small beads that can easily fit onto your yarn. These can be glass or plastic, in colors that complement your yarn.
- Scissors: A pair of sharp scissors to cut your yarn.
- Tapestry Needle: For weaving in ends and sewing beads into your star.
Ensure that your yarn and beads are coordinated for a harmonious design. Choose colors that represent your style, whether you prefer traditional holiday shades or a more modern palette.
Understanding Crochet Patterns
Crochet patterns provide a structured way to create items. They include instructions on stitches, yarn types, and sizes. For our Mini Beaded Crochet Star, we’ll be using basic stitches like chains, single crochet, and slip stitches.
Reading crochet patterns involves understanding abbreviations. For instance, “ch” stands for chain, “sc” is single crochet, and “sl st” is slip stitch. Familiarizing yourself with these terms will make the process smoother.
Follow the pattern closely to achieve the desired shape and size of your star. Consistency in your tension will ensure that each point of the star is well-defined and uniform, making your ornament look professional and polished.
Starting the Mini Beaded Crochet Star
Step 1: Create a Slip Knot
Begin your project by creating a slip knot with your yarn. This forms the foundation of your crochet work. Slide the yarn loop onto your crochet hook, ensuring it’s snug but not too tight.
Step 2: Chain Stitches
Next, chain 4 stitches (ch 4). This will create a small ring that serves as the center of your star. After chaining, join the last chain to the first with a slip stitch (sl st) to form a ring.
Step 3: Building the Star Points
To create the star’s first point, chain 3 (ch 3), which counts as your first double crochet (dc). In the center of the ring, make 2 double crochets (dc), then chain 2 (ch 2). This creates the point of the star.
Now, make 3 double crochets (dc) into the ring. Repeat this process for a total of five points, ensuring each point is separated by a chain 2 space.
Adding Beads to Your Ornament
Step 4: Preparing the Beads
Before incorporating beads into your crochet, it’s helpful to thread them onto your yarn. This saves time during the crochet process. Use a tapestry needle to slide beads onto a length of yarn, ensuring they are positioned for easy access.
Step 5: Incorporating Beads into the Crochet
When you reach the points of the star, you will crochet in the beads. To add a bead, simply pull the yarn through the bead before completing the stitch. For instance, as you complete a double crochet (dc), pull the yarn through the bead to position it on the stitch.
Step 6: Finishing the Points with Beads
Continue to crochet the remaining points, ensuring you add beads at each peak. This will create a beautiful, sparkly effect on your star ornament. The beads should be evenly spaced to give a balanced look.
Completing the Star
Step 7: Final Rounds
After finishing all five points, join your last stitch with a slip stitch to the top of the first chain you created. This secures the shape of your star.
Step 8: Weaving in Ends
Cut the yarn, leaving a small tail. Use your tapestry needle to weave in any loose ends to the back of the ornament. This step ensures your star looks neat and professional.
Step 9: Adding a Hanging Loop
To complete your ornament, create a loop for hanging. Chain 10 stitches, then join with a slip stitch to the top point of the star. This loop can be adjusted to your desired length.
OTHER FREE CROCHET PATTERNS HERE!!
Customizing Your Mini Beaded Crochet Star
Experimenting with Colors
One of the joys of crochet is the ability to customize. You can create stars in various colors to match your holiday theme. Consider using multi-colored yarn or alternating colors for each point of the star.
Using Different Bead Types
Different types of beads can dramatically change the appearance of your star. Experiment with metallic beads for a festive feel, or use transparent beads to let the yarn color shine through.
Adding Embellishments
You can further personalize your star by adding embellishments like sequins or small fabric flowers. These additions can enhance the overall look and make your ornament truly unique.
Displaying Your Mini Beaded Crochet Star
Creating a Holiday Display
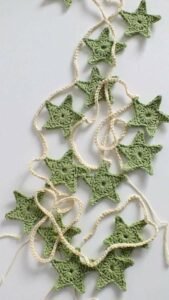
Once your Mini Beaded Crochet Stars are complete, consider how you’ll display them. Hang them on your tree, string them together to create a garland, or use them as decorative accents around your home.
Gift Giving
Handmade ornaments make thoughtful gifts. Consider making several stars to give to friends or family. You can package them in a decorative box with a note explaining their significance.
Seasonal Decor
These stars aren’t limited to just holiday use. Change the colors and beads to create ornaments suitable for any season, enhancing your home decor year-round.
Conclusion
The Mini Beaded Crochet Star Ornament is not only a delightful craft but also a beautiful addition to your holiday decor. By following this tutorial, you can create unique ornaments that showcase your creativity and skill. With a little practice and experimentation, you can develop your own crochet patterns and make these stars your own. Enjoy crafting and spreading cheer with your handmade creations!

