An Owl Key Chain Crochet – Pattern is one of the most delightful projects a crafter can take on, blending functionality with an undeniable “cute factor.” Whether you are looking to clear out your yarn stash or searching for a heartfelt, handmade gift, this crochet owl accessory is the perfect solution. Small projects like these are highly rewarding because they offer instant gratification, allowing you to see a finished character come to life in just an hour or two of focused stitching and stuffing.
Beyond being adorable, the Owl Key Chain Crochet – Pattern serves as an excellent gateway for beginners to practice amigurumi techniques. These techniques involve working in continuous spirals, mastering the magic ring, and learning how to increase and decrease stitches to create 3D shapes. Because an owl keychain is compact, any mistakes are easy to spot and fix, making it a low-stress environment for honing your crochet skills while producing something genuinely useful for your keys or backpack.
To get started with your Owl Key Chain Crochet – Pattern, you will need to understand the fundamental components that make this bird so iconic: the wide eyes, the pointed beak, and the tufted ears. This guide is designed to walk you through the process, ensuring your handmade owl looks professional and stays durable over time. By following these SEO-optimized crochet instructions, you will not only create a beautiful item but also master the art of miniature crochet construction using basic tools like a hook, yarn, and polyfill.
1 Understanding the Owl Key Chain Crochet – Pattern Essentials
The foundation of a successful Owl Key Chain Crochet – Pattern lies in selecting the right materials. For a keychain, you want a yarn that is durable and doesn’t pill easily, which is why mercerized cotton yarn is often the top choice for amigurumi enthusiasts. This type of yarn provides excellent stitch definition, ensuring that the “scales” or “feathers” of your crochet owl are crisp and visible.
Next, you must consider the hook size relative to your yarn weight. In the world of amigurumi patterns, it is standard practice to use a hook that is one or two sizes smaller than what the yarn label recommends. This creates a tight, dense fabric that prevents the polyester fiberfill from peeking through the holes, giving your Owl Key Chain Crochet – Pattern a polished, high-quality finish.
The magic ring (or magic circle) is the most critical starting technique for this project. It allows you to pull the center of your work tight, leaving no hole at the top of the owl’s head or bottom of its body. Mastering the magic ring ensures that your crochet keychain looks professional from the very first stitch and provides a sturdy base for the rest of the pattern.
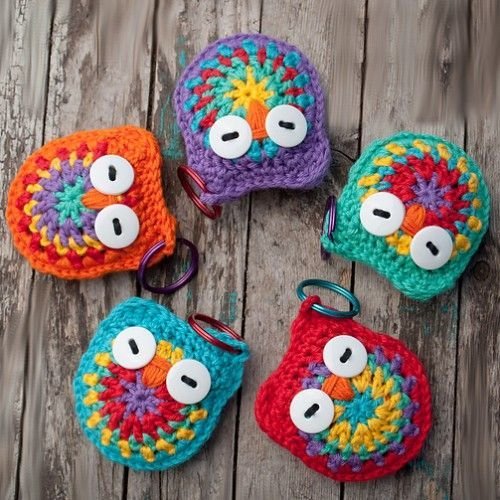
Color selection is where your Owl Key Chain Crochet – Pattern truly gains its personality. While traditional owls use earthy tones like brown, cream, and grey, modern crochet designs often feature vibrant teals, pinks, or variegated yarns. Using a contrasting color for the owl’s belly or “apron” section adds visual interest and allows you to practice color changing in crochet without a steep learning curve.
Don’t forget the essential notions required to complete the assembly. You will need a pair of safety eyes (usually 6mm to 8mm for keychains), a tapestry needle for weaving in ends, and the metal keychain ring itself. Having these tools ready before you start the Owl Key Chain Crochet – Pattern prevents interruptions and makes the assembly process much smoother.
Lastly, understanding stitch markers is vital for this project. Since an Owl Key Chain Crochet – Pattern is typically worked in a continuous spiral without joining rounds, it is incredibly easy to lose your place. A simple locking stitch marker or a scrap piece of yarn placed at the beginning of each round will save you from the frustration of miscounting your single crochet stitches.
2 Step-by-Step Construction of the Owl Body
The main structure of the Owl Key Chain Crochet – Pattern usually begins from the top down or the bottom up, forming a simple egg or pill shape. Most crochet owl designs start with 6 single crochets in a magic ring, followed by rounds of increases until the desired width is reached. This spherical shaping is the “bread and butter” of amigurumi, providing the structural integrity needed for a portable accessory.
As you work through the middle rounds of the Owl Key Chain Crochet – Pattern, you will maintain a consistent number of stitches to create the height of the body. This is the perfect time to incorporate textured stitches like the bobble stitch or crocodile stitch if you want to simulate the appearance of feathers. However, for a sleek keychain design, a simple single crochet texture is often preferred for durability.
Once the body reaches about two-thirds of its intended height, it is time to insert the safety eyes. In an Owl Key Chain Crochet – Pattern, placement is everything; putting the eyes too far apart or too close together drastically changes the “expression” of the owl. Secure the backings firmly, as these are meant to be handled frequently as a bag charm or key holder.
Stuffing your Owl Key Chain Crochet – Pattern requires a delicate balance. You want the owl to be firm enough to hold its shape against the weight of keys, but not so overstuffed that the stitches stretch and distort. Use small clumps of polyfill at a time, pushing them into the corners to ensure the crochet bird is symmetrical and plump.
Closing the body of the Owl Key Chain Crochet – Pattern usually involves a series of invisible decreases. The invisible decrease technique is superior to the standard decrease because it eliminates the bumps and gaps that can occur in crochet toys. This results in a smooth bottom surface, allowing your miniature owl to sit upright if placed on a desk.
Finalizing the body shape involves “pinching” the top corners to create the ears. Many Owl Key Chain Crochet – Pattern variations don’t require separate ear pieces; instead, you simply sew the top edge flat, and the corners naturally point upward. Adding small yarn fringes to these corners mimics the tufted ears of a Great Horned Owl, adding a touch of realism to your crochet project.
3 Adding the Details Eyes Beak and Wings
The face of your Owl Key Chain Crochet – Pattern is what brings the character to life. Typically, you will crochet two small white circles (using single crochet or half double crochet) to act as the eye whites behind the safety eyes. This “owl-eyed” look is a signature feature of the Owl Key Chain Crochet – Pattern, making the gaze appear wide and curious.
For the beak, a simple embroidery technique is often more effective than crocheting a separate piece. Using a small amount of yellow or orange embroidery floss or yarn, you can sew a small triangle between the eyes. This minimalist approach ensures the beak stays securely attached to the keychain, even with heavy daily use.
Wings for an Owl Key Chain Crochet – Pattern are usually small, teardrop-shaped pieces sewn onto the sides of the body. You can make them “flat” by crocheting a few rows of increasing and decreasing, or “3D” by making tiny stuffed cones. Attaching the wings at a slight angle can give your crochet owl a sense of movement, as if it is about to take flight from your keyring.
The Owl Key Chain Crochet – Pattern can be further customized with embroidered “V” shapes on the chest to represent feathers. These small details don’t take much time but significantly elevate the handmade aesthetic. Use a contrasting color of thread to make these features pop against the main body color of your crochet amigurumi.
Durability is key when attaching these components to your Owl Key Chain Crochet – Pattern. Use a whip stitch or a ladder stitch to join the wings and eye circles to the body. Ensure that every yarn tail is knotted securely on the inside before finishing, as keychains undergo a lot of friction inside pockets and bags.
Finally, consider adding a small crochet flower or a tiny hat to your owl to make it truly unique. The beauty of a basic Owl Key Chain Crochet – Pattern is its versatility; it acts as a canvas for your creativity. Whether you want a “scholar owl” with tiny glasses or a “sleeping owl” with embroidered closed eyes, the customization options are endless.
4 Final Assembly and Attaching the Hardware
The final stage of the Owl Key Chain Crochet – Pattern is transforming the plushie into a functional tool. You must decide where to attach the metal jump ring. Most crafters prefer attaching it to the center-top of the head for balance. Using a crochet hook to pull a loop of yarn through the stitch and around the ring is a common method for a secure hold.
If you find that the weight of the keys pulls on the yarn of your Owl Key Chain Crochet – Pattern, you can reinforce the attachment point. Sewing a small piece of felt on the inside of the head before closing it up provides a “backing” for the keychain hardware to grip onto. This prevents the crochet stitches from stretching out over time.
Another popular option for the Owl Key Chain Crochet – Pattern is using a lobster claw clasp. This allows the user to easily clip the owl onto different bags or belt loops. Attaching the clasp with a short crochet chain or a braided cord adds a bit of length and dangling movement to the accessory, making it easier to find in a deep purse.
Before you consider your Owl Key Chain Crochet – Pattern finished, do a “stress test.” Gently tug on the wings, eyes, and the keychain attachment to ensure nothing is loose. In the world of crafting for profit, quality control is what sets your crochet owls apart from mass-produced items.
If you are making these as crochet gifts or items to sell at a craft fair, consider adding a small brand tag or a “Handmade with Love” label. This adds a professional touch to your Owl Key Chain Crochet – Pattern project. Presentation matters, and a well-finished crochet owl attached to a nice backing card can significantly increase its perceived value.
Now that you have completed your Owl Key Chain Crochet – Pattern, you have a charming, functional piece of art. These little owls are addictive to make, and once you finish one, you’ll likely want to create a whole “parliament” of owls in different colors. They are the perfect quick crochet project for busy crafters and a wonderful way to spread handmade joy.
Frequently Asked Questions (FAQ)
What is the best yarn for an Owl Key Chain Crochet – Pattern?
The best choice is usually 100% cotton or a cotton-acrylic blend. Cotton is less “fuzzy” than wool, which helps the owl’s features stay sharp and prevents the keychain from looking worn out after being handled daily.
How long does it take to finish an Owl Key Chain Crochet – Pattern?
For an intermediate crocheter, a single owl keychain usually takes between 45 minutes to 90 minutes. This includes the crocheting, stuffing, and the final assembly of the face and hardware.
Are safety eyes safe for children’s keychains?
While they are called “safety eyes,” they can still be a choking hazard for children under three if they pull them out. For toddlers, it is better to embroider the eyes using black yarn or embroidery floss instead of using plastic pieces.
Can I wash my crochet owl keychain?
Yes, if you used washable fiberfill and cotton yarn. It is best to hand wash the keychain in cool water with mild soap and let it air dry. Be careful with the metal hardware; dry it immediately to prevent any potential rusting.
What size crochet hook should I use?
For most Owl Key Chain Crochet – Patterns using DK weight yarn, a 2.25mm (B) or 2.75mm (C) hook is ideal. The goal is to create a tight fabric so the stuffing doesn’t leak out.
How do I make the owl ears look pointy?
The easiest way is to sew the top of the head flat. When you reach the corners, you can add a few fringe knots (looping short strands of yarn through the stitch) and trim them to look like feathery tufts.
Conclusion
In this article, we have explored the delightful world of the Owl Key Chain Crochet – Pattern, covering everything from essential material selection to the final attachment of hardware. We learned that using mercerized cotton and a smaller hook size is crucial for a durable, professional finish.
We also discussed the importance of the magic ring for a clean start and the invisible decrease for a smooth finish. By focusing on detailed eye placement and secure wing attachment, your crochet owl transforms from a simple shape into a character full of personality.