Whether you are looking to prank a roommate or gear up for the spookiest season of the year, creating a Scary Crocheted Spider – Pattern is the ultimate way to blend cozy crafting with a touch of the macabre. Crocheting is often associated with soft blankets and cute stuffed animals, but there is a growing community of makers who love exploring the darker, “creepy-cute” side of yarn arts. By using specific techniques, you can transform simple acrylic or wool fibers into a realistic, eight-legged critter that is sure to make anyone do a double-take.
Designing or following a Scary Crocheted Spider – Pattern requires a bit of an eye for anatomy and a lot of patience for repetitive leg-work. To make a spider truly “scary,” you need to focus on texture and scale; using a fuzzy “eyelash” yarn can mimic the fine hairs of a tarantula, while a sleek, black mercerized cotton can give the impression of a dangerous black widow. The beauty of this project lies in its versatility, as you can scale the size up to create a giant porch guardian or keep it small for a subtle shoulder accessory.
In the world of amigurumi, the Scary Crocheted Spider – Pattern stands out because it challenges the creator to master wire armatures and intricate shaping. Unlike a standard sphere-based plushie, a realistic spider needs a distinct cephalothorax and abdomen, plus legs that have the correct “jointed” appearance. This guide will walk you through the essential components of creating your own arachnid masterpiece, ensuring your finished piece looks professionally crafted and delightfully eerie for your next Halloween display.
1. Understanding the Scary Crocheted Spider – Pattern Basics
The foundation of any Scary Crocheted Spider – Pattern begins with understanding amigurumi—the Japanese art of knitting or crocheting small, stuffed yarn creatures. For a spider, you are essentially working in rounds to create two main body parts: the prosoma (front) and the opisthosoma (back). Using a tight tension is crucial here so that the stuffing doesn’t peek through the stitches.
When selecting your materials for this specific Scary Crocheted Spider – Pattern, consider the “fright factor” you want to achieve. A matte black yarn is a classic choice, but adding hints of deep crimson or burnt orange can give it a more venomous look. Most patterns will recommend a hook size slightly smaller than what the yarn label suggests to ensure a firm, rigid fabric.
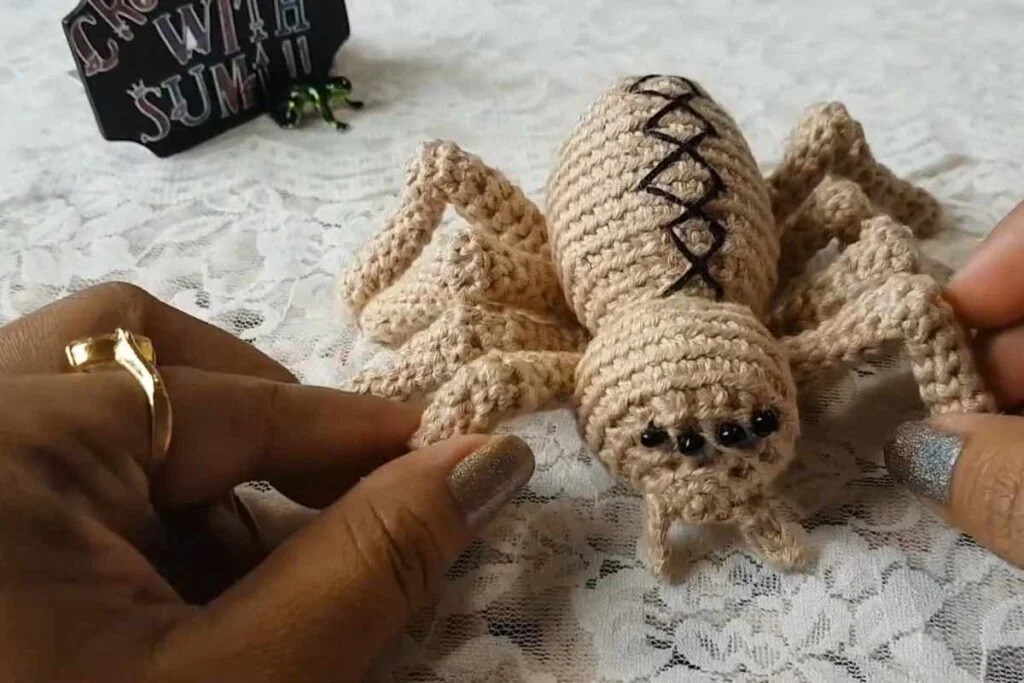
The “Scary” element in the Scary Crocheted Spider – Pattern often comes from the eyes. While standard safety eyes are convenient, using multiple sizes of red or silver beads can recreate the clustered eye pattern found in real arachnids. This attention to detail is what separates a generic toy from a truly unsettling decorative piece.
Leg construction is the most time-consuming part of the Scary Crocheted Spider – Pattern. Most designers use a series of long, thin tubes or “i-cords.” To make them poseable, you will likely need to insert pipe cleaners or floral wire. This allows you to bend the legs into a “creeping” position, which significantly increases the realism of the finished product.
Stitch markers are your best friend when working on a Scary Crocheted Spider – Pattern. Because you are often working with dark yarn, it can be incredibly difficult to see where one round ends and the next begins. Placing a bright scrap of yarn or a plastic marker at the start of every row will save you hours of frustration and frog-work.
Finally, the Scary Crocheted Spider – Pattern usually involves a bit of “sculpting” after the crochet work is done. By using a yarn needle and a long strand of matching thread, you can pull through the body to create indentations, giving the spider a more organic, segmented look that mimics the exoskeleton of a real hunter.
2. Choosing Materials for Your Scary Crocheted Spider – Pattern
The yarn choice for your Scary Crocheted Spider – Pattern dictates the final vibe of the creature. Acrylic yarn is excellent for beginners because it is durable and holds its shape well. However, if you want a “hairy” spider, mohair or specialty faux-fur yarns can be held together with a strand of standard yarn to add a terrifyingly realistic texture.
Hook selection is the next vital step for a successful Scary Crocheted Spider – Pattern. If your stitches are too loose, the wire frame inside the legs will show, or the stuffing will fall out. Aim for a “solid” feel to the fabric. Most creators find that a 2.5mm or 3.0mm hook works best with standard 4-ply or worsted-weight yarns.
Don’t forget the importance of internal structure in your Scary Crocheted Spider – Pattern. To get those legs to stand up and support the weight of the body, you need a sturdy wire. 18-gauge floral wire is usually the “sweet spot”—it’s strong enough to hold a pose but flexible enough to be manipulated without special tools.
Stuffing might seem simple, but for a Scary Crocheted Spider – Pattern, “less is more” in the joints and “more is more” in the abdomen. High-quality polyester fiberfill is the standard. Make sure to tear it into small tufts before stuffing to avoid lumps, ensuring the spider’s body remains smooth and anatomically convincing.
Colors play a massive role in the Scary Crocheted Spider – Pattern‘s effectiveness. While black is the go-to, exploring “Natural” palettes like browns, tans, and greys can result in a spider that looks like it crawled straight out of the garden. For a fantasy look, neon greens or purples can make the spider look “radioactive” or magical.
Lastly, you’ll need a set of basic notions to finish your Scary Crocheted Spider – Pattern. A sharp pair of embroidery scissors, a wide-eyed tapestry needle for assembly, and perhaps some fabric glue to secure the wire ends are essential. Having these ready before you start will make the assembly process much smoother and more enjoyable.
3. Stitching Techniques for a Realistic Scary Crocheted Spider – Pattern
The most common stitch used in a Scary Crocheted Spider – Pattern is the single crochet (sc). This stitch creates a dense, sturdy fabric. To make the body shapes, you will use “invisible decreases.” Unlike a standard decrease, the invisible version is nearly undetectable, preventing the gaps that usually form when shaping rounded objects.
Increasing rounds in your Scary Crocheted Spider – Pattern should be staggered. If you place your increases in the same spot every round, you’ll end up with a hexagon shape instead of a perfect circle. By shifting the increases slightly, you ensure the spider’s abdomen is perfectly plump and realistic, which is key for the “creepy” aesthetic.
Texture can be added to the Scary Crocheted Spider – Pattern using the “loop stitch” or “bobble stitch.” If you want your spider to have a bumpy, textured back—similar to a wolf spider—incorporating a few bobbles on the top of the abdomen can add a fantastic level of detail that catches the light and creates shadows.
The legs of the Scary Crocheted Spider – Pattern often utilize the “Back Loop Only” (BLO) technique. By crocheting in the back loops, you create a ridge on the surface of the work. This ridge can serve as a guide for where to attach the legs later, or it can simply provide a segmented look that mimics the joints of an insect.
Working with black yarn on a Scary Crocheted Spider – Pattern can be a literal headache for your eyes. A pro tip is to use a neck light or work over a white cloth. This provides contrast, allowing you to see the “v” of the stitches more clearly, which is essential when you are trying to count rounds for eight identical legs.
Finishing the Scary Crocheted Spider – Pattern involves a technique called “fastening off with a long tail.” Never cut your yarn short! You will need those long tails to sew the legs to the cephalothorax securely. A “whip stitch” is usually the best method for attachment, as it allows for a very tight, seamless connection between the limbs and the body.
4. Customizing and Displaying Your Scary Crocheted Spider – Pattern
Once you have mastered the basic Scary Crocheted Spider – Pattern, the fun of customization begins. You can add “spinnerets” to the back of the abdomen using small chain stitches. You could also crochet a “prey bundle”—a small white cocoon—to hang from the spider’s fangs, telling a mini-story through your craft.
Scale is another way to modify your Scary Crocheted Spider – Pattern. By using jumbo blanket yarn and a 10mm hook, the same pattern used for a palm-sized spider can produce a giant floor pillow. This is a popular way to create high-impact DIY Halloween decor that is both scary and strangely comfortable.
If you want to take your Scary Crocheted Spider – Pattern to a professional level, consider “needle felting” details onto the crochet surface. You can use a felting needle and a small amount of red wool roving to add the iconic hourglass shape of a Black Widow, which looks much more organic than a sewn-on felt patch.
For those who want a “Gothic” or “Victorian” version of the Scary Crocheted Spider – Pattern, try using metallic embroidery thread held alongside your yarn. This gives the spider a subtle glint, making it look like a piece of haunted jewelry. Adding small lace “veils” to the spider can also create a “Widow” theme that is both beautiful and unsettling.
Displaying your Scary Crocheted Spider – Pattern is where the “scary” part truly comes to life. Using “invisible” fishing line, you can hang these spiders from ceiling fans, door frames, or inside lampshades. When the air moves, the spiders will bounce and sway, giving the terrifying illusion of movement that will startle any guest.
Finally, remember that a Scary Crocheted Spider – Pattern makes a fantastic gift for oddity collectors or entomology enthusiasts. You can mount your finished spider inside a deep shadow box frame with a botanical background. This transforms a simple crochet project into a sophisticated piece of “taxidermy” art that can be displayed year-round.
FAQ: Frequently Asked Questions
Is this Scary Crocheted Spider – Pattern suitable for beginners?
While the basic stitches are simple, the assembly and working with dark yarn can be challenging. If you are a beginner, try making it in a lighter color first to practice the shaping before moving on to the “scarier” dark tones.
What is the best yarn for a realistic spider look?
For a realistic finish, a “fuzzier” yarn like mohair or a brushed acrylic is best. However, for a clean, graphic look that shows off stitch definition, a standard mercerized cotton is the top choice for many designers.
How do I make the legs stay in position?
The secret to a poseable Scary Crocheted Spider – Pattern is using wire. Most patterns suggest inserting a pipe cleaner or a doubled-over piece of floral wire into the legs before sewing them to the body.
Can I wash my crocheted spider?
If you have used wire or safety eyes, hand washing is highly recommended. Submerging the spider in a bowl of cool water with a bit of wool wash and air-drying it will keep the “scary” features intact without ruining the internal structure.
How many eyes should a “scary” spider have?
Most spiders have eight eyes, usually arranged in two rows. To make your Scary Crocheted Spider – Pattern look authentic, use eight beads of varying sizes. However, for a “monster” spider, you can add as many as you like!
Where can I find more Scary Crocheted Spider – Patterns?
You can find various versions on platforms like Ravelry, Etsy, or Pinterest. Many designers offer “free” versions for simple spiders and “paid” versions for highly detailed, anatomically correct patterns.
Conclusion
Creating a Scary Crocheted Spider – Pattern is a rewarding project that combines technical skill with creative flair. Throughout this article, we have explored the importance of material selection, from choosing the right “hairy” yarn to the necessity of wire armatures for realistic posing.
We also delved into the specific stitching techniques, such as invisible decreases and BLO, that give these arachnids their lifelike shape. Whether you are making a tiny brooch or a giant porch decoration, the key is in the details—the clustered eyes, the segmented legs, and the eerie textures.