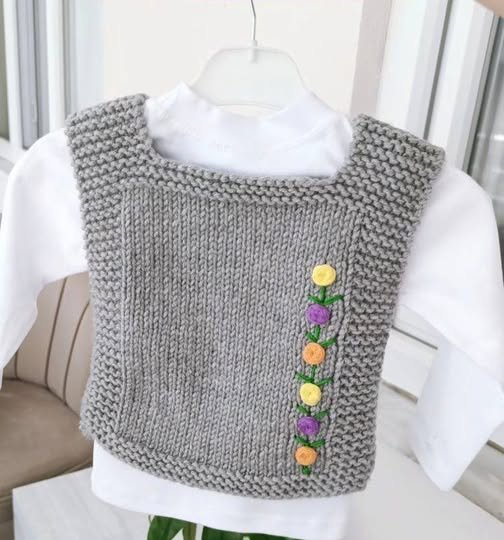
The Square Crochet Vest – Pattern is a creative and stylish way to bring handmade fashion into your wardrobe. Unlike more complicated garment patterns, a crochet vest made from squares is simple to construct, beginner-friendly, and incredibly customizable. Whether you’re making it for yourself or as a thoughtful handmade gift, this type of vest offers both functionality and beauty in equal measure.
At its core, the Square Crochet Vest – Pattern is built using one or more crocheted squares, often based on the classic granny square. These squares are then joined together in a specific arrangement to form a vest that fits and flatters a variety of body shapes. It’s a smart way to turn a timeless stitch into a wearable work of art.
In this article, we’ll explore everything you need to know to successfully create your own Square Crochet Vest – Pattern. You’ll discover what materials to use, how to crochet and join squares, customization options, and tips to avoid common mistakes. We’ll also include a helpful FAQ and a conclusion to tie it all together—pun intended.
1. Materials and Tools Needed
Starting your Square Crochet Vest – Pattern project requires just a few essentials. The great thing is that most of the materials may already be in your yarn stash if you’re an active crocheter. If you’re new, this project is an affordable and approachable way to begin making garments.
First and foremost, you’ll need yarn. The type of yarn you choose will influence the look, feel, and warmth of your vest. Cotton yarn is perfect for lightweight summer vests, while wool or acrylic blends are great for cooler weather. Worsted weight yarn is commonly used for square-based garments, but you can also opt for sport or DK weight for a more delicate look.
Next, select a crochet hook that matches the yarn weight. Check the yarn label for the recommended hook size. Typically, for worsted weight yarn, a 5mm or 5.5mm hook works well. If you crochet tightly, consider going up a size to ensure the squares remain soft and flexible.
You’ll also need scissors, a tapestry needle for weaving in ends, and stitch markers if your square pattern includes multiple rounds or color changes. Stitch markers help you keep track of rounds and ensure symmetry in your work.
A measuring tape is essential for checking the size of each square and the overall vest dimensions. Even though most vests are designed to be relaxed in fit, it’s good practice to measure your work for consistency.
If you’re working from a printable Square Crochet Vest – Pattern, keep it handy as you work. Choose a pattern that includes a clear square motif, joining instructions, and sizing tips.
Optionally, you may want to line your vest or add buttons. For that, lightweight fabric, a sewing needle, and coordinating thread will come in handy. However, many vests are designed to be open-style with no closures.
2. How to Crochet and Join the Squares
The heart of the Square Crochet Vest – Pattern is, of course, the squares themselves. These can be basic granny squares or more intricate motifs depending on your skill level and desired look. Let’s break down the steps.
Start by selecting your square pattern. A basic granny square with double crochets and chain spaces is an excellent choice for beginners. More advanced crocheters might enjoy textured or lace-style motifs. Make one sample square first to check size and drape.
Once your square is complete, block it using steam or pinning it into shape. Blocking ensures all your squares are the same size, which makes joining them much easier and results in a cleaner final product.
Decide on the layout of your squares. A traditional arrangement might include two large squares for the front, two for the back, and additional squares for side shaping. Some patterns use one giant square folded and seamed into a vest shape—a great option if you prefer simplicity.
Use the whip stitch, slip stitch, or single crochet join method to connect your squares. Each has a different finish: whip stitch is nearly invisible, while slip stitch and single crochet add a visible seam that can be used decoratively.
Be sure to check alignment as you go. It’s easy to accidentally twist or misplace squares, especially if working with multicolor motifs. Lay out your pieces flat before joining to double-check placement.
After joining all squares, try the vest on or lay it over a form. Make any necessary adjustments before weaving in all your ends. Once it looks how you want it, weave in the tails securely and give it one final block if needed.
3. Customizing Your Square Crochet Vest
One of the most fun aspects of working with a Square Crochet Vest – Pattern is the limitless ability to personalize it. From color to texture, size to shape, there’s plenty of room for creativity.
Color choice is one of the easiest ways to change the feel of your vest. Go for bold, bright combinations for a retro vibe, or soft pastels for a more romantic look. You can stick with a monochromatic palette or go all out with rainbow squares.
Try alternating solid and multicolor squares to create visual interest. You can even place contrasting borders around each square to frame the designs and make them pop.
Customize the length and width of the vest by adding or subtracting squares. You can also use half-squares or triangle motifs to adjust armholes or taper the waist, giving a more tailored shape.
Add finishing touches like edging or ribbing. Crocheting a simple border around the vest adds polish. For a modern touch, try a ribbed bottom band or sleeve edging.
Incorporate different textures by using a variety of stitches within each square. Puff stitches, bobbles, or popcorn stitches add a tactile element to your vest, while lacy patterns keep it lightweight and breezy.
Lastly, consider adding closures like buttons, toggles, or ties. If you want the vest to stay closed, add a few buttons down the front or side. Alternatively, use a crocheted chain to create a tie at the waist or chest.
4. Tips for Success and Common Mistakes to Avoid
Even though the Square Crochet Vest – Pattern is beginner-friendly, there are a few tips that can help make your project even smoother and more enjoyable.
Check your gauge before making all your squares. Even a small difference in stitch size can throw off the entire fit of the vest. It’s worth taking the time to make a test square and measure it.
Use consistent tension throughout. Especially when switching colors or yarn types, make sure your stitches stay even. This keeps your squares uniform and helps the vest sit correctly on the body.
Don’t skip blocking, especially when using natural fibers like cotton or wool. Blocking smooths out each square and ensures they fit together evenly. It can also help stretch or shape your vest to the correct size.
Avoid heavy yarns if you’re making a larger vest. While chunky yarn might seem faster to work with, it can make the vest bulky and lose its shape over time. Stick with medium-weight yarns unless the pattern specifically calls for bulky yarn.
Mark your rows and rounds if the square pattern is complex. It’s easy to get lost in multicolored motifs or layered stitches. Stitch markers and row counters are your best friends here.
Try the vest on as you assemble it. Even though the pieces are small, the overall fit can shift as you join squares. Test fit periodically to make sure everything is aligning the way you want.
FAQ: Square Crochet Vest – Pattern
Q1: How many squares do I need for a crochet vest?
It depends on the size and layout. Some patterns use as few as 2 large squares, while others may require 10 or more smaller squares. Always refer to the specific pattern for guidance.
Q2: What is the best yarn to use for a crochet vest?
Cotton yarn is great for breathable, lightweight vests. Acrylic is a budget-friendly choice, and wool is excellent for warmth. Choose according to the season and desired texture.
Q3: Can I make a square crochet vest without a pattern?
Yes! If you understand the basics of shaping and measuring, you can freestyle your vest using basic granny squares and a few measurements of your body.
Q4: How do I size a square crochet vest correctly?
Measure your bust, shoulders, and length preferences. Then determine how many squares you need to match those dimensions. Blocking and checking gauge are essential for accuracy.
Q5: Should I line my crochet vest?
It’s optional. Most square crochet vests don’t need lining, but if you’re using lacy squares or fine yarn, a light lining can help maintain structure.
Q6: Can I sell vests made from free patterns?
Most free patterns allow it, but you should always check the designer’s copyright or licensing terms. If permitted, giving credit is courteous and appreciated.
Conclusion
The Square Crochet Vest – Pattern combines simplicity with elegance, offering crocheters of all levels a chance to create a unique, wearable garment with minimal stress. Whether you’re using basic granny squares or complex motifs, the freedom to customize your vest with color, texture, and shape makes this project endlessly rewarding.
From choosing the right yarn to joining your final square, we’ve covered each step to help you succeed.
Whether you’re crocheting for personal use or as a gift, a square vest is a beautiful addition to any handmade wardrobe.
If this guide helped you or inspired you to make your own version of the Square Crochet Vest – Pattern, please leave a sincere opinion and suggestions in the comments below. Sharing your thoughts helps the crochet community grow and evolve—one square at a time.
Happy crocheting! 🧶