Fall wouldn’t feel complete without pumpkins — and what better way to celebrate the season than with The Perfect Crochet Pumpkin Pattern? Whether you’re decorating your home, making gifts, or simply enjoying the meditative rhythm of your stitches, this crochet pattern is a warm, cozy, and rewarding project for all levels of experience.
The Perfect Crochet Pumpkin Pattern allows you to create charming and customizable pumpkins that don’t rot and can be reused year after year. Unlike store-bought decorations, these handmade pumpkins carry a personal touch, making your autumn decor truly unique. You can choose from classic orange, rustic neutrals, or even bright, whimsical colors to match your style.
This article will guide you through everything you need to know to make The Perfect Crochet Pumpkin Pattern, including the materials you need, step-by-step instructions, creative variations, and how to use your pumpkins throughout your home. Let’s get into the cozy world of fall crochet and stitch your way into the season!
1. Materials Needed for The Perfect Crochet Pumpkin Pattern
Getting started with The Perfect Crochet Pumpkin Pattern begins with the right supplies. The good news is, this is a low-cost and beginner-friendly project, and you might already have everything you need in your yarn stash.
Start with yarn selection. Most pumpkin patterns use worsted weight (medium #4) yarn, which is thick enough to hold shape but soft enough to crochet comfortably. Acrylic yarn is the most affordable and widely available option, but cotton yarn offers a more refined texture and firm shape.
Next, select a crochet hook that matches your yarn weight. Usually, a 5.0 mm (H/8) hook is ideal for worsted yarn. If you want a tighter stitch (which is often recommended to keep stuffing inside), go down a half-size. A tighter gauge helps your pumpkin hold its shape without visible gaps.
You’ll also need fiberfill stuffing to shape your pumpkin. Polyester fiberfill is lightweight, washable, and perfect for this project. Avoid overstuffing — your pumpkin should be full but still flexible enough to create the indented sections.
Don’t forget a yarn needle for weaving in ends and sewing the sections, and a stitch marker to keep track if you’re working in continuous rounds. Some patterns use a bit of twine or jute cord to create the ribbed pumpkin effect. You can also use the yarn tail and a large needle to thread around and cinch the shape.
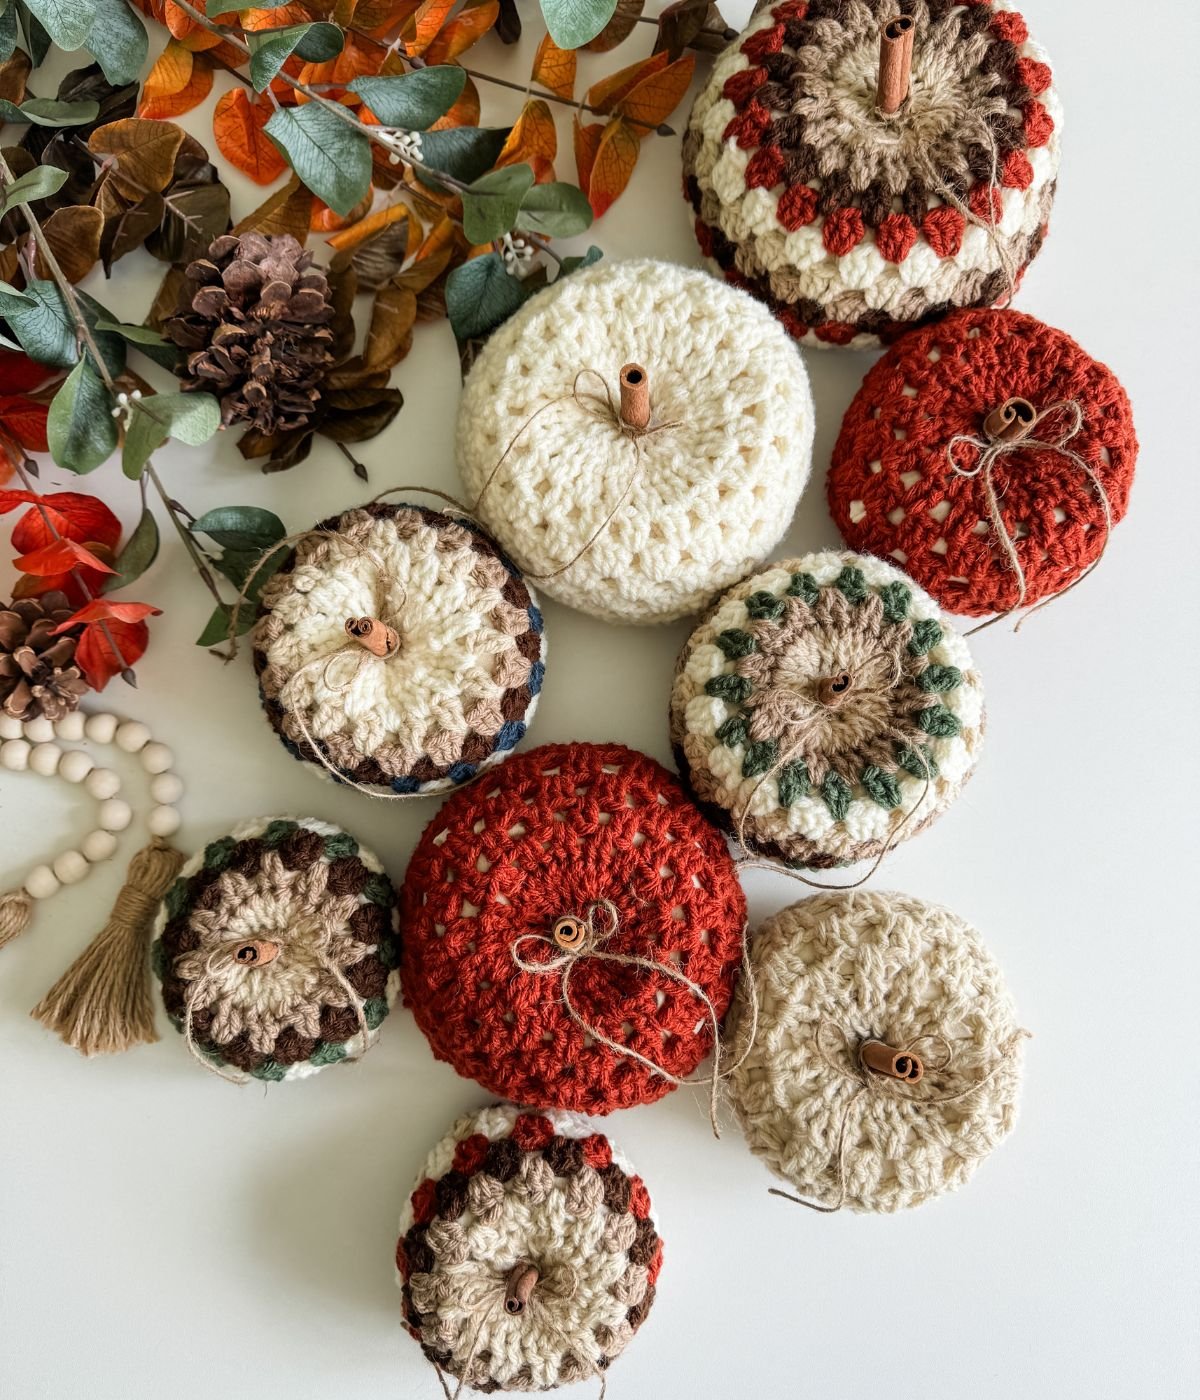
Lastly, if you want to add a pumpkin stem, you can crochet it, use a cinnamon stick for a rustic touch, or even a small twig from your backyard. Finish it off with twine, ribbon, or felt leaves for added flair.
2. Step-by-Step Instructions for Crocheting the Pumpkin
Now that you have your materials, let’s walk through the process of creating The Perfect Crochet Pumpkin Pattern. While there are many variations, most crochet pumpkins follow a basic structure that is easy to adapt.
Start by creating a magic ring or chain two and work into the first chain. Crochet single crochets (sc) in the round, increasing each round to form a flat circle. This base forms the body of your pumpkin and grows as you increase in each round.
Once you reach your desired width, stop increasing and continue working single crochet stitches evenly in the round to build up the sides. The number of rounds you do here will determine the height of your pumpkin. For a squat, wide pumpkin, work fewer rounds. For a tall one, add more rounds.
When you’re happy with the height, begin decreasing each round to close the top. Before you close it completely, stuff your pumpkin with fiberfill, making sure it’s evenly packed but not too tight.
After closing, cut a long tail and use your yarn needle to wrap around the pumpkin, from top to bottom, creating the indentations. Pull tight after each wrap to give the pumpkin its iconic ribbed look. Most pumpkins have 6 to 8 sections, but you can adjust this based on your preference.
Once shaped, attach your stem by hot-gluing or sewing it to the top. A cinnamon stick adds a wonderful scent and rustic vibe, while a crocheted or felt stem gives a softer, homemade look.
Finally, weave in any loose ends, and your pumpkin is done! You now have a lovely handmade decor piece made from The Perfect Crochet Pumpkin Pattern.
3. Customizing Your Crochet Pumpkin
One of the best parts of working with The Perfect Crochet Pumpkin Pattern is how easy it is to customize. From size to color and finishing details, each pumpkin can be completely unique.
Change up the colors to match your decor. Traditional orange is always a hit, but you can create neutral pumpkins with cream, beige, or taupe yarn for a farmhouse look. For Halloween or a kid-friendly feel, try purple, green, or even glow-in-the-dark yarn.
Adjust the size by changing the number of increase rounds and how tall you make the sides. Tiny pumpkins are great for garlands or tabletop accents, while oversized pumpkins make great statement pieces for porches or couch corners.
Experiment with texture by using different stitches. Instead of single crochet, try half-double crochet (hdc) or bobble stitches for a bumpy, fun finish. Adding surface crochet or ridges can mimic natural pumpkin grooves.
Add fun embellishments like crocheted leaves, curly vines, or little flowers. You can also embroider faces for a jack-o’-lantern look or initials for personalized gifts.
Try mixing yarn types, like pairing cotton yarn for the body with faux fur yarn for the stem. This contrast creates a stylish, eye-catching effect. You can also hold two strands of yarn together to create marbled or chunky looks.
For an eco-friendly version, use recycled yarn or even strips of old t-shirts (tarn) to crochet a rustic, reusable fall pumpkin. This makes for a thoughtful project and a great conversation starter.
4. Using and Displaying Your Crochet Pumpkins
Once you’ve completed your Perfect Crochet Pumpkin Pattern, it’s time to show it off! These pumpkins aren’t just cute — they’re incredibly versatile when it comes to decor and gift-giving.
Use them to decorate your home during fall. Place them in a wooden bowl, on a tiered tray, or across your mantel. Cluster multiple sizes together to create a cozy autumnal centerpiece.
Make a garland by stringing several small pumpkins together. Use a neutral jute twine or festive ribbon and hang them across your fireplace, window, or wall for instant seasonal charm.
Add them to a fall wreath! Attach small crochet pumpkins to a grapevine wreath with some faux leaves and flowers. It’s an adorable way to greet guests at your front door.
These pumpkins also make thoughtful gifts. Add one to a Thanksgiving hostess basket, or gift a set of three with a handwritten tag. They’re perfect for teachers, neighbors, or crafty friends.
Don’t forget about photo props. Crochet pumpkins make sweet accessories for baby photoshoots, flat lays, or cozy fall Instagram content. Pair them with a warm cup of coffee and a soft blanket for the perfect fall aesthetic.
Finally, get creative with functional uses — turn them into pincushions, scented sachets with cinnamon and cloves, or even ornaments for a Thanksgiving tree. The options are endless!
FAQ – Frequently Asked Questions
Is The Perfect Crochet Pumpkin Pattern suitable for beginners?
Yes! This pattern uses basic stitches like single crochet and simple increases/decreases. It’s a great beginner project with beautiful results.
What yarn is best for crochet pumpkins?
Worsted weight yarn (acrylic or cotton) works best. Cotton holds shape better, while acrylic is softer and more budget-friendly.
How long does it take to make one pumpkin?
A small pumpkin can be completed in under an hour. Larger pumpkins or detailed versions may take 2–3 hours depending on your speed.
Can I wash my crochet pumpkin?
Spot cleaning is best. Since many pumpkins are decorative and have stuffing or glued stems, machine washing isn’t recommended.
How do I make the pumpkin indents?
Use a long yarn tail and a yarn needle to wrap from top to bottom several times, pulling tightly to create the ribbed sections.
Can I sell pumpkins made from this pattern?
Yes, you can sell the finished items, especially if it’s your own version or a public-domain pattern. Be sure to give credit if using a designer’s specific pattern.
Conclusion
The Perfect Crochet Pumpkin Pattern is not only a fun and beginner-friendly project, but also a fantastic way to bring autumn warmth into your home. With just a hook, some yarn, and a little creativity, you can craft pumpkins that will charm your space for years to come.
From gathering materials and crocheting the shape to customizing and displaying your pumpkins, this pattern offers endless opportunities for personalization. Whether you’re making them for yourself or to give as gifts, crochet pumpkins are timeless, versatile, and heartwarming.
We’d love to hear your thoughts! Have you tried The Perfect Crochet Pumpkin Pattern or have tips to share? Leave a sincere opinion or suggestion in the comments below — your experience could inspire others to pick up their hook and try it too
Happy crocheting and happy fall! 🎃🍁🧶