The Zebra Fish Potholder is a fun and creative project that adds a touch of whimsy to your kitchen.
If you enjoy crocheting and are looking for a unique pattern, this design combines both functionality and artistry. A potholder not only protects your hands from hot pots and pans but can also be a stylish decorative piece.
The Zebra Fish Potholder is particularly popular among crochet enthusiasts because it combines the bold pattern of a zebra with the practicality of a potholder.
Whether you are a beginner or an experienced crocheter, this pattern will guide you through the process of making a one-of-a-kind potholder that will brighten up any kitchen.
Crocheting a potholder is a great way to practice your crochet skills. While basic potholders typically consist of simple square or round shapes, the Zebra Fish Potholder takes things to the next level by incorporating an intricate design that resembles the distinctive stripes of a zebra. This gives the potholder a fun, textured look that’s perfect for adding some flair to your kitchen. The use of color, texture, and shape in this pattern makes it more than just a practical item—it’s a charming conversation piece.
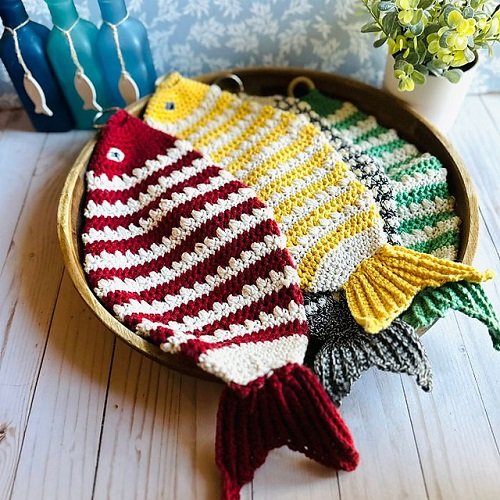
Before diving into the step-by-step guide, it’s important to understand the key elements of the Zebra Fish Potholder – Crochet pattern. The pattern typically includes the main body of the zebra fish, the tail, fins, and the zebra stripes that define the fish’s unique appearance. The combination of these elements results in a functional yet eye-catching potholder that will be a delightful addition to your crochet collection.
1. Materials Needed for the Zebra Fish Potholder
To begin crafting your Zebra Fish Potholder – Crochet pattern, you’ll need to gather the right materials. Choosing the right yarn and crochet hook will make the process easier and ensure that your potholder turns out looking its best. Here’s a list of materials you’ll need:
- Yarn: The type of yarn you choose is essential for both the look and feel of your potholder. For this project, cotton yarn is ideal because it’s durable, heat-resistant, and easy to work with. A medium-weight yarn (like worsted weight) works well for creating the right size and texture.
- Crochet Hook: A size H-8 (5mm) crochet hook is a good choice for this project. It allows for tight stitches while still being comfortable to handle.
- Scissors: You’ll need a sharp pair of scissors to trim the yarn at the end of your project.
- Tapestry Needle: This tool is essential for weaving in the loose ends of your yarn once you’ve completed the crochet work.
- Stitch Markers: While not always necessary, stitch markers are helpful in keeping track of rounds and ensuring your project stays in shape.
- Yarn for Details: You’ll need additional yarn in black and white for the zebra stripes, as well as a contrasting color for the fins and tail.
Make sure to choose colors that contrast well for the zebra stripes. Black and white are traditional, but feel free to get creative and experiment with different color combinations. These materials are readily available at most craft stores or online, and many come in affordable options, making it a budget-friendly project.
2. Step-by-Step Guide for Making the Zebra Fish Potholder
Now that you have all your materials ready, it’s time to start crocheting your Zebra Fish Potholder – Crochet pattern! This project involves creating several crochet pieces that will come together to form the zebra fish shape. Here’s a step-by-step guide to help you complete the potholder:
- Start with the Fish’s Body: Begin by making a magic ring with your main color yarn (usually white). Chain a few stitches, then work your way around to form a round base for the fish. You’ll continue increasing stitches to form the round shape of the fish’s body.
- Crochet in Rounds: Work in continuous rounds to create the body of the fish. You can increase and decrease stitches as needed to shape the fish. Remember, consistency is key, so keep your tension even for the best result.
- Add the Zebra Stripes: Once the body is complete, it’s time to add the characteristic zebra stripes. Using black yarn, carefully crochet lines across the body of the fish to create the striped pattern. You can create the stripes by working in slip stitches or single crochet stitches depending on your preference.
- Create the Tail: For the tail, work in smaller rounds to form a tapered shape. Once you’ve reached the desired size, attach it to the back of the fish’s body using slip stitches.
- Add the Fins: The fins of the zebra fish can be crocheted separately and then sewn onto the body. Use contrasting colors to make them stand out and give the fish a realistic look.
- Finish with a Hanging Loop: Finally, create a small loop at the top of the fish’s body for easy hanging. This is particularly useful for storing your potholder or displaying it as a decoration in your kitchen.
By following these steps, you’ll create a delightful zebra fish potholder that’s both fun and functional.
3. Tips for Perfecting Your Zebra Fish Potholder
Creating the Zebra Fish Potholder – Crochet pattern can be a rewarding experience, but there are a few tips and tricks that can help you improve your final product. Here are some essential tips to keep in mind:
- Use Tight Stitches: Crocheting tightly is important when making potholders, as this ensures durability and sturdiness. Tight stitches will also help the potholder retain its shape.
- Pay Attention to Tension: Consistent tension is crucial for maintaining an even pattern. If your stitches are too tight or too loose, it can affect the final look of the potholder. Try to keep your tension consistent as you work.
- Use a Stitch Marker: If you’re working in rounds, use a stitch marker to mark the beginning of each round. This will help you keep track and ensure your stitches stay aligned.
- Experiment with Different Textures: While the Zebra Fish Potholder requires a basic crochet technique, don’t be afraid to add some texture to your work. You can experiment with puff stitches or bobble stitches to create a more interesting and dynamic surface.
- Choose Durable Yarn: Since the potholder will be exposed to heat, choose a yarn that is heat-resistant and durable. Cotton yarn is the best option for this project, but be sure to select a high-quality variety to ensure the potholder’s longevity.
- Finish Neatly: After you finish your crochet work, use a tapestry needle to weave in any loose yarn ends. A clean, neat finish will make your potholder look more polished and professional.
With these tips, you’ll be able to make a beautiful, durable, and functional Zebra Fish Potholder that will last for years.
4. Creative Variations for Your Zebra Fish Potholder
While the Zebra Fish Potholder – Crochet pattern is already a fun and distinctive project, you can always add your personal touch by making a few creative changes. Here are some ideas for customizing your potholder:
- Color Variations: While traditional zebra stripes are black and white, feel free to experiment with different color schemes. For example, you could create a rainbow-colored zebra fish or use pastel shades for a softer look.
- Add Eyes and Mouth: You can make the zebra fish even more realistic by crocheting small eyes and a mouth. Use a tiny black bead or embroidered stitches to create eyes for an extra detail.
- Try Different Yarn Types: If you want a different texture or appearance, try using different yarn types for the fins and tail. You could use metallic yarn for a shimmering effect or variegated yarn for a dynamic look.
- Make a Set: Create a matching set of potholders featuring different sea creatures. A group of crochet fish in various colors and patterns can turn your kitchen into an underwater wonderland.
- Add Embellishments: You can add embellishments like beads or buttons to your potholder for a more decorative effect. These could be sewn onto the body of the fish for added texture.
- Experiment with Size: If you want a larger or smaller potholder, adjust the number of stitches you use for the body. A smaller fish might make a cute trivet, while a larger fish could be used for a more substantial potholder.
These creative variations allow you to personalize your Zebra Fish Potholder and make it a unique addition to your home.
FAQ: Frequently Asked Questions
1. What is the best yarn to use for a Zebra Fish Potholder?
Cotton yarn is the best option for a potholder because it’s durable, heat-resistant, and soft enough to work with. It also helps the potholder maintain its shape.
2. Can I use this pattern for other sea creatures?
Yes, you can adapt the pattern to create different sea creatures. Simply adjust the body shape and colors to suit the fish you want to crochet.
3. How do I make sure my potholder is durable?
Use tight stitches and cotton yarn to ensure that your potholder is both sturdy and heat-resistant. Always weave in the loose ends to keep the potholder intact.
4. How can I make my Zebra Fish Potholder unique?
You can personalize your potholder by experimenting with different yarn colors, adding textures, or incorporating small details like eyes and mouths for a more realistic look.
5. Can I wash my Zebra Fish Potholder?
Yes, cotton potholders are washable. Just make sure to hand wash or machine wash on a gentle cycle and lay it flat to dry.
Conclusion
In conclusion, the Zebra Fish Potholder – Crochet pattern is a fun, creative project that adds personality and charm to your kitchen. With the right materials, step-by-step instructions, and a few tips, you can easily crochet your own zebra fish potholder that’s both functional and decorative. Whether you follow the basic pattern or add some creative variations, this potholder will make a wonderful addition to your home. Feel free to share your thoughts, suggestions, and finished potholder photos in the comments below! Happy crocheting!