Napkin Witch Hats – Pattern is a charming and whimsical craft idea that combines creativity, seasonal décor, and practical functionality. If you’re looking to elevate your Halloween table settings or delight guests with a playful touch, making a Napkin Witch Hats – Pattern offers a fun way to personalize your celebration. In this article, we’ll explore how to design, customize, and produce these adorable napkin witch hats step by step, ensuring your final piece is both beautiful and functional.
Creating a Napkin Witch Hats – Pattern is not only an engaging DIY project but also a way to add a handmade feel to holiday gatherings. Rather than buying mass-produced decorations, crafting your own allows for customization of colors, sizes, and embellishments. Whether you’re an experienced crafter or a beginner, following a well-structured pattern and clear instructions can guide you through the process with confidence.
To ensure your finished napkin hats look polished and professional, it’s important to pay attention to small details: folding techniques, securing methods, and design balance. In this guide, we’ll cover all those aspects in a human-centered style, while also implementing SEO best practices so that this article is discoverable and helpful. Without further ado, here are the steps broken into clear sections.
1. Understanding the Basics of Napkin Witch Hats – Pattern
When starting with the Napkin Witch Hats – Pattern, it’s critical to understand the foundational components. First, you need to select the right materials. You’ll require napkins (fabric or paper), lightweight card stock or felt for structure, glue or double‑sided tape, and optional embellishments (such as ribbons, glitter, or small charms). The pattern itself provides the template shapes and fold lines.
Next, consider size proportions. Your napkin witch hats should be large enough to cover the folded napkin elegantly but not so large as to overwhelm the plate setting. Typical base diameters range from 3 to 5 inches, while the cone height may be 4 to 6 inches. Use the Napkin Witch Hats – Pattern as a scaling reference, adjusting for your napkin dimensions.
Then, review your fold lines and seams. The pattern usually indicates dotted lines for folds and solid lines for cutouts. Remember that precise scoring (folding) helps the hat maintain form. In soft materials like paper napkins, avoid bulk at fold intersections.
Also, consider balance and symmetry. The hat should sit upright atop the napkin and maintain visual balance. That means the brim must be level and the cone centered. Slight trimming and adjustments may be required.
Finally, plan any decorative elements early. Whether you want a tiny buckle, ribbon trim, or miniature spider charm, budgeting space and attachment points in the Napkin Witch Hats – Pattern ensures the final design is cohesive.
By mastering these basics, you set yourself up for smooth execution in the next phases.
2. Step‑by‑Step Instructions Using Your Napkin Witch Hats – Pattern
Begin by printing or transferring your Napkin Witch Hats – Pattern onto card stock or construction paper. Carefully cut all the outlined pieces, ensuring clean edges so folds lie flat.
Once cut, score the fold lines gently with a bone folder or the dull side of a craft knife to help the folds stay crisp. Use a ruler to ensure straight fold lines.
Next, fold along the dotted lines: fold the brim upward or downward (depending on design) and the cone segment into shape. Often, one edge of the cone segment overlaps slightly to form a conical tip. Use glue or double‑sided tape to secure that seam.
Then, attach the brim. Many Napkin Witch Hats – Pattern designs require attaching the brim to the base of the cone. Align the edges, and glue evenly around the seam so the cone sits flush. Hold in place until adhesive sets.
After that, insert your napkin. Fold your napkin in a way (e.g. into a rectangle or fan fold) so that the hat slips over it or sits atop it securely. Some designs allow the napkin to pass through the hat interior so it appears to sprout from the cone’s top.
Finally, add embellishments. Use your earlier plan to glue on ribbon bands, mini buckles, feathers, or glitter accents. Ensure that decorative features do not interfere with the hat’s stability. You now have a finished napkin witch hat based on your pattern.
3. Customizing and Enhancing the Napkin Witch Hats – Pattern
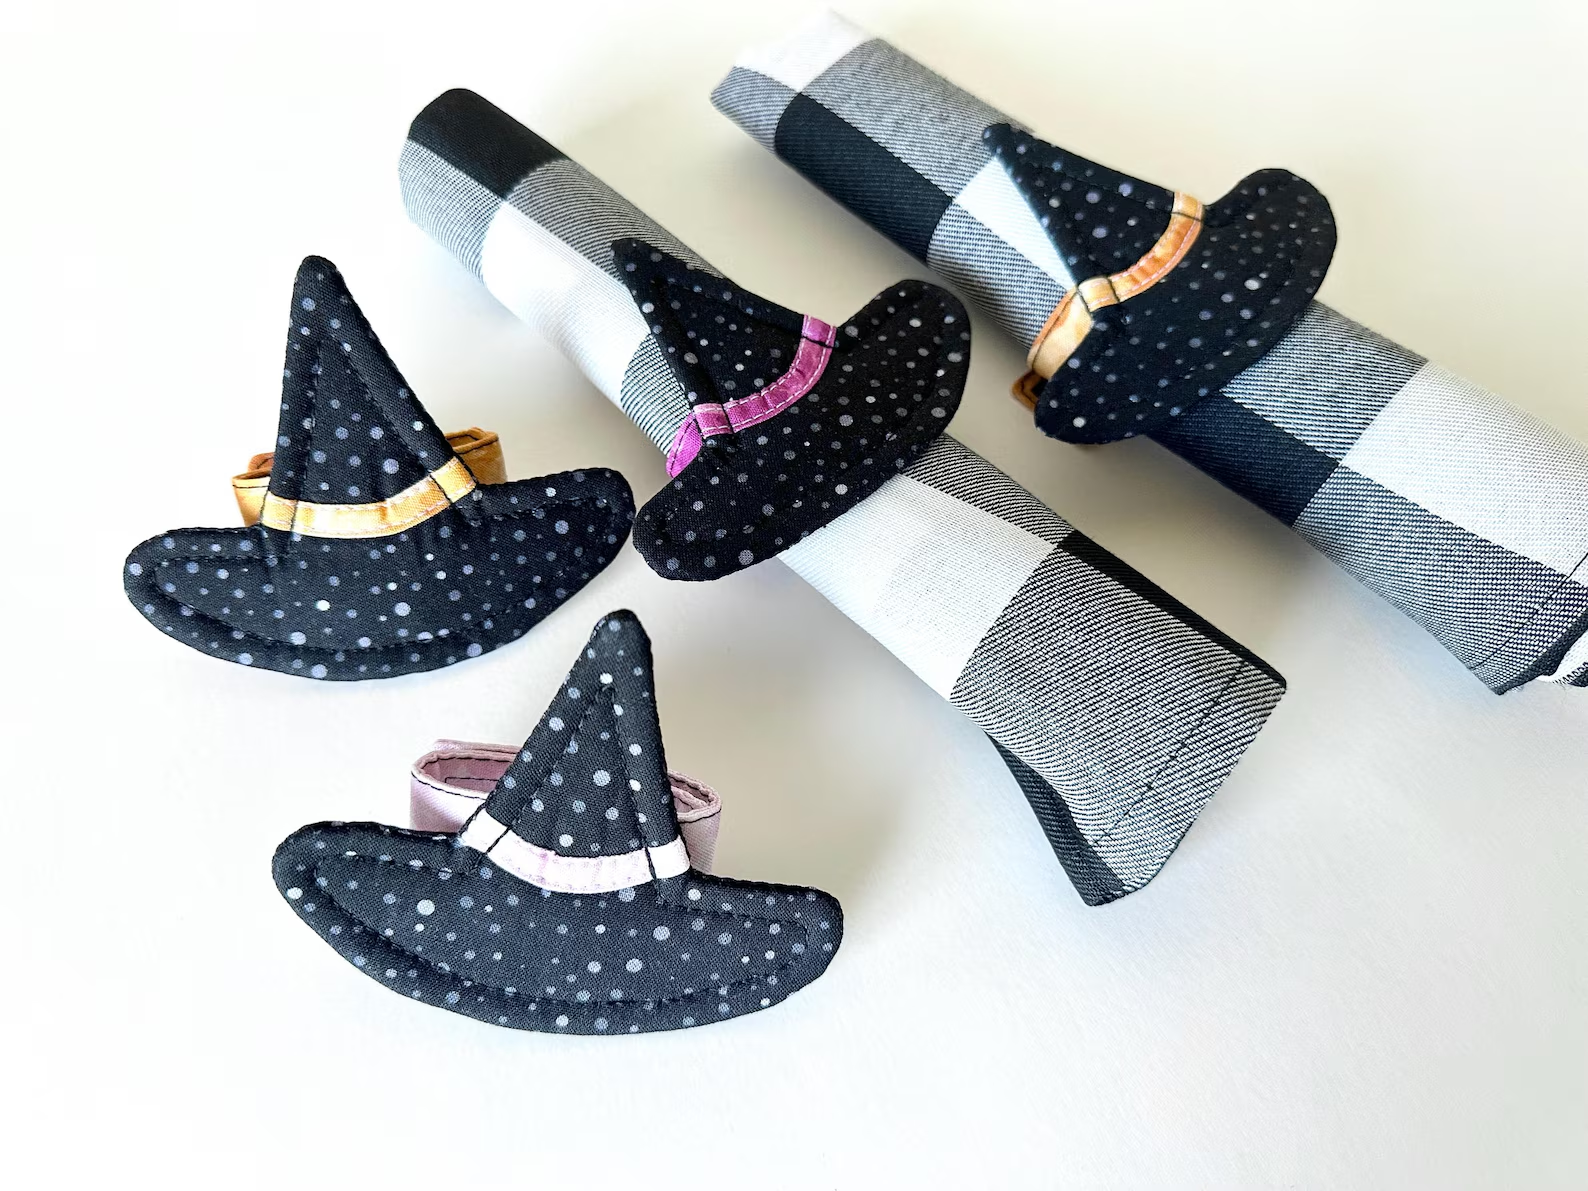
Once your basic Napkin Witch Hats – Pattern is complete, customization brings unique personality. Start by selecting thematic color schemes matching your party motif—classic black and orange, purple and silver, or green and black.
Experiment with textures. Felt, glitter paper, metallic cardstock, or patterned napkins can create contrast. For instance, using patterned napkins inside a plain hat design adds visual interest.
Add decorative layers. You might layer a thinner brim over a wider one for a tiered effect. The Napkin Witch Hats – Pattern can be altered slightly to accommodate these layers.
Introduce 3D accents. Miniature spiders, faux vines, or decorative buttons can be glued to the hat surface. Place them asymmetrically to lend a more organic, handmade look.
Lightweight ribbons or tulle streamers can cascade from the tip of the witch hat, trailing down the napkin. This gives dramatic flair and movement.
Test stability after embellishing. Once fully decorated, place the hat on the napkin and check whether it leans or tilts. Trim or rebalance as needed while preserving the essence of your design.
4. Tips, Troubleshooting, and Best Practices
Begin with simple versions. If this is your first Napkin Witch Hats – Pattern project, use plain paper or low-cost materials until you master folding and proportions.
Maintain clean edges. Frayed or uneven cuts cause irregular folds and weaken stability. Use sharp scissors or craft knives.
Control adhesive. Use thin lines of glue or tape—too much adhesive can cause warping or mess. Consider glue dots or craft tape for discrete bonds.
Reinforce when needed. If the hat feels flimsy, reinforce the cone’s interior seam with a small strip of lightweight material. Also, reinforce the brim connection with extra adhesive at key points.
Test variants. Make a small test hat first from scrap paper to ensure the Napkin Witch Hats – Pattern fits your napkin size before committing to your final materials.
Keep transport in mind. If you’re making these ahead of time, stack hats carefully or wrap them to prevent bending. Assemble final embellishments just before the event to preserve condition.
Frequently Asked Questions (FAQ)
Q: Can I use fabric napkins with the Napkin Witch Hats – Pattern?
A: Yes, fabric napkins can be used. The pattern works best when the napkin is folded compactly so the hat sits snugly. Choose lightweight fabric to avoid bulk interfering with the structure.
Q: What is the best adhesive for assembling the Napkin Witch Hats – Pattern?
A: A tacky glue, glue dots, or double‑sided craft tape all work well. Avoid wet liquid glue that can cause warping—use minimal amounts for clean seams.
Q: How do I scale the Napkin Witch Hats – Pattern to larger or smaller sizes?
A: Measure your folded napkin dimensions, then proportionally enlarge or shrink the pattern template. Maintain aspect ratios so the brim and cone remain balanced.
Q: Can I reuse the hat for subsequent events?
A: If made with durable materials like cardstock or felt (and handled gently), the napkin witch hat can be reused. However, delicate embellishments may need repair or replacement.
Q: Will heavier embellishments cause the hat to wobble?
A: Yes. To avoid wobble, keep decorative elements light—small ribbons, flat charms, or stickers. If heavier decor is desired, reinforce the interior or only attach at sturdy points.
Q: Do I need special tools or skills to use the Napkin Witch Hats – Pattern?
A: No. Basic tools—scissors, ruler, glue, pencil—are sufficient. The folding and assembly are straightforward if you follow the pattern carefully.
Conclusion
In this article, we’ve walked through how to use a Napkin Witch Hats – Pattern to craft adorable and functional holiday décor. We started by understanding core materials and proportions, moved through step‑by‑step instructions, explored customization ideas, and reviewed troubleshooting tips and best practices.
We also addressed common questions and provided guidance for a trouble‑free crafting experience. Now it’s your turn: try making your own Napkin Witch Hats – Pattern, experiment with colors and details, and let your creativity shine. Please leave a sincere opinion or suggestions in the comments—did this guide help you? What new ideas did you try?