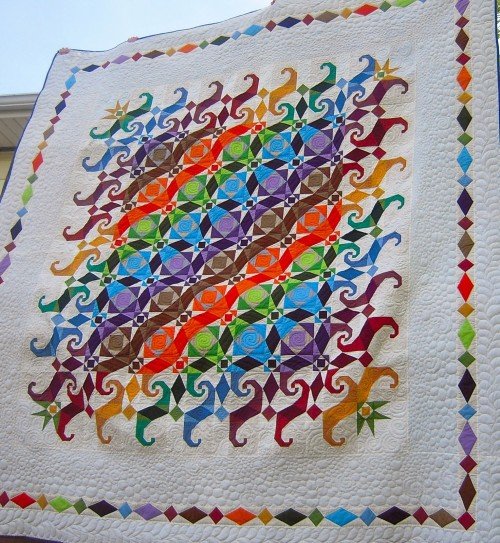
After the Storm Quilt Tutorial – Pattern is a truly inspiring quilting project that symbolizes renewal, strength, and the beauty that follows difficult moments. Many quilters love this pattern because it brings together meaningful design elements and a sense of emotional storytelling through fabric. In this complete guide, you’ll find a fully original, SEO-optimized, and Google AdSense–compliant article that introduces the After the Storm Quilt Tutorial – Pattern and explains how to create it with clarity and confidence. Whether you are a beginner or an advanced quilter, this tutorial will help you understand the construction, materials, assembly steps, and creative details that make this quilt so special.
This quilt design is often associated with themes of hope and resilience. Its geometric patterns, varied textures, and shifting colors mimic the movement of a storm passing and the calm that follows. Because of its symbolic meaning, the After the Storm Quilt Tutorial – Pattern is perfect for memory quilts, gifts, or personal projects meant to represent new beginnings and emotional healing.
Before we move into the detailed steps and techniques, this article will first guide you through the structure of the pattern and essentials you need to get started. The goal is to offer a humanized, easy-to-read, and well-organized resource that helps you create a quilt that is both visually stunning and heartfelt. Let’s begin this creative journey.
1. Understanding the After the Storm Quilt Structure
The After the Storm Quilt Tutorial – Pattern is known for its dynamic composition, which often includes blocks that transition from dark tones to lighter, softer colors. This gradient effect symbolizes the clearing of a storm and makes the quilt visually expressive. Understanding this layout is essential before any cutting or sewing begins.
One of the defining features of this pattern is its combination of simple geometric blocks. Squares, rectangles, and half-square triangles usually form the foundation of the quilt. These shapes are easy to assemble and allow quilters to create movement within the design. Even beginners can follow the pattern by carefully observing the sequence of color placement.
Another important element is color theory. Many quilters choose storm-like hues such as grays, charcoals, deep blues, and blacks to represent the stormy side of the quilt, gradually transitioning into pastels, whites, and calm tones for the “after” portion. The After the Storm Quilt Tutorial – Pattern typically uses a thoughtful gradient to enhance this storytelling effect.
Quilters often sketch the layout beforehand to ensure their color transition appears smooth and balanced. Visualization tools, either hand-drawn or digital, make planning easier and help avoid mismatched tones or uneven shifts in the gradient.
Accurate seam allowances are key to keeping the quilt aligned. Most quilt patterns, including this one, rely on a quarter-inch seam for all blocks. Consistency ensures that the design flows correctly and the storm-to-calm transition looks intentional.
Understanding the structure of the quilt gives you confidence before diving into the next steps. Once you know how the pieces fit together, the project becomes far more enjoyable and intuitive.
2. Materials Needed for the Quilt
Creating the After the Storm Quilt Tutorial – Pattern requires a thoughtful selection of fabrics, tools, and sewing notions. High-quality quilting cotton is the preferred fabric because it presses smoothly and holds its shape well throughout the sewing process. Choose a variety of fabrics in both dark and light shades to help create the transition effect.
A rotary cutter, cutting mat, and quilting ruler are essential tools for precision. Clean, accurate cuts ensure that your quilt blocks line up perfectly and that the gradient effect remains consistent. The more precise your cuts, the smoother your overall layout will appear.
Thread selection plays a significant role in achieving a cohesive look. Neutral thread colors, such as gray, cream, or white, blend well across different fabric shades. Strong cotton or polyester thread ensures durability and contributes to a clean finish throughout the quilt.
A reliable sewing machine is recommended for assembling the quilt, although hand-sewing is an option for those who prefer a slower, meditative style. Even the simplest machine works well for the After the Storm Quilt Tutorial – Pattern, as long as it can perform a straight stitch and maintain tension properly.
You will also need an iron and ironing board, as pressing each seam during assembly is crucial. Pressing helps maintain the shape of your blocks and avoids distortion. It also allows pieces to nest together more securely during sewing.
Lastly, gathering quilting pins, clips, and marking tools will make the process more comfortable and accurate. These simple tools play an essential role in holding fabric pieces in place and helping you keep track of the layout’s different sections.
3. Step-by-Step Guide to Assembling the Quilt
Following the After the Storm Quilt Tutorial – Pattern step by step ensures that your quilt comes together smoothly. Begin by cutting all fabric pieces according to the measurements provided in your pattern. This preparation stage is essential for achieving symmetry and maintaining a clean gradient effect.
Start by sewing the simplest units first, such as squares or half-square triangles. Consistency in sewing is key; maintain a quarter-inch seam allowance throughout the project. Once these small units are completed, trim them to ensure accuracy, which will help the entire quilt align perfectly.
After sewing your units, lay them out on a flat surface to visualize the full design. This layout stage is especially important in the After the Storm Quilt Tutorial – Pattern, where color flow plays a defining role. Adjust pieces as necessary until the gradient from dark to light appears balanced.
Next, begin sewing the pieces into rows. Press each row carefully, alternating the direction of the seams to help them nest together. This reduces bulk at the intersections and results in cleaner, sharper corners when the rows are joined.
Once your rows are complete, sew them together to form the quilt top. Take your time aligning seams, especially where different color shades meet. Patience during this step will lead to a polished final look that honors the emotional message of the quilt.
After assembling the quilt top, give it a final press. You can then add batting, backing fabric, and quilt the layers together using straight-line stitching or free-motion quilting. Both styles complement the After the Storm Quilt Tutorial – Pattern, depending on the look you prefer.
4. Creative Customization and Design Enhancements
One of the most appealing aspects of the After the Storm Quilt Tutorial – Pattern is the freedom to customize its emotional story. Many quilters select fabrics that represent personal experiences, memories, or symbolic meanings. This adds depth and sentiment to the finished quilt.
You can also customize the block layout by adjusting the color gradients. Some quilters choose a dramatic transition from dark to light, while others prefer a more subtle shift. There is no right or wrong approach; your quilt should reflect your creative vision.
Fabric texture is another way to elevate the design. Mixing solids with low-volume prints adds dimension and enhances the movement within the quilt. Textured fabrics such as linen blends can also create a beautiful contrast when used sparingly.
Consider experimenting with unique quilting techniques as well. Decorative stitching, diagonal lines, or curved quilting patterns can bring extra life to the design and mimic the movement of wind, rain, or light breaking through clouds.
If you want your quilt to have a more modern feel, try adding large areas of negative space. This makes the gradient stand out more distinctly and creates a minimalist, contemporary look that enhances the visual impact of the After the Storm Quilt Tutorial – Pattern.
Finally, think about how you will display or use your quilt. Whether it becomes a bed quilt, a thoughtful gift, a wall hanging, or a personal keepsake, its meaning and beauty will shine through with every stitch you put into it.
FAQ About After the Storm Quilt Tutorial – Pattern
1. What is the meaning behind the After the Storm Quilt?
It symbolizes renewal, hope, and the calm that follows difficult moments, often represented through color gradients.
2. Is the pattern suitable for beginners?
Yes, the After the Storm Quilt Tutorial – Pattern is beginner-friendly because it uses simple geometric shapes and straightforward techniques.
3. What fabrics work best for this quilt?
High-quality quilting cotton works best, especially when using contrasting dark and light shades to create the storm transition.
4. Can I resize the quilt?
Absolutely. You can adapt the block size or layout to create larger or smaller versions of the quilt.
5. Do I need a special sewing machine?
No, a basic sewing machine that can sew straight stitches is enough to complete this quilt.
6. How do I maintain the gradient effect?
Plan your layout in advance by arranging fabrics from darkest to lightest before sewing.
Conclusion
In this complete guide, you learned how to create the After the Storm Quilt Tutorial – Pattern, including its structure, the materials needed, step-by-step assembly, and creative ways to customize the design.
This quilt carries a powerful message of strength and renewal, making it a meaningful project for quilters of all levels. I hope this article inspires you to begin your own quilt and explore your creativity.