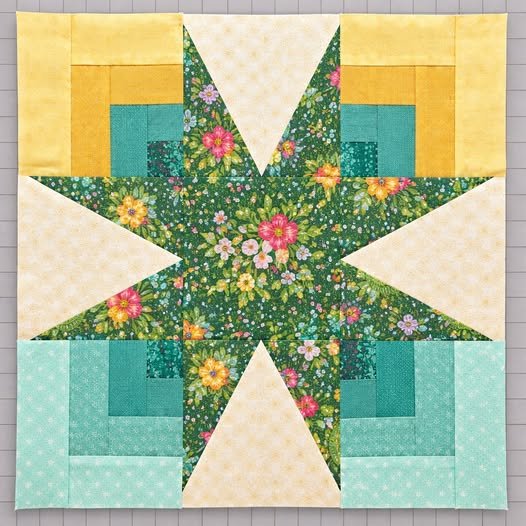
The Black Magic Quilt Block – Pattern is one of the most visually striking designs in the world of quilting, offering a sophisticated blend of geometry and contrast that captures the eye immediately. Despite its mysterious and complex-sounding name, this pattern is a favorite among quilters who want to create a high-impact visual statement without necessarily spending months on a single block. By utilizing clever placement of dark and light fabrics, the Black Magic Quilt Block – Pattern creates an illusion of depth and movement that can transform a simple bedspread into a genuine piece of textile art.
When you decide to work with the Black Magic Quilt Block – Pattern, you are engaging with a tradition of precision and bold aesthetics. This specific design relies heavily on the “disappearing” technique or the clever use of half-square triangles (HSTs) to form its signature look. It is often categorized as a modern classic because it fits perfectly in both minimalist, contemporary homes and cozy, traditional spaces, depending entirely on your choice of fabric selection and color palette.
Understanding the intricacies of the Black Magic Quilt Block – Pattern requires a bit of patience and a keen eye for detail, but the results are undeniably worth the effort. In this guide, we will explore how to master this pattern, ensuring your seams are crisp and your points are sharp. Whether you are a seasoned quilter or a motivated beginner, following a structured quilting tutorial will help you unlock the potential of this enchanting design and add a touch of “magic” to your next sewing project.
1 Understanding the Black Magic Quilt Block – Pattern Fundamentals
The core of the Black Magic Quilt Block – Pattern lies in its ability to play with negative space and high-contrast colors. Usually, this pattern features a dark, “mysterious” center or outer frame—hence the name—contrasted against vibrant or crisp white fabrics. Mastering the quilt block construction starts with selecting high-quality cotton fabrics that won’t fray easily, ensuring your geometric shapes stay true to size throughout the sewing process.
Precision cutting is the most vital step when preparing your Black Magic Quilt Block – Pattern materials. Because this design often incorporates multiple small triangles and squares, even a 1/4-inch seam allowance variation can throw off the entire alignment. Using a rotary cutter and a non-slip quilting ruler is highly recommended to achieve the exact dimensions required for the quilt patches to fit together like a perfect puzzle.
One of the reasons the Black Magic Quilt Block – Pattern is so popular is its versatility in layout. You can arrange the blocks in a uniform grid for a structured look, or rotate them to create a secondary pattern that emerges across the surface of the quilt. This flexibility allows the maker to experiment with visual symmetry and artistic expression, making each finished quilt a unique reflection of the creator’s personal style.
To succeed with this pattern, you must become comfortable with chain piecing, a technique that saves time and thread. By sewing the components of your Black Magic Quilt Block – Pattern in long continuous strands, you maintain a rhythm and consistency that is hard to achieve otherwise. This method also helps in keeping your organized stacks of fabric pieces in the correct order so you don’t accidentally flip a triangle the wrong way.
Pressing is another “secret ingredient” to a professional-looking Black Magic Quilt Block – Pattern. You should always press your seams to the dark side to prevent the seam allowance from showing through lighter fabrics. Use a hot, dry iron and a tailor’s clapper if you want those seams to lay exceptionally flat, which is crucial when you start joining multiple blocks into a full quilt top.
Finally, don’t be intimidated by the “Magic” in the name; it refers to the stunning visual result, not a hidden difficulty level. The Black Magic Quilt Block – Pattern is essentially a collection of basic shapes arranged in a clever way. By breaking the process down into manageable steps—cutting, piecing, and pressing—you will find that creating this intricate quilt design is a logical and deeply satisfying creative journey.
2 Fabric Selection and Color Theory for the Black Magic Quilt Block
Choosing the right colors for your Black Magic Quilt Block – Pattern is where the real fun begins. To truly honor the name, many quilters opt for a “midnight” palette, using deep blacks, charcoals, and navy blues as the primary background fabric. This creates a dramatic stage for “pops” of color, such as neon purples, bright yellows, or metallic silver, which seem to glow against the darker tones of the quilt layout.
Contrast is the engine that drives the beauty of the Black Magic Quilt Block – Pattern. If your fabrics are too similar in value (lightness or darkness), the intricate geometry of the star points or central shapes will get lost. A good trick is to take a photo of your fabric pull and turn it into a black-and-white image on your phone; if you can still see the shapes clearly, your color value contrast is perfect.
Consider the “mood” you want to evoke with your Black Magic Quilt Block – Pattern project. A monochrome version using various shades of grey and black can look incredibly sophisticated and “high-end” in a modern living room. Conversely, using a “scrappy” approach with many different fabric scraps can give the pattern a folk-art feel that is warm, inviting, and full of historical charm.
The texture of the fabric also plays a role in the Black Magic Quilt Block – Pattern‘s final appearance. While standard quilting cotton is the go-to choice, mixing in a bit of batik fabric can add a sense of movement and organic depth to the block. The hand-dyed nature of batiks often provides subtle color shifts that enhance the “magic” effect of the geometric quilt pattern without distracting from the lines.
Don’t forget the importance of the binding and backing when planning your block colors. Often, a bold, striped binding can frame the Black Magic Quilt Block – Pattern beautifully, acting as a boundary for the intense colors inside. Your backing choice is an opportunity to be playful—perhaps a large-scale floral or a whimsical print that provides a surprising contrast to the structured front design.
Lastly, always pre-wash your fabrics if you are using high-contrast colors like red and white or black and white. In a Black Magic Quilt Block – Pattern, the risk of “bleeding” is real because of the saturated dyes. Using color catchers in the wash is a smart insurance policy to ensure that your crisp white triangles don’t turn a muddy grey after the first time you wash your finished masterpiece.
3 Step by Step Assembly of the Black Magic Quilt Block
The assembly of the Black Magic Quilt Block – Pattern typically begins with the creation of the central unit. This is often a square-in-a-square or a series of small triangles that form the “heart” of the block. Ensuring this center is perfectly square is the most important part of the process, as every subsequent row of fabric will be sewn onto this foundation, and any tilt will be magnified as the quilt block grows.
Once the center is ready, you will move on to the corner units, which often utilize the HST (Half-Square Triangle) method. To make these for your Black Magic Quilt Block – Pattern, place two squares right sides together, draw a diagonal line, and sew a 1/4 inch on both sides of that line. When you cut them apart, you have two perfect triangles that, once pressed, form the essential “wings” of your quilt design.
Joining the units into rows is the next phase of the Black Magic Quilt Block – Pattern assembly. You will generally have three rows: the top, the middle (containing your center unit), and the bottom. Use fine quilting pins to match your intersections perfectly. In quilting, “nesting seams”—where you press one seam one way and the connecting seam the opposite way—is the best technique to get those perfect, sharp points.
After the rows are joined, you’ll see the Black Magic Quilt Block – Pattern truly come to life. This is the moment to check for “lost points.” If you notice that the tip of a triangle is cut off by the seam, don’t be afraid to use your seam ripper. It’s better to fix a small mistake now than to look at a blunted point every time you see the finished quilt on your bed.
The final step in the block assembly is the “squaring up” process. Even the most careful quilters can end up with a Black Magic Quilt Block – Pattern that is slightly wonky. Use a large square ruler to trim the block to its final unfinished size (e.g., 12.5 inches). This ensures that when you go to sew all your blocks together, the quilt top stays flat and doesn’t develop “waves” or “bubbles.”
As you finish each block, keep them organized in a “design wall” or on a flat floor space. Seeing multiple Black Magic Quilt Block – Pattern units together allows you to spot any errors in fabric placement or orientation. It also provides a massive boost of motivation as you watch the repetitive pattern build into a complex, professional-looking textile that looks much harder to make than it actually was.
4 Advanced Tips for Quilting and Finishing Your Project
Once your Black Magic Quilt Block – Pattern units are all sewn into a complete quilt top, the question of how to quilt it arises. For a pattern this bold, straight-line quilting or “echo quilting” often works best. By following the lines of the block itself, you emphasize the geometric nature of the Black Magic design, creating shadows and texture that make the fabric “pop” even more.
If you prefer a more organic look, free-motion quilting with swirls or feathers can provide a beautiful contrast to the sharp angles of the Black Magic Quilt Block – Pattern. This “softens” the look of the quilt and gives it a more traditional, heirloom feel. Using a contrasting thread color can make the quilting stitches a part of the design, while a matching thread will let the fabric pattern take center stage.
The choice of quilt batting is also crucial for this specific pattern. If you want a flat, modern look for your Black Magic Quilt Block – Pattern, a bamboo or cotton-poly blend is ideal. However, if you want a “puffy” look where the design seems to be embossed, a high-loft polyester or wool batting will give you the stitch definition needed to make the magic happen.
Don’t overlook the power of bordering. A simple “stop border” (a thin strip of fabric) in a neutral color can act as a visual rest before a larger, more decorative outer border. This helps the viewer’s eye focus on the complexity of the Black Magic Quilt Block – Pattern without being overwhelmed by the scale of the entire quilt.
For those looking to take their Black Magic Quilt Block – Pattern to the next level, consider adding fussy cutting to your repertoire. This involves cutting your fabric so that a specific motif—like a flower or a bird—is perfectly centered within the triangles or squares of the block. This adds an extra layer of “magic” and shows a high level of craftsmanship and attention to detail.
Finally, remember that quilting is a journey, not a race. Each Black Magic Quilt Block – Pattern you create is a chance to refine your skills. Label your quilt with your name, the date, and the pattern name. Years from now, you will look back at this quilting project and remember the satisfaction of turning simple pieces of cloth into a stunning, magical geometric display.
FAQ: Common Questions About the Black Magic Quilt Block
Is the Black Magic Quilt Block suitable for beginners? Yes, absolutely! While it looks complex, the Black Magic Quilt Block – Pattern is mostly made of squares and triangles. If you can sew a straight line and maintain a consistent seam allowance, you can successfully create this block. It is a great project for a “confident beginner” looking to level up.
What is the best size for a Black Magic Quilt Block? Most patterns recommend a 12-inch finished block. This size is large enough to show off the fabric prints but small enough to handle easily during construction. However, the Black Magic Quilt Block – Pattern can be scaled up to 18 inches for a “big block” quilt or down to 6 inches for a miniature version.
How many fabrics do I need for this pattern? At a minimum, you need two high-contrast fabrics. However, the Black Magic Quilt Block – Pattern truly shines with three or four colors: a dark background, a light “pop” color, and one or two medium-toned “bridge” fabrics to create a gradient effect.
Can I use jelly rolls for this pattern? Many variations of the Black Magic Quilt Block – Pattern are “2.5-inch strip friendly.” If your pattern uses strips to create the units, a jelly roll is a fantastic way to get a huge variety of colors that are already coordinated and pre-cut to the correct width.
Why is my quilt block coming out smaller than the pattern says? This is almost always due to the “scant 1/4 inch” rule. Because the fabric takes up a tiny bit of space when it’s folded over the seam, your seam allowance needs to be just a hair thinner than a true 1/4 inch. If your Black Magic Quilt Block – Pattern is too small, try adjusting your needle position slightly.
What does “Black Magic” refer to in quilting? In the context of the Black Magic Quilt Block – Pattern, it usually refers to the visual trickery created by the color placement. It creates a “secondary design” where the eye sees stars or circles that aren’t actually there, appearing as if they were conjured by magic through clever geometry.
Conclusion
The Black Magic Quilt Block – Pattern is an extraordinary example of how simple shapes can be transformed into a sophisticated and mesmerizing work of art. Throughout this article, we have covered the essential fundamentals of quilt construction, the importance of color value contrast, and the step-by-step assembly required to bring this pattern to life. We also explored advanced finishing techniques like straight-line quilting and nesting seams to ensure your project looks professional and lasts for generations.
By mastering the Black Magic Quilt Block – Pattern, you aren’t just making a blanket; you are honing your precision, expanding your understanding of fabric interaction, and creating a visual legacy. Whether you choose a dramatic midnight palette or a bright, scrappy look, the results are guaranteed to impress.