The Box Quilt Block – Pattern remains one of the most versatile and visually captivating designs in the world of traditional quilting, offering a geometric simplicity that appeals to both modern and classic tastes. This specific block relies on the clever use of color value and placement to create a three-dimensional effect, often making the fabric appear as though it is popping off the surface of the quilt top. Whether you are a beginner looking to practice your precision piecing or an experienced quilter aiming to create an intricate optical illusion, mastering this design is a fundamental step in your creative journey.
Exploring the history of the Box Quilt Block – Pattern reveals its roots in the early days of functional needlework, where quilters used scraps of fabric to simulate architectural depth. It is closely related to designs like the “Tumbling Blocks” or “Log Cabin,” yet it stands out due to its structured, clean lines and the ease with which it can be tiled across a large surface. The beauty of this block lies in its mathematical balance; when executed correctly, it creates a secondary pattern across the entire quilt, transforming a collection of simple squares and triangles into a complex visual tapestry.
In this comprehensive guide, we are going to dive deep into the technical specifications and artistic possibilities of the Box Quilt Block – Pattern. We will discuss how to choose fabrics that emphasize the “box” effect, the best cutting techniques to ensure your corners remain sharp, and how to assemble the pieces with a professional finish. By understanding the underlying geometry of this quilting pattern, you will be able to scale it for projects ranging from small decorative pillows to expansive king-sized bedspreads. Let’s unlock the secrets of this timeless design together.
1. Selecting Fabrics for the Perfect Box Quilt Block – Pattern Illusion
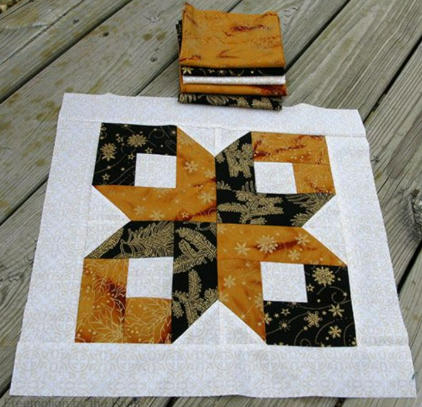
The most critical factor in achieving a successful Box Quilt Block – Pattern is the concept of color value. To create the illusion of a three-dimensional box, you must select at least three distinct shades: a light, a medium, and a dark. The light fabric typically represents the “top” of the box where the light hits, the medium represents one side, and the dark represents the shadow. Without this contrast, the geometric “pop” that makes this quilt block so famous will be lost in a flat sea of color.
When browsing for fabrics for your Box Quilt Block – Pattern, consider using solid colors or “read-as-solid” prints like small dots or tonal batiks. High-contrast prints can sometimes distract the eye from the clean lines of the box, making the 3D effect harder to perceive. However, if you are an experienced quilter, you can use directional prints to add even more movement to the block design, provided you align the grain of the fabric consistently across all units.
Quality of material is just as important as the color. Always choose 100% high-quality quilting cotton for your Box Quilt Block – Pattern to ensure that the fabric doesn’t stretch or warp during the piecing process. Cheap fabrics often have a lower thread count, which can lead to fraying at the seams—a major problem when you are dealing with the precise angles required for this specific geometric pattern. Pre-washing your fabrics is also recommended to prevent uneven shrinking later.
Think about the “story” you want your Box Quilt Block – Pattern to tell. For a modern, minimalist look, a palette of grays, whites, and blacks can create a sophisticated architectural vibe. If you prefer something more traditional, “Civil War” reproduction fabrics or warm “Thimbleberries” style flannels can make the quilt feel like a cozy heirloom. The versatility of the block means it can adapt to any aesthetic as long as the value contrast is maintained.
Texture plays a subtle role in the Box Quilt Block – Pattern as well. Mixing a flat cotton with a slight linen blend can add a tactile dimension to the finished piece. Just be sure that the weights of the fabrics are similar; mixing a heavy denim with a light lawn will make it nearly impossible to get the seams to lay flat. Consistency in fabric weight is the secret to achieving those razor-sharp points that define a high-quality handmade quilt.
Lastly, don’t be afraid to use a “fussy cut” technique for the center of your Box Quilt Block – Pattern. If you have a fabric with a beautiful motif—like a flower or a small animal—placing it in the very center of the box can make it look like the “treasure” inside the container. This adds a whimsical element to the pattern and allows you to personalize the quilt for a child or a special occasion, making the geometric design feel more intimate.
2. Essential Cutting and Piecing Techniques for Precision
Precision is the hallmark of a well-executed Box Quilt Block – Pattern. Before you even touch your fabric, ensure that your rotary cutter has a fresh, sharp blade. Dull blades can pull the fabric, leading to slightly jagged edges that will make it difficult to align your pieces perfectly. Using a non-slip quilting ruler is also vital; even a 1/16th of an inch discrepancy can cause the final quilt block to be “wonky” or out of square.
Most versions of the Box Quilt Block – Pattern involve a combination of squares and half-triangle squares (HSTs). To make your life easier, many quilters prefer to make their HSTs slightly oversized and then “trim down” to the exact required size. This extra step ensures that every component of your block is perfectly uniform, which is the key to getting the “box” to look symmetrical and professionally tailored.
The “scant quarter-inch seam” is a technique you must master for the Box Quilt Block – Pattern. Because every fold of fabric takes up a tiny amount of space, a true quarter-inch seam can actually result in a block that is slightly too small once all the pieces are joined. By sewing just one or two threads narrower than a quarter-inch, you account for that “turn of the cloth,” ensuring that your finished block measures exactly what the pattern intends.
Pressing is just as important as sewing in the Box Quilt Block – Pattern. You should always press your seams to the “dark side” to prevent the seam allowance from showing through the lighter fabrics. However, in complex areas where many seams meet, “spinning” the seams or pressing them open can help reduce bulk. A flat, well-pressed block is much easier to quilt later, whether you are doing it by hand or on a longarm machine.
Organization is your best friend when working on a Box Quilt Block – Pattern project. Because the 3D effect depends on specific color placement, it is easy to accidentally flip a triangle and ruin the illusion. Many quilters use a “design board”—a small piece of batting-covered foam—to lay out the pieces of the block next to their sewing machine. This allows you to double-check the orientation before every single seam is sewn.
If you are making multiple blocks, “chain piecing” will save you an immense amount of time. This involves sewing the same component of several Box Quilt Block – Pattern units in one long string without cutting the thread between them. Not only does this speed up the process, but it also helps maintain a consistent seam allowance across your entire quilt, resulting in a more cohesive and professional-looking textile project.
3. Creative Layouts and Scaling the Box Pattern
Once you have mastered a single Box Quilt Block – Pattern, the fun really begins with the layout. If you set the blocks “straight” in rows and columns, you create a very structured, grid-like appearance. However, if you set them “on point” (rotated 45 degrees), the boxes appear to be tumbling or floating through space. This simple change in orientation can completely transform the energy of your quilt design.
Sashing and borders can also drastically alter the look of your Box Quilt Block – Pattern. Adding a thin “inner border” in a dark, solid color can act like a frame for each box, making the 3D effect even more pronounced. Alternatively, using “cornerstone” sashing—where a small square is placed at the intersection of the sashing strips—can add another layer of geometric complexity to the finished quilt top.
Scaling the Box Quilt Block – Pattern is a great way to experiment with different project types. A tiny 4-inch version of this block is perfect for a “mug rug” or a decorative coaster, while a massive 24-inch “big block” can serve as a stunning baby quilt all on its own. The math remains the same; you simply increase the size of your starting squares and triangles to fit your desired project dimensions.
Negative space is a modern quilting concept that works beautifully with the Box Quilt Block – Pattern. Instead of filling the entire quilt with boxes, you can place a few “floating” boxes against a solid, neutral background. This creates a minimalist, artistic look that highlights the geometry of the pattern without overwhelming the viewer. It’s a great way to make a bold statement with fewer blocks.
Don’t forget the “secondary patterns” that emerge when you join several Box Quilt Block – Pattern units together. Depending on how you flip the blocks, you might see stars, diamonds, or zig-zags appear in the “valleys” between the boxes. Spending some time on a design wall (or even the floor) to move your blocks around before sewing them together is the best way to discover these “hidden” geometric wonders.
Finally, consider the quilting design itself. You can use “stitch-in-the-ditch” to emphasize the clean lines of the Box Quilt Block – Pattern, or you can use a free-motion “swirl” pattern to provide a soft contrast to the rigid angles. Some quilters even use “echo quilting” inside the boxes to enhance the 3D depth, making the center of the box look like it is receding even further away from the surface.
4. Troubleshooting and Finishing Tips for Quilting Success
One of the most common issues with the Box Quilt Block – Pattern is “blunted points.” This happens when the tip of a triangle is cut off by the seam allowance of the next piece. To avoid this, always look for the “X” where the previous seams cross. If you sew exactly through the center of that “X,” your points will remain perfectly sharp. It takes practice, but it is the hallmark of a master quilter.
If your Box Quilt Block – Pattern is coming out “rippled” or not laying flat, it usually means your tension was too tight or your fabric was stretched during sewing. To fix this, you can try “steam blocking” the finished block. Use plenty of steam and a heavy iron to gently encourage the fabric back into its square shape. Pinning the block to a gridded cutting mat while it dries can also help “lock” it into the correct dimensions.
Squaring up is a non-negotiable final step for every Box Quilt Block – Pattern. Even with the most careful sewing, blocks can sometimes end up a tiny bit skewed. Use a square ruler that is the exact size of your unfinished block and trim away any excess “whiskers” of fabric. This ensures that when you go to sew the blocks into rows, the intersections will align perfectly, saving you hours of frustration later.
Basting is another area where you want to be meticulous. Because the Box Quilt Block – Pattern has so many seams, a quilt sandwich that shifts can lead to unsightly puckers on the back. Whether you prefer pin basting or spray basting, make sure the layers are taut and smooth. A well-basted quilt is much easier to manage under the needle, ensuring that your pattern remains crisp and distortion-free.
Choosing the right binding can provide the perfect “frame” for your Box Quilt Block – Pattern. A “striped” binding cut on the bias can add a sense of motion to the edges of the quilt, while a solid dark binding can ground the design and make the colors inside the boxes pop. Hand-sewing the binding to the back provides a classic, clean finish that honors the handmade tradition of the craft.
Lastly, label your work! Every Box Quilt Block – Pattern quilt is a labor of love and a piece of history. Use a fabric marker or embroidery to record your name, the date, and the name of the pattern on a small square of fabric sewn to the back corner. Future generations will appreciate knowing who created the beautiful textile art, and it adds a final touch of professional pride to your completed project.
FAQ – Frequently Asked Questions
Is the Box Quilt Block – Pattern suitable for total beginners?
Yes! While it looks complex, it is actually made of basic shapes. As long as you can sew a straight line and maintain a consistent quarter-inch seam, you can successfully create this block. It is an excellent project for learning about color value and fabric contrast.
How do I get the “3D” effect to work?
The 3D illusion depends entirely on color value. You must use a light, a medium, and a dark fabric. If the colors are too similar in “weight,” the box will look like a flat hexagon or a collection of triangles rather than a three-dimensional cube.
Can I make a Box Quilt Block – Pattern with scraps?
Absolutely. This is a classic “scrap-buster” project. The only rule is to categorize your scraps into light, medium, and dark piles. As long as you follow the value rules, you can use a different fabric for every single box and still achieve a cohesive quilting design.
What size is a standard Box Quilt Block?
There is no “official” size, but 12 inches (unfinished) is very common because it is easy to calculate the math for the internal components. However, the Box Quilt Block – Pattern is easily adaptable to almost any size you need for your specific project.
Do I need special rulers for this pattern?
You don’t need them, but a 6.5-inch or 12.5-inch square ruler makes trimming and squaring up much easier. A “Half-Square Triangle” ruler can also speed up the process if you are making a large quantity of blocks for a full-sized quilt.
Why do my corners never line up?
This is usually due to an inconsistent seam allowance. If your seams vary even slightly, the points won’t meet. Practice your “scant quarter-inch” and use plenty of pins to keep the intersections from shifting as they go under the presser foot of your sewing machine.
Conclusion
In this guide, we have explored the intricate and rewarding process of creating the Box Quilt Block – Pattern, from the vital importance of color value to the technical precision required in cutting and piecing. We’ve learned that while the design may seem intimidating at first, it is built upon foundational quilting skills that anyone can master with a bit of patience and practice.
By choosing the right fabrics and focusing on consistent seam allowances, you can create a stunning optical illusion that adds depth and sophistication to your home. Whether you are making a small gift or a large heirloom, this pattern offers endless opportunities for creativity and self-expression.