If you are tired of searching for a loose tissue box sliding under your seats, creating a Car tissue holder made of fabric Tutorial – Pattern is the perfect weekend project to organize your vehicle. This functional accessory ensures that you always have a tissue within reach while driving, combining convenience with a touch of personal style. By following this guide, you will learn how to transform a simple piece of cloth into a professional-looking dispenser that fits perfectly over your visor or headrest.
The beauty of a Car tissue holder made of fabric Tutorial – Pattern lies in its versatility and the ability to customize it to match your car’s interior. Unlike bulky plastic store-bought versions, a handmade fabric holder is soft, washable, and durable. Whether you are a seasoned seamstress or a complete beginner, this project is designed to be accessible, requiring only basic sewing tools and a small amount of material, making it an excellent way to use up your favorite fabric scraps.
To achieve the best results with this Car tissue holder made of fabric Tutorial – Pattern, it is essential to focus on precise measurements and quality finishing. Throughout this article, we will explore the step-by-step process of selecting the right materials, cutting the fabric according to a specific template, and assembling the pieces for a snug fit. By the end of this tutorial, you will have a stylish and practical item that solves a common travel nuisance while showcasing your creative skills.
1. Selecting the Best Materials for Your Car Tissue Holder
When starting your Car tissue holder made of fabric Tutorial – Pattern, the choice of textile is the foundation of a long-lasting product. It is highly recommended to use medium-weight cotton or canvas because these fabrics provide the necessary structure to hold the tissues firmly without sagging. Choosing a high-quality fabric ensures that the holder can withstand the heat inside a car during summer months without fading or becoming brittle.
The design of your Car tissue holder made of fabric should complement your car’s aesthetic, so consider using neutral tones or patterns that match your upholstery. If you want something more vibrant, floral prints or geometric patterns can add a pop of personality to your dashboard area. Always pre-wash your fabric before starting to prevent any shrinkage after the project is completed, ensuring the tissue box dimensions remain accurate.
In addition to the main fabric, you will need a few essential sewing notions to complete the task. These include a sharp fabric rotary cutter, a cutting mat, and high-quality polyester thread that matches your chosen design. Using a walking foot on your sewing machine can also be helpful if you decide to use thicker materials like denim or quilted cotton for added durability.
For the closure system of your fabric tissue dispenser, you have several options such as Velcro strips, snap buttons, or even a simple elastic band. Hook and loop fasteners are particularly popular for car accessories because they allow for quick refills while keeping the tissues secure during bumpy rides. Make sure to have these items ready on your workspace before you begin the assembly process.
Interfacing is another secret ingredient for a professional Car tissue holder made of fabric Tutorial – Pattern. Applying a thin layer of fusible interfacing to the wrong side of your fabric adds crispness and prevents the “slouchy” look that some handmade items have. This step is crucial if you are using lightweight cotton, as it gives the tissue holder pattern a much-needed structural boost.
Lastly, don’t forget the elastic straps if you plan to mount the holder on the sun visor. Opt for a heavy-duty elastic that is about 1 inch wide, as this will provide a secure grip without stretching out over time. Having all these sewing supplies organized will make the transition to the cutting and sewing phases much smoother and more enjoyable.
2. Understanding the Dimensions and Cutting the Pattern
The core of a successful Car tissue holder made of fabric Tutorial – Pattern is getting the measurements exactly right. Most standard travel-sized tissue packs require a fabric rectangle of approximately 11 by 12 inches, but you should always measure your preferred brand first. Creating a custom paper template before cutting your fabric is a smart way to ensure consistency and avoid wasting beautiful material.
When you lay out your fabric pattern, pay close attention to the grainline of the cloth. Cutting along the grain ensures that the holder doesn’t twist or warp after it is sewn together. If your fabric has a directional print, make sure the design faces the right way once the holder is folded into its final shape, which is a common mistake in many DIY sewing projects.
To begin the cutting process for your Car tissue holder made of fabric, fold your fabric in half and mark the center points clearly with a fabric marking pen. These marks will act as guides for where the tissue opening will be located. Precise seam allowances are vital; usually, a 1/4 inch or 3/8 inch allowance is standard for this type of small-scale sewing tutorial.
If you are following a specific printable sewing pattern, ensure that your printer settings are set to “Actual Size” to maintain the correct scale. Once the main body is cut, you will also need to cut two smaller strips of fabric or elastic for the attachment straps. These pieces are what turn a standard tissue cover into a specialized car organization accessory.
Safety is paramount, so always use a sharp blade when cutting through multiple layers of fabric and interfacing. If you are using fusible interfacing, cut it slightly smaller than the fabric pieces to reduce bulk in the seams. This technique, known as grading seams, results in a much flatter and more professional-looking finish for your handmade tissue holder.
Once all your pieces are cut, it is a good idea to finish the edges using a zigzag stitch or a serger. This prevents the fabric from fraying inside the car, especially with the constant vibration and movement of a vehicle. Organizing your cut pieces into a small pile will prepare you for the most exciting part of the Car tissue holder made of fabric Tutorial – Pattern: the actual sewing.
3. Step-by-Step Assembly and Sewing Instructions
The assembly phase of the Car tissue holder made of fabric Tutorial – Pattern begins with preparing the opening where the tissues will be pulled through. Fold the long edges of your fabric rectangle toward the center, overlapping them slightly to create a slit opening. Pin these layers carefully, ensuring the fabric alignment is perfectly straight to avoid a crooked dispenser.
Begin sewing the top and bottom edges of the rectangle, making sure to backstitch at the start and end of every seam for maximum durability. If you are adding elastic straps, sandwich them between the fabric layers at this stage. Position the straps so they will sit horizontally across the visor, which is the most stable orientation for a visor tissue holder.
As you move through this Car tissue holder made of fabric Tutorial, take the time to press your seams with an iron. Pressing as you go is the difference between a project that looks “homemade” and one that looks “handmade.” A crisp edge makes it much easier to topstitch around the tissue opening, adding a decorative and functional reinforcement to the most used part of the holder.
For the opening itself, you can leave it as a simple overlap or finish it with a rolled hem. If you want a more advanced look, consider adding a contrasting binding around the slit. This not only strengthens the opening but also adds a professional design element to your custom car accessory, making it look like a high-end boutique item.
Once the main structure is sewn, turn the holder right side out through the center slit. Use a point turner or a blunt chopstick to push out the corners firmly. A sharp corner is a sign of high-quality sewing craftsmanship, and it ensures that the tissues fit snugly inside without being crushed or folded awkwardly within the fabric casing.
The final step in the sewing process is to test the fit with a real pack of tissues. Slide the tissues in and check if the tension of the fabric is correct. It should be tight enough to hold the box in place but loose enough to allow for easy removal of a single sheet. This adjustment period is a key part of mastering the Car tissue holder made of fabric Tutorial – Pattern.
4. Final Touches and Installation in Your Vehicle
Now that your Car tissue holder made of fabric Tutorial – Pattern is complete, it is time to add any final embellishments. You might consider adding a decorative label or a small piece of embroidery to the corner. These small details enhance the aesthetic value of your work and make it a wonderful gift for friends and family who take pride in their car’s appearance.
Before installing the holder, give it one last press with a steam iron to remove any wrinkles caused during the turning process. This ensures the fabric fibers are set and the holder maintains its shape even when empty. A well-pressed item always reflects better on the creator’s attention to detail and sewing skills.
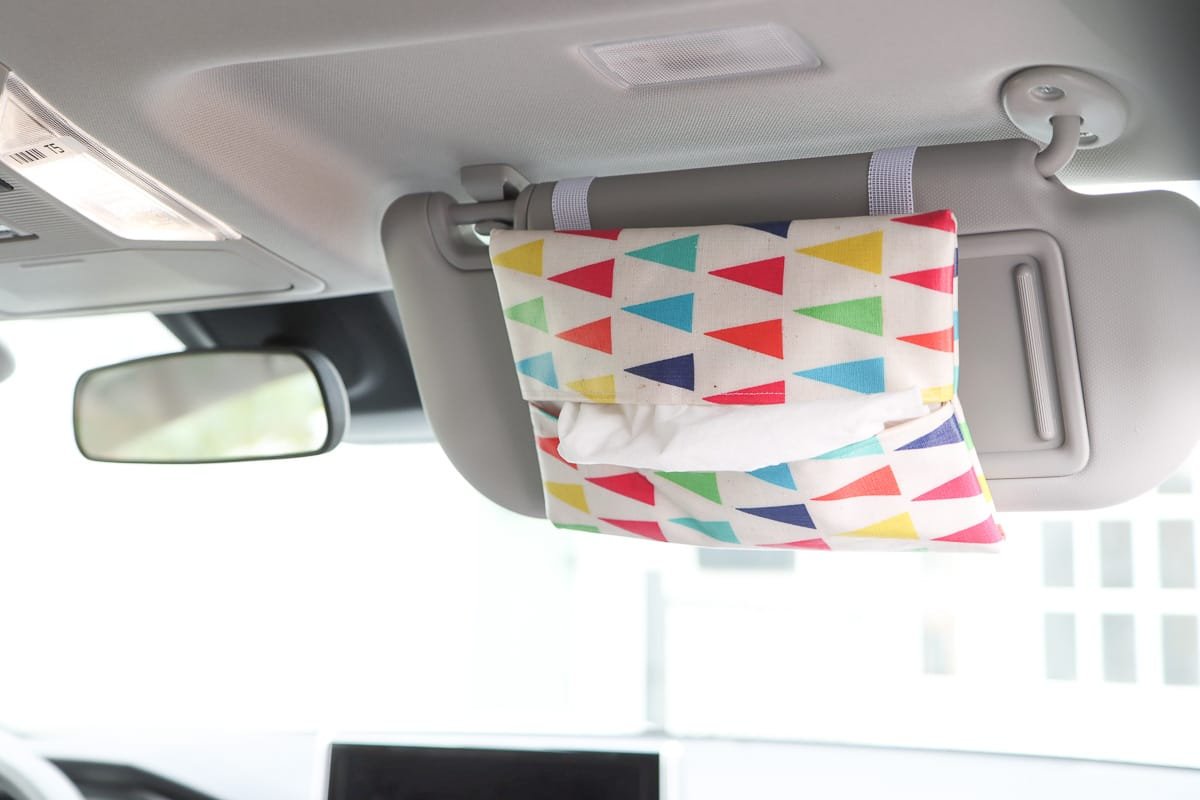
To install your new Car tissue holder made of fabric, simply slide the elastic straps over your sun visor. Make sure the holder does not obstruct your view or interfere with the movement of the visor. The strategic placement of the tissue holder is important for safety; it should be accessible but never a distraction while you are operating the vehicle.
If you prefer to keep your tissues on the back of the seat, you can adjust the strap length during the sewing phase to fit around a headrest. This versatility is why the Car tissue holder made of fabric Tutorial – Pattern is so popular among DIY enthusiasts. It adapts to your specific needs, whether you are a solo commuter or a parent with a car full of kids.
Maintenance of your handmade fabric holder is incredibly easy. Because you chose high-quality cotton, you can simply toss it in the washing machine whenever it gets dusty. This hygienic advantage is a major reason why fabric holders are superior to built-in car compartments that are difficult to clean and sanitize.
Sharing your finished project online is a great way to inspire others in the sewing community. Take a clear photo of your Car tissue holder made of fabric in its new home and share the results of your hard work. Using a well-constructed pattern ensures that your project is not only beautiful but also a testament to the utility of handmade goods in modern life.
Frequently Asked Questions (FAQ)
What is the best fabric for a car tissue holder?
The best fabrics are medium-weight cotton, canvas, or home decor fabrics. These provide enough stiffness to maintain the shape of the Car tissue holder made of fabric Tutorial – Pattern while remaining soft to the touch.
Can I make this without a sewing machine?
Yes, you can certainly sew this by hand using a backstitch for strength. However, using a sewing machine is much faster and provides more consistent seam tension for an item that will be handled frequently.
How do I wash my fabric tissue holder?
Most fabric tissue holders can be machine washed on a gentle cycle with cold water. It is best to air dry them to prevent the elastic from losing its stretch and to keep the fabric colors vibrant.
What size tissues fit in this holder?
This specific Car tissue holder made of fabric Tutorial – Pattern is designed for standard travel-sized or “soft pack” tissues. If you use full-sized boxes, you will need to scale up the measurements accordingly.
Will the elastic damage my sun visor?
No, if you use a soft, wide knitted elastic, it will securely grip the visor without leaving permanent marks or indentations on the material.
How long does it take to complete this project?
For most people, this is a quick project that takes between 30 to 60 minutes, including the cutting and prep time, making it an ideal “quick-win” for busy crafters.
Conclusion
In this guide, we have covered everything you need to successfully complete a Car tissue holder made of fabric Tutorial – Pattern. From selecting the right durable textiles and understanding the importance of precise cutting, to the step-by-step assembly and final installation, you now have the knowledge to create a functional and stylish accessory for your vehicle.
This project not only helps in keeping your car organized but also allows you to practice essential sewing techniques like topstitching and elastic integration.