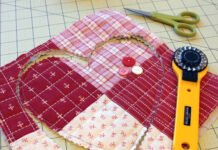
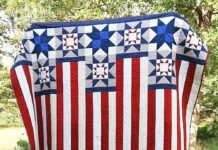
The Chained Nine Patch is a traditional and timeless quilt block design that has remained popular among quilters for generations.
Known for its simple, yet elegant appearance, this pattern consists of a series of interconnected nine-patch blocks, giving the illusion of a chain running through the quilt.
The Chained Nine Patch is not only a beautiful addition to any quilt but also a perfect choice for quilters of all skill levels. Whether you are new to quilting or an experienced quilter, the Chained Nine Patch offers a fun and rewarding project.

Creating a quilt with the Chained Nine Patch pattern allows quilters to experiment with different fabrics, colors, and layouts, resulting in endless design possibilities. The versatility of the pattern makes it suitable for a variety of occasions, from cozy home décor to gifts for loved ones. In this article, we will explore how to create a Chained Nine Patch quilt, the materials you need, and some creative ways to customize the design.
Whether you want to make a small lap quilt, a large bedspread, or simply learn a new technique, the Chained Nine Patch pattern is a great place to start. The following sections will guide you through the process, step-by-step, to ensure that you can create your very own Chained Nine Patch quilt.
1. Materials You Will Need for the Chained Nine Patch Quilt
Before you dive into creating your Chained Nine Patch quilt, it’s important to gather the necessary materials. Having everything prepared ahead of time will make your quilting process smoother and more enjoyable. Here’s a list of the basic supplies you’ll need:
- Fabric: For a traditional Chained Nine Patch, you’ll need a variety of fabrics in two or more color schemes. Typically, quilters use a combination of light, medium, and dark fabrics to create contrast and depth in the design. You’ll need fabric for the nine-patch blocks as well as a border fabric if you wish to add one.
- Quilt Batting: This is the fluffy material that goes between the quilt top and backing fabric. Choose a batting that suits the feel and weight you want for your quilt. Cotton batting is a common choice, as it provides a soft, warm feel.
- Quilt Backing Fabric: The backing fabric is the material that covers the back of your quilt. Choose a fabric that complements the quilt top and adds to the overall aesthetic of the design.
- Quilting Thread: Choose a thread that matches the colors of your quilt. A good quality cotton quilting thread is ideal for piecing the blocks together and for quilting the finished quilt.
- Rotary Cutter and Mat: A rotary cutter and cutting mat are essential for cutting the fabric accurately. These tools make it easier to cut the fabric into the precise shapes needed for the Chained Nine Patch blocks.
- Quilting Ruler: A quilting ruler will help you cut the fabric into straight and uniform strips, ensuring your blocks are the right size and shape.
Once you have these materials, you’re ready to begin your quilting project and start working on your Chained Nine Patch.
2. How to Make the Chained Nine Patch Quilt Block
Creating the Chained Nine Patch quilt block is a straightforward process, but it requires precision and patience. Here’s a step-by-step guide to making the nine-patch blocks:
- Cutting the Fabric: Start by cutting your fabric into squares. You will need to cut several squares of different fabrics for each nine-patch block. A typical nine-patch block consists of 9 squares arranged in a 3×3 grid. The squares should all be the same size, typically 3 inches, but this can be adjusted depending on your desired block size.
- Sewing the Rows: Begin by sewing together the squares for the first row of the nine-patch block. Use a ¼-inch seam allowance for all seams. Press the seams open as you go to reduce bulk and keep the blocks flat.
- Sewing the Columns: Once the first row is complete, sew the second and third rows in the same manner. Again, press the seams open to keep the blocks looking neat and tidy.
- Joining the Rows: After the rows are complete, join them together to form the full nine-patch block. Be sure to line up the seams carefully to ensure that the blocks match up perfectly.
- Adding the Chain Effect: In the Chained Nine Patch pattern, the blocks are arranged in such a way that they appear to be linked or “chained” together. When arranging the blocks for your quilt, alternate the direction of the nine-patch blocks in a consistent pattern, creating the visual effect of a chain running through the quilt.
- Repeat: Continue making additional nine-patch blocks in the same way. You can make as many blocks as needed for your quilt, depending on the size you want. Each block will be connected in the layout, forming the signature “chained” look.
By following these steps, you’ll be well on your way to creating a beautiful Chained Nine Patch quilt block. Don’t forget to check the alignment and seams as you work to ensure that your quilt top comes together seamlessly.
3. Tips for Customizing Your Chained Nine Patch Quilt
One of the best aspects of the Chained Nine Patch is its flexibility. You can customize this pattern to suit your style, preferences, and the intended purpose of your quilt. Here are some tips for making your quilt truly one-of-a-kind:
- Play with Color: Experiment with color placement to add variety and interest. You can use a monochromatic color scheme or incorporate multiple colors to create a more vibrant and dynamic design. By choosing contrasting colors for the “chain” and “nine-patch” sections, you can create a striking effect.
- Use Different Fabrics: For a modern twist on the classic pattern, try using a mix of fabric types, such as prints, solids, or even textured fabrics like flannel or linen. This will give your quilt a unique feel and a lot of visual appeal.
- Vary the Block Size: While a traditional Chained Nine Patch uses 3-inch blocks, feel free to play around with the block size. Making larger blocks can speed up the process, while smaller blocks can give your quilt a more intricate look.
- Add Borders: A border can frame your quilt and add a finishing touch to the design. Choose a fabric that complements your main quilt design, whether it’s a solid color, a print, or a complementary fabric to the main blocks.
- Create a Scrappy Quilt: If you have a collection of fabric scraps, this pattern is a great way to use them up. A scrappy Chained Nine Patch quilt is colorful, fun, and gives each block its own personality.
- Experiment with Layout: The layout of the blocks is key to achieving the “chained” effect. Try rotating the blocks, flipping them, or arranging them in diagonal lines to create different visual effects. You can also play with the spacing between the blocks to change the quilt’s overall look.
4. Assembling and Quilting the Chained Nine Patch
Once your Chained Nine Patch quilt blocks are completed, it’s time to assemble the quilt top and begin the quilting process. Here’s how to put everything together:
- Arrange the Blocks: Lay out the blocks in the desired pattern, making sure that the “chain” effect is visible. Play with the arrangement until you’re satisfied with how it looks.
- Sew the Blocks Together: Once you’re happy with the layout, sew the blocks together into rows, following the chain pattern. Press the seams open to keep the quilt top flat and smooth.
- Add the Quilt Border: If you’re adding a border, now is the time to attach it. Sew the border fabric to the edges of the quilt top, ensuring that the corners are neat and aligned.
- Quilt the Layers: Layer the quilt top, batting, and backing fabric. Pin or baste the layers together and begin quilting. You can choose to quilt by hand or machine, depending on your preference. Simple straight-line quilting works well for the Chained Nine Patch design.
- Bind the Quilt: Once quilting is complete, add the quilt binding to finish the edges. Fold the binding over the edges and sew it in place, ensuring a neat and tidy finish.
- Final Touches: After binding, give your quilt a final press and make sure all seams are secure. Your Chained Nine Patch quilt is now ready to be enjoyed!
FAQ
1. What is a Chained Nine Patch quilt?
A Chained Nine Patch is a traditional quilt pattern that features nine-patch blocks arranged in a way that creates the illusion of a chain running through the quilt.
2. What fabric is best for a Chained Nine Patch quilt?
You can use a variety of fabrics, but cotton fabric is the most commonly used for quilting. Choose fabrics that contrast with each other to emphasize the chain effect.
3. Can I make a smaller version of a Chained Nine Patch quilt?
Yes! You can adjust the size of the blocks to create a smaller quilt, such as a baby quilt or wall hanging. Just be sure to adjust the fabric cutting measurements accordingly.
4. Is the Chained Nine Patch quilt suitable for beginners?
Yes! The Chained Nine Patch pattern is simple and perfect for beginners. It involves basic piecing
techniques and allows quilters to practice their skills.
5. How can I make my Chained Nine Patch quilt more modern?
To create a modern look, use bold fabrics, minimalist patterns, or even incorporate negative space between blocks. You can also experiment with larger blocks for a quicker, more contemporary design.
Conclusion
The Chained Nine Patch quilt is a classic design that offers endless opportunities for creativity. By following the steps outlined in this article, you can create a beautiful quilt that showcases your personal style and skills. Whether you’re new to quilting or an experienced quilter, the Chained Nine Patch pattern is a rewarding project that can result in a stunning finished quilt.
We hope this guide has helped you understand how to create a Chained Nine Patch quilt. If you have any questions or would like to share your experience, please leave a comment below. We’d love to hear your thoughts and suggestions. Happy quilting!


