The Chicken Salad Sew Along Guide- Pattern is an essential resource for quilting enthusiasts looking to master one of the most charming and intricate designs in the modern quilting world. This project, famous for its playful aesthetic and detailed appliqué techniques, offers a unique opportunity for makers to refine their skills while creating a stunning heirloom piece. Whether you are a seasoned quilter or a motivated beginner, following a structured guide ensures that each block comes together with precision and professional flair.
Many crafters find that participating in a communal project like this provides the perfect blend of motivation and creative inspiration. By focusing on the Chicken Salad Sew Along Guide- Pattern, you are joining a global community of sewists who appreciate the art of storytelling through fabric. Each section of the quilt allows for personal expression, enabling you to choose a color palette that reflects your individual style while adhering to the core structural requirements of the pattern.
To achieve the best results, it is important to approach the Chicken Salad Sew Along Guide- Pattern with a focus on organization and high-quality materials. Proper preparation of your fabric scraps, interfacing, and quilting notions will make the assembly process much smoother and more enjoyable. In the following sections, we will break down the essential components of this project, ensuring you have all the knowledge needed to complete your masterpiece with confidence and ease.
1. Essential Materials for Your Chicken Salad Sew Along Guide- Pattern
Starting your project with the right tools is the first step toward a successful finish. For the Chicken Salad Sew Along Guide- Pattern, you will need a variety of high-quality cotton fabrics that provide both contrast and harmony. Selecting a mix of small-scale prints and solid blenders helps the appliqué chickens stand out against the background blocks.
Precision is key when cutting your fabric, so ensure your rotary cutter has a fresh blade. Using a non-slip quilting ruler will help you achieve the exact dimensions required for the sashing and border elements. Many quilters also recommend using a design board to arrange their pieces before the final stitching begins.
Don’t forget the importance of your sewing machine needles; a sharp microtex needle or a topstitch needle is often preferred for detailed appliqué work. The Chicken Salad Sew Along Guide- Pattern involves multiple layers, so a fresh needle prevents skipped stitches and fabric puckering. Choosing a high-quality polyester or cotton thread in a neutral taupe or grey can also help your seams blend seamlessly.
For those who prefer the raw-edge appliqué method, a reliable fusible web is a must-have item. This adhesive helps hold your fabric shapes in place while you navigate the curves of the chicken motifs. Be sure to follow the manufacturer’s instructions for heat settings to avoid damaging your delicate textile fibers.
If you are opting for needle-turn appliqué, a set of fine applique pins and a wooden pressing tool will be your best friends. This traditional method adds a beautiful, soft dimension to the Chicken Salad Sew Along Guide- Pattern. Regardless of your chosen technique, having a reliable iron and a tailor’s ham nearby will ensure your blocks lay perfectly flat.
Lastly, consider the batting and backing fabric you intend to use. A low-loft cotton batting is excellent for showing off intricate quilting lines without adding too much bulk. Planning these final layers early in the process of the Chicken Salad Sew Along Guide- Pattern helps you stay focused on the end goal of a beautifully finished quilt.
2. Understanding the Block Layout and Design Symmetry
The Chicken Salad Sew Along Guide- Pattern is celebrated for its organized yet whimsical layout. Each block features a unique character, requiring a balance of color and texture to maintain visual interest across the entire quilt top. Understanding how these blocks interact with the quilt sashing is vital for a cohesive look.
When beginning the assembly, it is helpful to categorize your fabric pieces by block number. The Chicken Salad Sew Along Guide- Pattern often utilizes a grid system that makes it easier to track your progress. By staying organized, you reduce the risk of misplacing small template pieces or sewing blocks in the wrong orientation.
Consistency in your seam allowance is perhaps the most important technical aspect of this project. A standard 1/4-inch seam is the industry norm, and using a patchwork foot on your sewing machine can help you maintain this measurement. This ensures that all the components of the Chicken Salad Sew Along Guide- Pattern fit together perfectly during the final assembly.
Visual balance is achieved by distributing “heavy” and “light” fabrics evenly. If you have a particularly bold floral print, try to pair it with a more subtle background fabric. This strategy allows the intricate details of the Chicken Salad Sew Along Guide- Pattern to remain the focal point without overwhelming the viewer’s eye.
Pressing your seams is another critical step that shouldn’t be rushed. Most experts recommend pressing toward the darker fabric or “nesting” your seams to reduce bulk at the intersections. In the Chicken Salad Sew Along Guide- Pattern, flat seams contribute to a professional appearance and make the final longarm quilting process much easier.
Take the time to step back and look at your progress from a distance. Often, a “bird’s eye view” helps you spot any color clusters that might need adjusting. The beauty of the Chicken Salad Sew Along Guide- Pattern lies in its diversity, so don’t be afraid to swap a few pieces around until the layout feels just right to you.
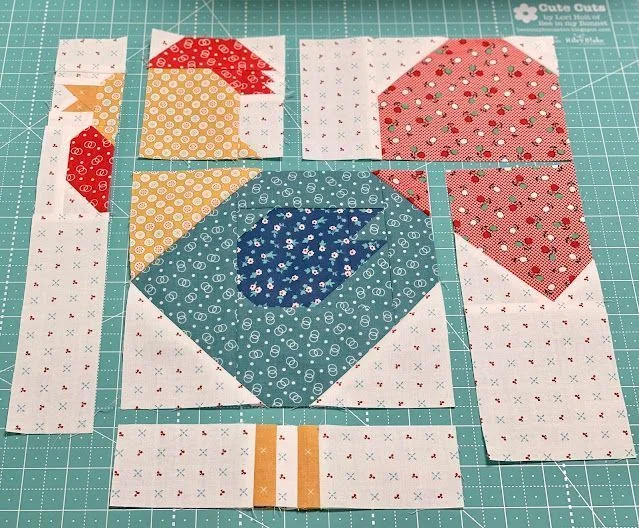
3. Advanced Appliqué Techniques for Detailed Motifs
The heart of the Chicken Salad Sew Along Guide- Pattern lies in its appliqué. This technique allows you to create shapes that would be nearly impossible with traditional piecing. Whether you are using machine appliqué or hand-stitching, the goal is to create smooth curves and sharp points for the wings and beaks.
If you are new to this method, practicing on a few fabric remnants can build your confidence. The Chicken Salad Sew Along Guide- Pattern features several small pieces, so mastering the pivot stitch on your machine is highly beneficial. Slowing down your sewing speed will give you greater control over the intricate outlines of each chicken.
Using a tear-away stabilizer on the back of your fabric can prevent the stitches from “tunneling” or distorting the block. This is especially helpful if you choose a decorative blanket stitch or a zigzag stitch for your edges. In the Chicken Salad Sew Along Guide- Pattern, these decorative touches add a wonderful “folk art” feel to the finished project.
For those who love the look of hand embroidery, adding small details like eyes or feathers can truly bring your characters to life. Simple stitches like the French knot or stem stitch complement the Chicken Salad Sew Along Guide- Pattern perfectly. These tiny embellishments turn a standard pattern into a personalized work of art.
Don’t overlook the importance of thread color when doing appliqué. Some quilters prefer a monofilament thread for an invisible look, while others use a contrasting embroidery thread to make the shapes pop. Your choice will define the final aesthetic of your Chicken Salad Sew Along Guide- Pattern quilt.
Accuracy in tracing your templates is the foundation of good appliqué. Always use a fine-point fabric marker and ensure you are tracing on the correct side of the fusible web. Following the Chicken Salad Sew Along Guide- Pattern diagrams closely will ensure that your birds are facing the right direction and are proportional to their background.
4. Final Assembly and Professional Finishing Touches
Once all your blocks are completed, it is time for the final assembly of the Chicken Salad Sew Along Guide- Pattern. This stage involves joining the blocks with sashing strips and adding the final outer borders. It is the moment where all your hard work finally transforms into a recognizable quilt top.
Measure your quilt through the center before cutting your border strips to avoid “wavy borders.” This common quilting pitfall can be avoided by following the specific measurements provided in the Chicken Salad Sew Along Guide- Pattern. Squaring up each block to the same size is a prerequisite for a flat and square quilt.
Choosing a quilting motif is the next exciting step. You might opt for a simple cross-hatch pattern or a more organic free-motion quilting design like “stippling” or “swirls.” The Chicken Salad Sew Along Guide- Pattern looks wonderful with quilting that follows the outlines of the appliqué, adding depth and shadow.
The binding is the “frame” of your quilt and should be chosen with care. A bias-cut binding is often more durable and easier to navigate around corners. Many creators of the Chicken Salad Sew Along Guide- Pattern like to use a contrasting fabric for the binding to provide a bold finishing statement.
After the quilting and binding are done, give your quilt a final press. If you used water-soluble markers during the process, ensure they are completely removed according to the product instructions. This final touch ensures your Chicken Salad Sew Along Guide- Pattern project looks its absolute best before it is displayed or gifted.
Finally, don’t forget to add a quilt label to the back. Include your name, the date, and the name of the project: Chicken Salad Sew Along Guide- Pattern. Future generations will appreciate knowing the history behind the beautiful piece you have created. It is the perfect way to sign your “fabric painting.”
FAQ – Frequently Asked Questions
Is the Chicken Salad Sew Along Guide- Pattern suitable for beginners?
Yes, while it looks complex, the guide breaks the process down into manageable steps. If you can sew a straight line and have a bit of patience for appliqué, you can definitely succeed with this pattern.
How much fabric do I need for this project?
The fabric requirements vary depending on the size of the quilt you choose to make. Generally, a mix of “fat quarters” and “fat eighths” works best for the colorful chickens, plus several yards for the background, sashing, and backing.
Can I use a regular sewing machine for the appliqué?
Absolutely! Most modern sewing machines have a variety of stitches (like the blanket stitch) that are perfect for the Chicken Salad Sew Along Guide- Pattern. You don’t need a specialized embroidery machine.
How long does it take to finish the whole sew-along?
This depends on your pace, but many people complete one or two blocks per week. Following a “sew-along” schedule is a great way to stay on track and finish the quilt in a few months.
What is the best way to wash a finished quilt?
It is recommended to use a gentle detergent and cold water on a delicate cycle. Using “color catchers” in the wash is a great tip to prevent any dark fabrics from bleeding into the lighter areas of your quilt.
Conclusion
In conclusion, we have explored the essential steps to mastering the Chicken Salad Sew Along Guide- Pattern, from selecting the right materials and organizing your layout to executing advanced appliqué and finishing your quilt with professional techniques. This project is a wonderful journey into the world of creative quilting, offering both technical challenges and immense artistic satisfaction. By following this structured approach, you ensure that your version of the Chicken Salad Sew Along Guide- Pattern becomes a cherished piece of your textile collection.
We hope this guide has inspired you to pick up your needle and thread! Please leave your sincere opinion and any suggestions you might have in the comments below—we would love to hear about your experience with this pattern!