Christmas Table Runner – Pattern projects are among the most charming and rewarding seasonal crafts you can make. From the moment you begin working with the Christmas Table Runner – Pattern, you step into a festive creative journey filled with colors, textures, and meaningful handmade touches. Whether you’re decorating your dining room for family gatherings or crafting a thoughtful holiday gift, this pattern delivers a perfect blend of beauty and function. It is beginner-friendly, customizable, and intentionally designed to help sewists of all skill levels achieve professional-looking results.
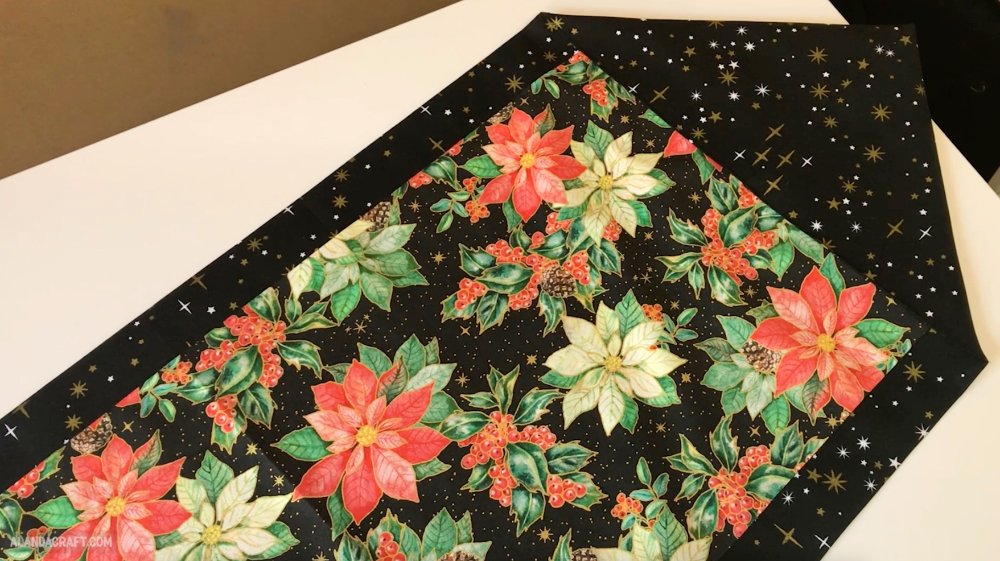
Creating a table runner for the holiday season adds warmth and personality to your home. The Christmas Table Runner – Pattern allows you to mix festive fabrics, highlight seasonal motifs, and craft a piece that complements your holiday décor. From traditional reds and greens to modern metallics or whimsical prints, the design possibilities are endless. This flexibility makes the pattern a joyful project that can adapt to any interior style.
Beyond aesthetics, a well-made table runner enhances the dining experience by creating a cohesive, welcoming atmosphere. With the Christmas Table Runner – Pattern, you can create a durable and reusable decoration that becomes part of your cherished holiday traditions. Now, let’s explore all the essential steps involved in bringing this festive project to life.
1. Materials and Fabric Selection for the Christmas Table Runner – Pattern
Choosing the right materials is the first and most important step when working with the Christmas Table Runner – Pattern. The overall look and durability of your runner depend largely on your fabric choices. Quilt-weight cotton is the most popular option because it is easy to sew, washable, and available in countless seasonal prints. Metallic-accent fabrics also add a touch of elegance and holiday sparkle.
For added structure, lightweight batting or fusible fleece is often used between the top and bottom layers of the table runner. This adds thickness and stability without making the piece overly stiff. The type of batting you choose depends on your preference—cotton batting offers softness, while polyester batting provides more loft and volume.
The backing fabric is just as important. Many crafters choose a coordinating seasonal print to make the table runner reversible. Others prefer solid-colored fabric for a more classic finish. Be sure to prewash and press all fabrics to prevent shrinking after assembly, which helps maintain the table runner’s crisp appearance.
Thread selection should not be overlooked. Choose high-quality cotton or polyester thread that matches or beautifully contrasts your fabric. Decorative quilting threads, especially gold or silver, can enhance the festive theme. Always test your stitches on fabric scraps before sewing the final piece.
Basic sewing tools are essential: rotary cutter, quilting ruler, scissors, pins or clips, sewing machine, iron, and pressing mat. Even though the Christmas Table Runner – Pattern can be sewn by hand, using a machine ensures strong seams and a more polished finish.
Before cutting any fabric, review the pattern instructions carefully. Having a clear understanding of the layout and measurements ensures accuracy and reduces material waste. A well-organized setup makes the crafting process smooth and enjoyable.
2. Crafting the Table Runner Top
After preparing your materials, it’s time to begin stitching the top portion of the Christmas Table Runner – Pattern. The top layer is your creative canvas. Many table runner patterns feature patchwork blocks, strip-pieced designs, or appliqué embellishments. Choose fabrics that blend well but still offer visual contrast to highlight the design.
Start by cutting your fabric pieces according to the pattern measurements. Use a rotary cutter and ruler to keep edges straight and precise. Accurate cutting ensures the pieces align correctly during assembly. Lay out your fabric pieces before sewing to visualize the final arrangement.
Sew the fabric sections together using a consistent seam allowance—typically 1/4 inch for quilting projects. Press each seam as you go; pressing, not ironing, helps keep seams flat and maintains accuracy. Properly pressed seams prevent bulky spots when the layers are quilted together.
If your Christmas Table Runner – Pattern includes appliqué elements such as stars, holly leaves, or ornaments, now is the time to add them. Use fusible adhesive for clean edges and secure placement. Appliqué pieces can be stitched using a straight stitch, zigzag stitch, or blanket stitch depending on the style you prefer.
Once the top is assembled, check that it lays flat and square. Trim any edges if necessary to ensure symmetry. A well-shaped top will make quilting and binding much easier, resulting in a polished final look.
Consider adding decorative stitching or light quilting to the top layer before assembling the full runner. Stitching along seams or around appliqué shapes adds texture and enhances the festive design.
3. Layering, Quilting, and Binding the Runner
With the top portion complete, the next step in the Christmas Table Runner – Pattern is constructing the full sandwich: the top, batting, and backing. Lay the backing fabric right side down, place the batting on top, and then position the table runner top right side up. Smooth out any wrinkles and secure the layers with pins or quilting clips.
Quilting is not only decorative—it also prevents the layers from shifting during use. You can quilt the piece using straight-line quilting, free-motion quilting, or simple stitch-in-the-ditch techniques. Straight-line quilting is a great option for beginners and creates a clean, modern look. More intricate quilting designs add elegance, especially when using metallic thread.
Begin quilting at the center and work outward to avoid bunching. Take your time and maintain steady stitching for a polished finish. After quilting, trim the edges to ensure all layers are even and the table runner retains its rectangular or tapered shape.
Binding is the final step. Binding frames the project and gives it a professional appearance. You can use pre-made bias tape or create your own binding strips from coordinating fabric. Fold the binding around the raw edges and sew it in place, either by machine or by hand for a seamless, invisible finish.
The binding color can either complement your design or provide bold contrast. A gold or metallic-accented binding can add holiday flair, while solid red or green creates a classic Christmas feel.
After binding, give your completed table runner a final press. This step smooths the seams, enhances the quilting, and prepares the table runner for display.
4. Customization Ideas and Creative Variations
One of the joys of using a Christmas Table Runner – Pattern is the endless potential for personalization. Whether you prefer traditional holiday décor or modern minimalism, the pattern can be tailored to your unique vision.
Consider creating a themed table runner such as a snowflake runner, candy cane stripes, Christmas village scenes, or patchwork ornaments. Using colors outside the traditional palette—such as navy, silver, or champagne—can also give your design a contemporary twist.
Adding embellishments like small bells, embroidered details, ribbons, or lace trim enhances the festive charm. Just ensure that any added decorations are securely attached and not too bulky for table use.
For a reversible runner, choose a non-Christmas fabric for the back. This gives you two designs in one: a holiday side and an everyday side. It’s a practical and creative option that increases the runner’s versatility.
If you enjoy quilting small projects, create a matching set with placemats, coasters, or napkin holders using the same fabrics. This adds cohesion to your holiday table setting and elevates the overall décor.
Table runners created with the Christmas Table Runner – Pattern also make thoughtful gifts. Handmade items carry sentimental value, especially when personalized with names, dates, or embroidered messages.
Finally, experiment with different shapes—traditional rectangles, pointed ends, or even a scalloped finish. These small details add sophistication and set your creation apart from mass-produced holiday décor.
FAQ – Christmas Table Runner – Pattern
1. Is the Christmas Table Runner – Pattern suitable for beginners?
Yes, it is beginner-friendly and follows simple, clear steps.
2. What fabric is best for holiday table runners?
Quilt-weight cotton is ideal due to its durability and variety of festive prints.
3. Do I need batting for a table runner?
Batting is recommended for structure but can be omitted for a thinner runner.
4. Can I quilt the runner by hand?
Yes, hand-quilting adds a beautiful, traditional touch, though machine quilting is faster.
5. How long should a Christmas table runner be?
It typically extends 6–10 inches past the table ends, but you can customize the size.
6. How do I wash a handmade table runner?
Use gentle washing with cold water and air-dry to preserve fabric and quilting.
Conclusion
The Christmas Table Runner – Pattern is a delightful project that brings creativity, warmth, and festive charm into your home.
From fabric selection to quilting and customization, this pattern provides everything you need to craft a stunning holiday centerpiece.