If you’re searching for a festive and heartwarming sewing project this holiday season, the Christmas Train Quilt – Pattern is the perfect choice. Combining the timeless charm of a Christmas train with the beauty of quilting, this pattern brings together color, texture, and creativity in one joyful design. Whether you’re a beginner quilter or an experienced maker, this project captures the magic of Christmas while letting you showcase your craftsmanship.
The Christmas Train Quilt – Pattern is more than just a holiday decoration—it’s a keepsake. Each quilt block tells a story of holiday spirit, with trains carrying gifts, trees, and cheerful patterns across a snowy background. It’s a piece that families can treasure year after year, bringing a touch of nostalgia and warmth to your home.
In this guide, you’ll learn how to create your own Christmas Train Quilt – Pattern, from selecting fabrics to assembling your quilt top, adding details, and finishing your masterpiece. By the end, you’ll have a festive quilt that will not only brighten your home but also become a cherished part of your Christmas tradition.
1. Materials and Preparation for the Christmas Train Quilt – Pattern
Before starting your Christmas Train Quilt – Pattern, it’s important to gather all your materials and prepare your workspace. This ensures a smooth, enjoyable quilting process.
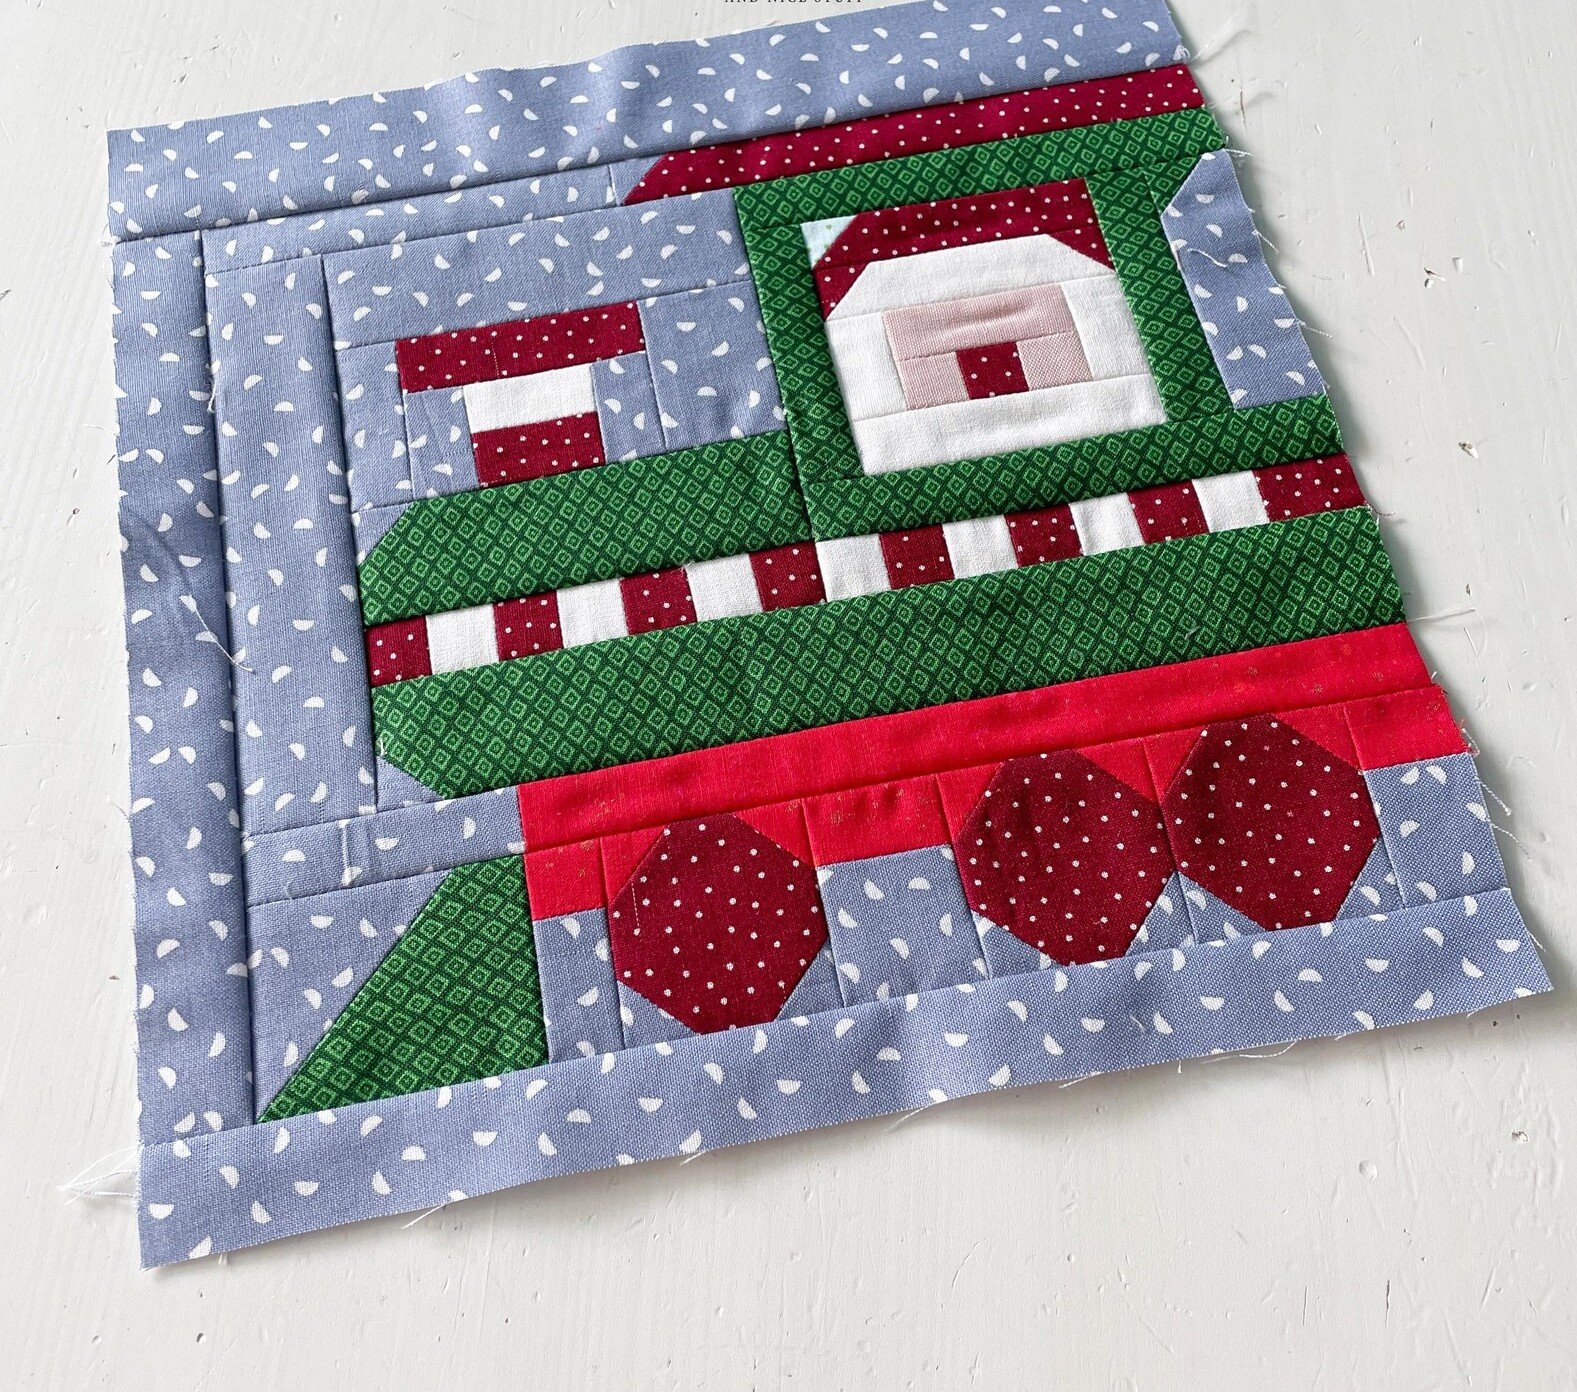
Start by selecting fabrics in classic Christmas colors—reds, greens, golds, and whites work beautifully. You can mix in festive prints with snowflakes, holly leaves, stars, or candy canes to add variety and visual interest. For a snowy backdrop, use white or cream fabric, and for the train cars, choose bold contrasting shades like deep red, forest green, or navy blue.
You’ll also need batting, backing fabric, and thread. Cotton or cotton-blend batting is ideal for a soft yet durable finish. Matching thread works best for piecing, while metallic or gold thread can add a decorative touch when quilting or outlining festive details.
Essential tools include a rotary cutter, cutting mat, quilting ruler, sewing machine, iron, and pins. Accuracy is key, so make sure to measure and cut your pieces carefully. A ¼-inch quilting foot for your sewing machine will help maintain consistent seam allowances.
Pre-wash and iron your fabrics before cutting to prevent shrinkage later. This step also makes your fabric easier to handle and ensures crisp seams. Once everything is prepared, lay out your fabric choices to visualize how the colors will flow across your quilt.
Before sewing, print or draw your Christmas Train Quilt – Pattern templates. You can find printable train block patterns online or design your own with simple geometric shapes like rectangles, squares, and triangles. Each block will represent a section of the train—an engine, cars, or caboose—creating a fun and cohesive layout.
2. Step-by-Step Guide to Making the Christmas Train Quilt – Pattern
Once your materials are ready, it’s time to start piecing your Christmas Train Quilt – Pattern together. This project is typically made using a combination of applique and pieced blocks, so take your time with each step.
Begin by cutting your fabric pieces according to your template measurements. Each train block generally includes sections for the train body, wheels, windows, and chimney. Use solid fabrics for the main shapes and patterned fabrics for accents. Lay out your cut pieces before sewing to ensure all components fit together correctly.
If you’re using applique, trace your train shapes onto fusible web and iron them onto your chosen fabrics. Cut out each piece and press them onto your quilt background fabric following your layout. Then, stitch around each applique piece using a zigzag or blanket stitch to secure them in place.
For traditional piecing, sew your shapes together using a ¼-inch seam allowance. Press your seams open as you go for a smooth, flat finish. Start by assembling each train block individually, ensuring your pieces align neatly. Once you’ve completed all the train cars, arrange them in a horizontal line across your quilt top.
To make your quilt more festive, consider adding extra details such as smoke clouds coming from the engine, Christmas presents in the train cars, or trees and stars in the background. You can hand-stitch or applique these elements for added charm.
After your quilt top is complete, layer it with batting and backing fabric. Pin or baste the layers together, then quilt as desired. Straight-line quilting along the train or free-motion quilting around the festive motifs can enhance the design beautifully.
Finish your Christmas Train Quilt – Pattern by trimming the edges and adding binding. A red or gold binding adds a polished, festive touch to your quilt, tying the whole piece together.
3. Creative Variations and Design Ideas for Your Quilt
One of the best things about the Christmas Train Quilt – Pattern is how flexible and customizable it can be. You can modify the colors, layouts, and decorative elements to match your personal taste or home decor.
For a classic Christmas look, stick with traditional reds, greens, and whites. You can add touches of metallic gold or silver to create a sparkling, festive appearance. If you prefer a more modern design, use non-traditional colors like turquoise, pink, and white for a fresh twist on the holiday theme.
Each train car can be customized to carry different holiday items. Try filling one with wrapped presents, another with Christmas trees, and another with candy canes or ornaments. This storytelling element gives your quilt a playful, whimsical feel that delights both children and adults.
You can also adjust the size of your quilt based on your needs. A smaller quilt makes a wonderful wall hanging or table topper, while a larger version can become a stunning bedspread or throw blanket.
Another fun idea is to personalize your Christmas Train Quilt – Pattern with embroidery. Add names, dates, or short messages like “Merry Christmas” or “All Aboard the Holiday Express” on the train cars. This makes the quilt even more special, especially if it’s intended as a family heirloom or holiday gift.
For a more detailed project, consider combining different quilting techniques such as applique, patchwork, and embroidery. This creates visual depth and texture, making your quilt stand out as a one-of-a-kind creation.
Lastly, don’t forget to add small embellishments like buttons, ribbons, or beads to enhance your quilt’s festive appeal. Just make sure they are securely attached and not too heavy for the fabric.
4. Assembling, Quilting, and Caring for Your Finished Piece
After completing your quilt top, assembling your Christmas Train Quilt – Pattern properly ensures it will last for many years to come. Careful quilting and finishing steps will give your project a polished, professional appearance.
Lay your quilt top flat over your batting and backing fabric. Smooth out any wrinkles, ensuring all layers are aligned. Use safety pins or basting spray to hold everything together before quilting.
When quilting, you can follow the lines of your train design for a structured look, or add swirling patterns to evoke the feeling of snow and movement. Decorative quilting stitches in metallic thread can add a touch of sparkle and elegance.
Once you’ve finished quilting, trim the excess batting and backing, leaving even edges. Then, attach your binding. For a festive finish, use a striped red-and-white binding reminiscent of candy canes or a shimmering gold fabric for a luxurious touch.
To care for your Christmas Train Quilt – Pattern, always wash it gently in cold water and air dry. Avoid harsh detergents that could fade your fabrics. Store your quilt in a cool, dry place away from direct sunlight to preserve its colors and quality.
Displaying your finished quilt is one of the most rewarding parts of this project. Hang it on a wall, drape it over a couch, or spread it on a guest bed to bring instant holiday cheer to your home. You can also gift it to loved ones as a handmade keepsake filled with warmth and love.
Every time you bring it out during the holiday season, your Christmas Train Quilt – Pattern will remind you of the care and joy that went into creating it.
FAQ – Christmas Train Quilt – Pattern
1. Is the Christmas Train Quilt – Pattern suitable for beginners?
Yes! The pattern can be simplified for beginners or made more detailed for advanced quilters.
2. What fabric works best for this project?
Cotton fabric is ideal because it’s durable, easy to sew, and comes in many festive prints.
3. Can I make this quilt using applique only?
Absolutely. Applique is a great way to create detailed train shapes and decorations easily.
4. How long does it take to make a Christmas Train Quilt?
Depending on the size and complexity, it can take anywhere from a weekend to several weeks.
5. Can I wash my quilt after finishing it?
Yes, but use cold water and gentle detergent to preserve the colors and fabric integrity.
Conclusion
The Christmas Train Quilt – Pattern is a delightful and meaningful holiday project that combines the joy of quilting with the spirit of Christmas. Whether you create it as a gift or a decoration for your home, this pattern captures the magic of the season with its whimsical design and vibrant colors.
By following the steps and creative ideas shared in this article, you’ll be able to craft a quilt that radiates love, tradition, and festive cheer. Each stitch becomes a part of a cherished story—one that can be passed down for generations.
We hope this guide has inspired you to create your own Christmas Train Quilt – Pattern. Don’t forget to share your honest opinions, experiences, and suggestions in the comments below. Your feedback helps inspire other crafters to embark on their own creative holiday journey!