Creating a Crazy Quilt Block – Pattern is one of the most liberating and artistically rewarding projects a quilter can undertake. Unlike traditional quilting, which relies heavily on precise measurements, straight lines, and repeating geometric shapes, the crazy quilt method celebrates chaos, color, and personal expression. This technique dates back centuries, gaining massive popularity in the Victorian era when makers used scraps of silk, velvet, and lace to create intricate, decorative masterpieces. Today, the Crazy Quilt Block – Pattern remains a favorite for those who want to use up their fabric stash while producing something truly one-of-a-kind.
The beauty of a Crazy Quilt Block – Pattern lies in its lack of rigid rules. You don’t need to worry about matching seams perfectly or following a strict grid. Instead, you focus on how different textures and colors interact within a single block. Because it is essentially a “scrappy” technique, it serves as a wonderful historical bridge to a time when fabric was a precious commodity and nothing went to waste. By mastering the Crazy Quilt Block – Pattern, you are not just making a blanket; you are engaging in a storied tradition of textile art that prizes individuality over uniformity.
In this comprehensive guide, we will explore everything you need to know about crafting your own Crazy Quilt Block – Pattern. We will dive into the essential materials, the step-by-step construction of the quilt block, and how to elevate your work with decorative stitching. Whether you are a beginner looking for a low-pressure entry into quilting or an experienced sewist wanting to explore mixed media, this pattern offers endless possibilities. Let’s break down the process of creating a stunning Crazy Quilt Block – Pattern that reflects your unique style and creativity.
1. Selecting Fabrics and Materials for Your Crazy Quilt Block – Pattern
The first step in any Crazy Quilt Block – Pattern is gathering a diverse array of fabrics. Unlike a standard quilt pattern, you aren’t limited to 100% cotton. You can mix and match silks, satins, brocades, and even denim. The goal is to create a rich visual and tactile experience within the quilt block.
Using a foundation fabric is a key strategy for a successful Crazy Quilt Block – Pattern. This “muslin” or scrap fabric base provides stability, especially when you are working with slippery or delicate materials. Having a solid foundation ensures that your pattern doesn’t warp or stretch as you add more pieces.
Precision tools still have a place here, even in a “crazy” pattern. High-quality thread, a rotary cutter, and a sharp set of fabric shears will make the process of assembling your Crazy Quilt Block – Pattern much smoother. Even though the shapes are irregular, clean cuts help the layers lay flat.
Color theory plays a significant role in making your Crazy Quilt Block – Pattern look cohesive. Even though it is “crazy,” choosing a specific color palette—like warm autumn tones or cool ocean blues—can help unify the disparate scraps. This thoughtful approach turns a random pattern into a professional-looking piece of art.
Don’t forget the importance of texture when selecting your Crazy Quilt Block – Pattern materials. Incorporating a bit of velvet next to a piece of crisp cotton creates a “3D” effect that is characteristic of high-end crazy quilting. The interplay of light on different surfaces is what makes this pattern so captivating.
Lastly, prepare your workspace for a bit of a mess. Since the Crazy Quilt Block – Pattern involves many small, odd-shaped scraps, you’ll want plenty of room to spread out. Organizing your scraps by color or size before you begin the quilt block construction will save you significant time during the sewing phase.
2. Step-by-Step Construction of the Crazy Quilt Block – Pattern
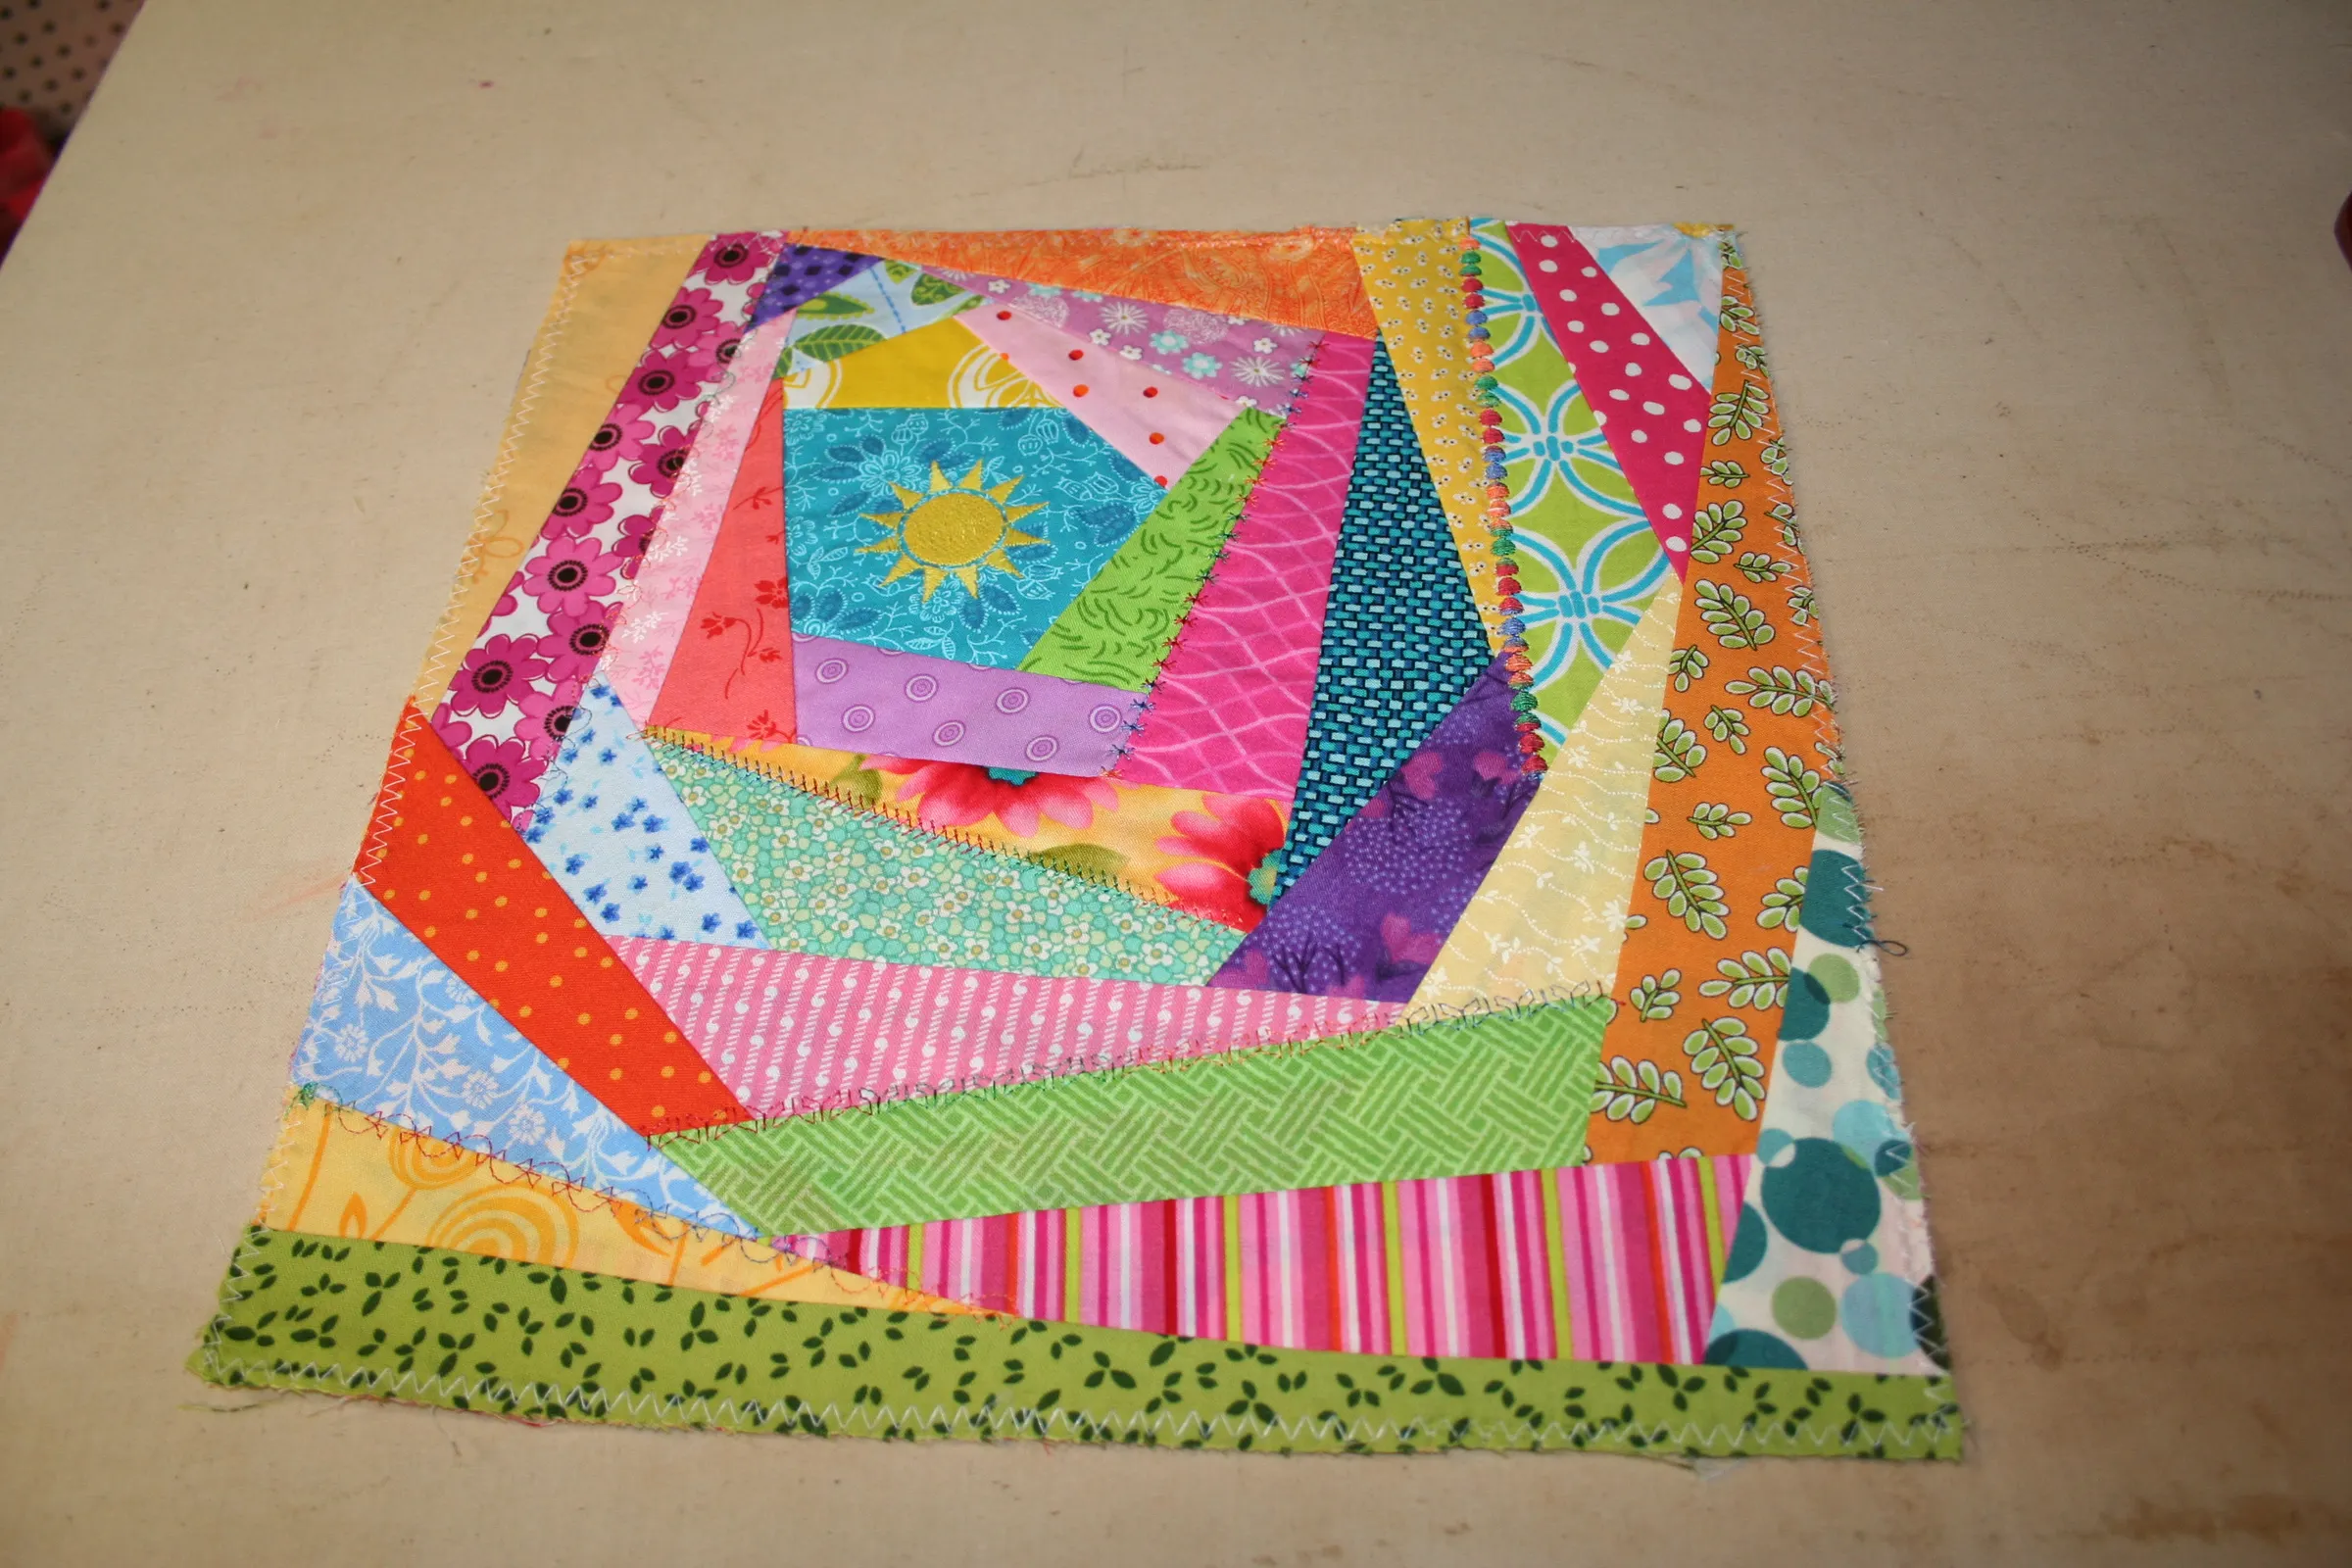
To begin the actual construction of your Crazy Quilt Block – Pattern, start with a five-sided piece of fabric placed near the center of your foundation square. This center piece acts as the anchor for the entire quilt block. Pin it right-side up, and you are ready to start the “flip and sew” method.
The “flip and sew” technique is the heart of the Crazy Quilt Block – Pattern. You take a second scrap, place it face down on one edge of the center piece, and sew a straight line. When you flip it open and press it, you have successfully expanded your pattern without needing complex templates.
Continue adding pieces around the center in a clockwise or counter-clockwise fashion. Each new scrap should cover the raw edge of the previous piece in the Crazy Quilt Block – Pattern. This “log cabin” style of expansion ensures that every seam is hidden and the quilt block grows uniformly toward the edges.
One pro tip for a beautiful Crazy Quilt Block – Pattern is to trim the excess fabric from each seam as you go. This prevents the quilt block from becoming too bulky or lumpy. Keeping the back of your pattern as flat as possible is essential for the final quilting process.
As you reach the edges of your foundation fabric, ensure that your scraps extend slightly past the border. This allows you to trim the entire Crazy Quilt Block – Pattern into a perfect square once you are finished. It’s the secret to making an irregular pattern fit perfectly into a larger quilt project.
Once the entire foundation is covered, give your Crazy Quilt Block – Pattern a final, heavy press with a steam iron. This sets the seams and gives the quilt block a crisp, finished look. You now have a completed “top” that is ready for the most exciting part: the decorative embellishments.
3. Decorative Stitching and Embellishing the Crazy Quilt Block – Pattern
What truly defines a Crazy Quilt Block – Pattern is the embroidery. Historically, quilters used these projects to show off their needlework skills. Every seam where two fabrics meet is an opportunity to add decorative stitches, such as the feather stitch, herringbone, or chevron.
You can use a variety of threads to enhance your Crazy Quilt Block – Pattern. Embroidery floss, silk ribbons, and even metallic threads add a layer of luxury to the quilt block. The goal is to draw the eye to the unique shapes you’ve created within the pattern.
Incorporating beads, sequins, and buttons is another classic move for a Crazy Quilt Block – Pattern. These elements add weight and sparkle, turning a simple fabric scrap into a focal point. Just be mindful of the placement if you plan for the quilt block to be used on a functional bedspread.
If you aren’t confident in hand embroidery, many modern sewing machines have built-in decorative stitches that work perfectly for a Crazy Quilt Block – Pattern. This is a great way to achieve a complex look in a fraction of the time. Experimenting with different widths and densities can yield amazing results for your pattern.
The Crazy Quilt Block – Pattern is also a great place for “storytelling” through charms or lace. Perhaps a piece of a wedding dress or a vintage handkerchief can be worked into the quilt block. These sentimental additions turn the pattern into a cherished heirloom.
Remember that balance is key when embellishing your Crazy Quilt Block – Pattern. You don’t have to cover every single inch of the quilt block, but adding details to the major seams helps define the structure. The contrast between the plain fabric and the ornate stitching is what makes the pattern pop.
4. Finalizing and Integrating Your Crazy Quilt Block – Pattern
After you have finished the embroidery, your Crazy Quilt Block – Pattern needs to be squared up. Use a large square ruler to trim the edges so the quilt block is exactly the size you need, whether that’s 10×10 or 12×12 inches. This ensures your pattern will align with other blocks.
If you are making a full quilt, you can alternate your Crazy Quilt Block – Pattern with “plain” blocks to give the eyes a place to rest. This creates a beautiful contrast and makes the intricate details of the crazy quilting stand out even more. Sashing is also a great way to frame each pattern.
When it comes to quilting the layers (top, batting, and back), many people choose to “quilt in the ditch” for a Crazy Quilt Block – Pattern. This means sewing along the existing seams so the quilting doesn’t interfere with the decorative embroidery. It keeps the quilt block secure without distracting from the art.
The binding you choose for your Crazy Quilt Block – Pattern can act as a frame for your masterpiece. A solid, dark color often works well to “contain” the vibrant energy of the pattern. However, a scrappy binding can also complement the whimsical nature of the quilt block.
Don’t forget to label your work! A Crazy Quilt Block – Pattern is often a labor of love that takes significant time. Attaching a fabric label to the back with your name, date, and the story behind the fabrics makes the quilt block a documented piece of history.
Whether you turn your Crazy Quilt Block – Pattern into a pillow, a wall hanging, or a full-sized blanket, the result is always a testament to your creativity. The beauty of this pattern is that no two blocks will ever be the same. Your Crazy Quilt Block – Pattern is as unique as a fingerprint.
FAQ: Everything You Need to Know About the Crazy Quilt Block – Pattern
1. Is the Crazy Quilt Block – Pattern suitable for absolute beginners?
Yes! In many ways, it’s easier than traditional quilting because there are no “wrong” shapes. It’s an excellent way to practice sewing straight lines and learning fabric handling without the stress of perfect points.
2. Do I have to use a foundation fabric for my quilt block?
While not strictly required, it is highly recommended. Using a foundation for your Crazy Quilt Block – Pattern prevents the block from becoming distorted, especially when using fabrics with different weights or stretches.
3. What is the best thread for the embroidery on a Crazy Quilt Block – Pattern?
Cotton embroidery floss is the most common choice, but perle cotton or silk thread provides a beautiful sheen. The “best” thread depends on the look you want for your pattern.
4. Can I wash a quilt made with the Crazy Quilt Block – Pattern?
This depends entirely on the fabrics you used. If you used silks, velvets, or heavy beading, your Crazy Quilt Block – Pattern should be treated as a decorative item and spot-cleaned or dry-cleaned only.
5. How do I choose the “center” piece for my pattern?
Choose a fabric that you love! Since the Crazy Quilt Block – Pattern builds outward from the center, this piece will always be a focal point of your quilt block.
Conclusion
Mastering the Crazy Quilt Block – Pattern is a journey into the heart of creative sewing. Throughout this article, we’ve covered how to select the right materials, the “flip and sew” method for constructing your quilt block, and the art of adding decorative embroidery to your pattern.
This technique allows you to breathe new life into fabric scraps and create something that is both historically grounded and modernly expressive. By following these steps, you can produce a Crazy Quilt Block – Pattern that is structurally sound, visually stunning, and deeply personal.