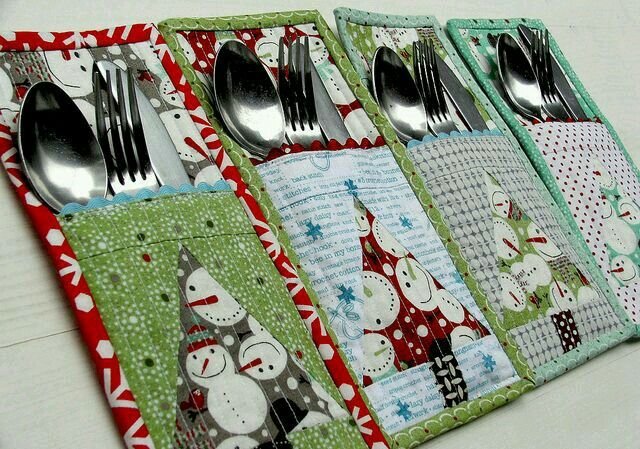
DIY Utensil Holder – Pattern is a wonderful project for anyone looking to add a personal touch to their kitchen while organizing utensils in a stylish and practical way. Whether you’re a seasoned crafter or a beginner, working with a pattern gives you a blueprint to follow while leaving room for your unique style to shine through. This article will guide you through everything you need to know—from choosing materials and reading your pattern to finishing touches and maintenance. Along the way, we’ll emphasize how to make this project both functional and aesthetically pleasing.
Embarking on a DIY Utensil Holder – Pattern means you’re doing more than simply buying storage; you’re creating a piece that reflects your personality, fits your space perfectly, and can even become a focal point in your kitchen décor. Imagine a holder that matches your countertop, complements your dishware, and holds your favorite wooden spoons, spatulas, and whisks in one organized spot. With a good pattern in hand, you can make just that.
In this article, we’ll break down the process into clear, actionable steps. You’ll learn how to interpret a pattern, pick and prepare your materials, assemble and finish your utensil holder, and finally maintain and adapt it as your style evolves. Let’s begin our journey toward creating a beautiful and functional DIY Utensil Holder – Pattern that you’ll love for years to come.
1. Understanding the Pattern and Materials
Choosing a suitable DIY Utensil Holder – Pattern starts with understanding what kind of pattern you’re working with—whether it’s sewing, woodworking, or another craft method. Patterns vary from simple stitch-by-stitch guides to detailed cutting plans with measurements and diagrams. The pattern you choose should align with your skill level and the tools you have available.
When selecting your materials, consider both aesthetics and durability. If you’re sewing, you’ll need fabric, interfacing, thread, and possibly padding. If you’re working in wood or metal, you’ll need appropriate cuts, finishes, and hardware. The pattern should list required materials, but you should also feel free to substitute colors or finishes to better match your space.
Be sure to account for dimensions. A well-designed DIY Utensil Holder – Pattern will specify how tall and wide the holder should be to fit your counter space and hold your tools comfortably. If you live in a compact kitchen, choose a narrow holder or modify the pattern accordingly. If you display large utensils or many items, scale up your pattern sensibly.
Check the pattern’s clarity. Good patterns include diagrams, step-by-step instructions, sometimes photos, and clear measurements. If something feels unclear or too advanced, look for additional resources or consider a simpler pattern. Starting with a clear design means fewer mistakes and more confidence in your build process.
Consider the finish and maintenance requirements at the beginning. For example, if you choose wood for your DIY Utensil Holder – Pattern, you’ll likely want to finish it with a protective sealant that is food-safe and easy to clean. If you’re using fabric, pick washable materials or removable covers. Planning ahead for how you’ll care for the finished piece makes a big difference in longevity.
Finally, plan your workspace and timeline. Some patterns can be completed in an evening, while others require more time and drying or curing when using finishes. Giving yourself realistic expectations helps avoid frustration and ensures you’ll enjoy the process as much as the final product.
2. Preparing Your Workspace and Materials
Once you’ve selected the pattern and gathered your materials for your DIY Utensil Holder – Pattern, it’s time to prepare your workspace. A clean, well-lit area helps you stay organized and makes the process smoother. Lay out all your pieces, tools, and materials so that you can reach everything easily.
If you’re working with fabric, pre-wash and iron it to remove any shrinkage or wrinkles. Cut your pieces according to the pattern, labeling them if necessary. If the pattern calls for interfacing or lining, be sure to apply those in this stage. Organizing pieces by size or step helps you follow the instructions without confusion.
For wood or metal patterns, ensure your tools are ready—saws, sandpaper, clamps, drill bits, finishing supplies. Double-check your measurements against the pattern, and mark your cuts precisely. Safety is key when working with power tools or sharp edges. Wear protective gear and go slowly if you’re new to a particular tool.
Keep a scrap piece handy for testing finishes or fit. For example, you can apply the stain or paint you plan to use on a scrap to see the final look under your kitchen lighting. This helps avoid surprises when you apply finishes to your actual holder based on the DIY Utensil Holder – Pattern.
Arrange your pieces in sequence as indicated by the pattern. Visualizing the assembly before starting helps you stay on track. If the pattern includes pre-finishing (like painting or sewing before full assembly), complete these ahead of time and let them dry or settle as needed.
Finally, keep the pattern instructions close at hand. Whether printed or on a tablet, having quick access to the pattern ensures you can refer to it whenever needed. Mark off each step as you complete it to track your progress. That way you’ll stay aligned with the design and avoid missing critical steps that impact the functionality or aesthetics of your DIY Utensil Holder – Pattern.
3. Assembly and Construction Process
With everything prepared for your DIY Utensil Holder – Pattern, you’re ready to begin assembly. Follow the pattern’s steps systematically, but also allow room for improvisation if you want to personalize the design. Start with the main structural components—whether that means sewing body panels together or assembling wood side pieces and bottom panels.
If sewing, begin by joining the fabric pieces as directed—seams, hems, topstitching, lining. Pay attention to reinforcement points: areas that will bear weight from utensils should have extra stitching or interfacing. Shape is important: the holder should be stable and upright when finished, so ensure base panels are squared and corners are properly finished.
In woodworking or metalworking, join the pieces as specified in the pattern. Use the appropriate adhesives, fasteners, or hardware. Clamps and jigs can help you maintain perfect angles and keep things aligned. As the holder’s structure takes shape, test fit periodic levels to ensure it stands evenly on your counter.
After the main body is complete, consider any decorative elements suggested by the pattern or your own ideas: painted motifs, stenciled designs, fabric prints, wood carving, or embellishments. These personal touches make the DIY Utensil Holder – Pattern truly your own. However, don’t let decoration interfere with functionality: ensure the inside space accommodates your utensils comfortably.
Install any finishing elements next: handles, labels, interior compartments, or divider systems if the pattern includes them. If the pattern calls for hardware like hinges or removable trays, install them carefully and test movement and fit. This ensures your finished holder functions just as well as it looks.
Finish by giving the piece a final inspection. Test the holder with your actual utensils: does it hold them upright and accessible? Does it wobble or tip? Fix any stability issues now rather than later. Once you’re satisfied, let any adhesives or finishes cure completely before placing utensils in it.
4. Finishing Touches, Styling & Maintenance
Upon completing the assembly of your DIY Utensil Holder – Pattern, the finishing touches elevate it from a crafted item to a featured piece in your kitchen. If you haven’t already, apply the final finishes: sealants, paints, varnishes, fabric treatments, or protective coatings. These finishes not only make your holder look good but also help it endure daily use.
Styling your holder is where creativity shines. Place it strategically on your countertop where it complements your dishware, backsplash, or kitchen color scheme. If the pattern allowed customization, choose a fabric or wood grain that echoes other elements in the room. You might group utensils by type in different compartments or add small labels so that your holder is both functional and organized.
Consider adding a washable liner if your utensils tend to get messy (for example, spatulas with sticky residue). If you used fabric, ensure it’s removable for washing. For wood or metal, a removable tray or easy-wipe surface helps maintain cleanliness. The pattern might include this, or you can adapt it based on your needs.
Maintenance is key to keeping your holder looking new and functioning well. Wipe it down weekly, tighten any screws if necessary, and inspect finishes for wear. If the holder gets scuffed or stained, you can touch up paints or varnishes to restore its look. A well-constructed DIY Utensil Holder – Pattern will last for years with proper care.
Adaptation is another benefit: should your utensil collection grow, reuse your pattern to make additional holders, or scale up the design. Patterns are not set in stone—they can be modified to fit changing needs. This makes the initial effort even more worthwhile.
Finally, enjoy the satisfaction of using something you made with your own hands. Every time you reach for a utensil and see your personalized holder, you’ll be reminded of your creativity and effort. That sense of ownership is one of the greatest rewards of completing a DIY Utensil Holder – Pattern.
FAQ
Q: What exactly is a “DIY Utensil Holder – Pattern”?
A: It’s a design guide that shows you how to make your own utensil holder from scratch. The pattern includes step-by-step instructions, measurements, material lists, and often diagrams or photos so you can craft the holder yourself.
Q: Do I need special tools to follow a DIY utensil holder pattern?
A: It depends on the craft method. For sewing patterns, a sewing machine, fabric scissors, and thread are typically enough. For woodworking or metalworking patterns, you might need saws, drills, sandpaper, clamps, and finishes. Choose a pattern suited to your tools and skill level.
Q: Can I customize the dimensions of the pattern?
A: Yes. Most patterns list the standard size, but you can scale the pattern up or down to fit your space. Just maintain the proportions so the holder remains stable and functional.
Q: What materials work best for a kitchen utensil holder?
A: Durable, washable, and safe-for-food-contact materials are best. Wood should be sealed with a food-safe finish; fabrics should be washable and preferably thick or reinforced. Metals should be non-rusting and easy to clean.
Q: How do I ensure the holder stays stable and upright?
A: Follow the pattern’s instructions for base construction, add weight to the bottom if needed (for example a heavy liner or base board), and make sure the holder’s walls are straight and the bottom is flat. Also test with your actual utensils before finishing.
Q: How do I care for my finished utensil holder?
A: Regularly wipe it down, wash any fabric liners, touch up finishes if they wear, and keep it dry to avoid warping or mold. With proper care, your handmade holder will last many years.
Conclusion
In this article, you’ve learned how to create a beautiful DIY Utensil Holder – Pattern by selecting the right pattern and materials, preparing your workspace, assembling with care, and adding finishing touches for styling and longevity.
We covered everything from interpreting the pattern to maintaining your finished piece. Now it’s your turn: gather your tools, pick your design, and start crafting a utensil holder that reflects your style and organizes your kitchen. I’d love to hear your honest opinion and suggestions—how did your project turn out? What would you do differently next time? Please share your experience and any creative tweaks you made.