Creating a high-quality Double oven mitt – Pattern is one of the most practical and satisfying projects a sewing enthusiast can undertake for their kitchen. If you have ever struggled with two separate, slippery mitts while trying to balance a heavy roasting pan or a wide baking sheet, you already know that a Double oven mitt is a game-changer. By utilizing a single long piece of fabric with pockets at each end, this design provides a secure grip and a protective bridge across your chest, ensuring that heat never touches your skin or your clothes.
Developing your own Double oven mitt – Pattern allows for complete customization in terms of size, aesthetic, and heat resistance. Standard store-bought mitts are often one-size-fits-all, which can be dangerous if they are too bulky or too loose for your hands. When you work from a dedicated Pattern, you can adjust the pocket depth and the total length of the mitt to match your specific wingspan, making the act of removing hot items from the oven much safer and more ergonomic for your daily cooking routine.
In this comprehensive guide, we will explore the essential components of a successful Double oven mitt – Pattern, focusing on both the construction of the Double oven mitt itself and the technical layout of the Pattern. We will dive into the best materials to use for heat insulation and how to assemble the layers so that your finished product looks professional and performs perfectly under high temperatures. Whether you are making this for your own home or as a thoughtful handmade gift, mastering this Double oven mitt – Pattern will elevate your kitchen safety and your sewing skills simultaneously.
1. Choosing the Best Materials for Your Double oven mitt
The first step in executing a Double oven mitt – Pattern is selecting the right materials, as safety is the absolute priority when dealing with high heat. You must use 100% cotton fabric for the exterior and lining because synthetic fibers like polyester can melt when they come into contact with a hot oven rack. Choosing a heavy-weight cotton, such as canvas or denim, provides a sturdy base for your Double oven mitt and ensures it can withstand the wear and tear of a busy kitchen environment.
Insulation is the most critical part of any Double oven mitt – Pattern to prevent burns. You should look for specialized heat-resistant batting, often sold under brand names like Insul-Bright, which contains a metallic film that reflects heat back away from your hands. For maximum protection, many crafters layer this thermal batting with a layer of traditional 100% cotton batting. This combination ensures that the Double oven mitt remains flexible enough to grip handles while providing a thick barrier against extreme temperatures.
When following your Double oven mitt – Pattern, don’t forget the importance of the binding tape. This is the fabric strip that finishes the raw edges of your mitt and pockets. You can make your own bias tape from matching cotton fabric or buy pre-made extra-wide double-fold bias tape. High-quality binding ensures that the layers of your Double oven mitt stay firmly together and don’t fray after multiple trips through the washing machine, which is inevitable for kitchen accessories.
Thread choice is another detail that many beginners overlook when starting a Double oven mitt – Pattern. Just like the fabric, your thread should be 100% cotton or a high-quality heavy-duty polyester that is heat-treated. Using cheap, thin thread might result in the seams popping when you are holding a heavy ceramic pot, which could lead to accidents. A strong, reliable stitch is what holds the entire Double oven mitt together and guarantees its longevity over years of use.
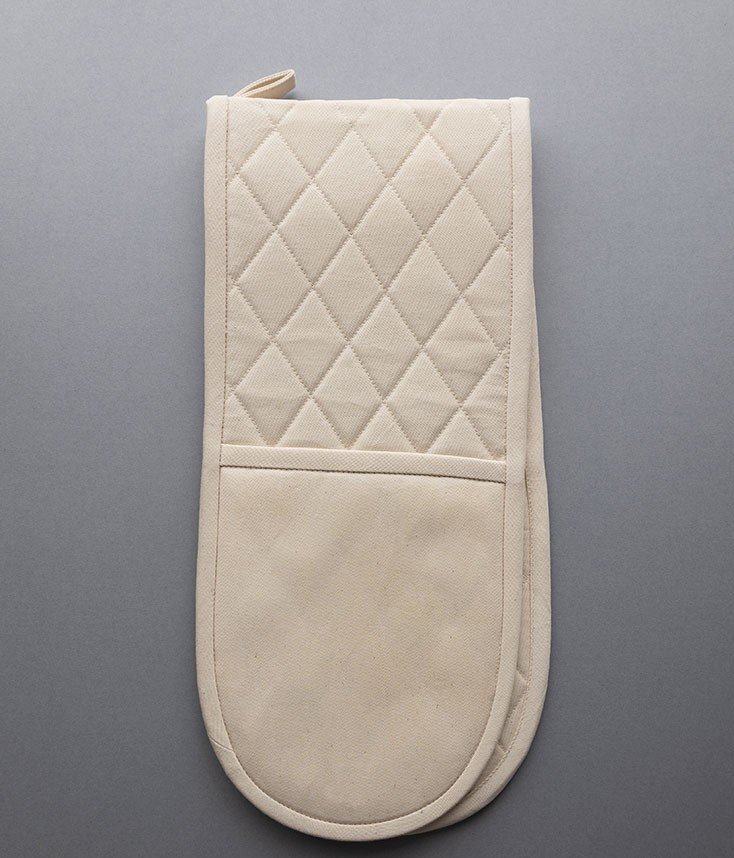
Texture can also play a role in the effectiveness of your Double oven mitt – Pattern. Some people choose to add silicone grip dots or a cross-hatch quilting pattern to the palm areas of the mitt. Quilting the layers of fabric and batting together is not just for decoration; it prevents the internal insulation from shifting around inside the Double oven mitt. By following the quilting lines suggested in a professional Pattern, you ensure that the heat protection remains evenly distributed across the entire surface.
Finally, consider the aesthetics of your Double oven mitt – Pattern. Since this is a large piece of fabric that often hangs over an oven handle, it becomes a part of your kitchen decor. Choosing vibrant prints or classic kitchen patterns allows your Double oven mitt to stand out. Always pre-wash your fabrics before cutting your Pattern to ensure that any shrinkage happens before assembly, which keeps the dimensions of your finished mitt accurate and prevents the fabric from warping later on.
2. Understanding the Layout of a Double oven mitt – Pattern
A professional Double oven mitt – Pattern typically consists of two main parts: the long rectangular body and the two smaller hand pockets. The body usually measures around 30 to 35 inches in length, while the pockets are designed to be deep enough to cover your wrists. When you look at the Pattern, it will show you exactly where to round the corners, as curved edges are much easier to finish with binding tape than sharp 90-degree angles on a Double oven mitt.
The technical markings on a Double oven mitt – Pattern are there to guide your precision. Look for the “place on fold” line, which allows you to cut a perfectly symmetrical long piece without having a seam in the middle. Having a continuous piece of fabric and batting for the body of the Double oven mitt is vital because a center seam could create a weak point where heat might penetrate or where the fabric could eventually split under the weight of heavy pans.
Seam allowance is a crucial concept to master when working with a Double oven mitt – Pattern. Most patterns use a 1/4 inch or 3/8 inch seam allowance. Because the layers of a Double oven mitt are quite thick due to the multiple layers of batting, you need to be very consistent with your sewing lines. If your seam allowance is off, the pockets might end up too small for your hands to fit comfortably, rendering the Pattern ineffective for its primary purpose.
Another feature to look for in a Double oven mitt – Pattern is the inclusion of a hanging loop. Most patterns will include a small template for a fabric loop that is sewn into the binding at the center point. This allows you to hang your Double oven mitt on a wall hook or the oven door handle. It is a small detail, but it adds a level of professional finish and convenience that makes your handmade project feel superior to store-bought versions.
Drafting your own Double oven mitt – Pattern can be done using a large sheet of butcher paper or specialized pattern paper. You can even trace around your own hands to ensure the pockets are the perfect width. By customizing the Pattern, you can create a “slim” version for smaller hands or an extra-long version if you frequently use a very wide professional-grade oven. This flexibility is the greatest advantage of using a DIY Double oven mitt – Pattern over commercial alternatives.
Before you start cutting your expensive fabric, it is a great idea to do a “dry run” with your Double oven mitt – Pattern using scrap fabric or even paper. This helps you visualize how the pockets fold over the main body and how the binding will wrap around the curves. Understanding the spatial relationship between the pieces of the Pattern will give you the confidence to sew through the thick layers of the Double oven mitt without making mistakes that require the dreaded seam ripper.
3. Step-by-Step Construction of the Double oven mitt
Once your pieces are cut according to the Double oven mitt – Pattern, the assembly begins with the quilting process. Sandwich your layers—exterior fabric, cotton batting, heat-resistant batting, and lining—and pin them securely. Sew diagonal lines across the entire body of the Double oven mitt. This step is essential because it bonds the layers together, making the fabric act as a single, sturdy unit that is much easier to manage during the rest of the Pattern assembly.
After quilting the main body and the pocket pieces separately, it is time to finish the top edges of the pockets. According to most Double oven mitt – Pattern instructions, you should apply binding tape to the straight edge of the pockets first. This is the edge where your hand enters the mitt. Using a decorative stitch here can add a nice touch, but a standard straight stitch is perfectly functional for keeping the layers of the Double oven mitt pocket clean and professional.
Now, lay the main body of the Double oven mitt flat on your workspace with the lining side facing up. Place the pocket pieces at each end, aligning the curved outer edges. This is where the Double oven mitt – Pattern starts to take its final shape. Use clips instead of pins if the layers are too thick to pierce easily. Basting these layers together within the seam allowance will prevent them from shifting when you apply the final outer binding to your Double oven mitt.
The most challenging but rewarding part of the Double oven mitt – Pattern is applying the bias binding around the entire perimeter. Start on one of the long straight sides and slowly work your way around the curves. Take your time to ensure the binding catches all layers of the Double oven mitt. If your sewing machine struggles with the thickness, try using a “walking foot” or a “denim needle,” which are designed to handle the bulk of a heavy-duty Double oven mitt – Pattern.
As you reach the center of the Double oven mitt, remember to tuck in your hanging loop if your Pattern includes one. Sew over this area a few times to ensure it is strong enough to hold the weight of the mitt. Completing the circle of binding requires a neat overlap or a mitered join. Once this is done, your Double oven mitt is nearly complete, and you can see how the geometric shapes of the Pattern have transformed into a functional kitchen tool.
The final step is to inspect your work for any missed spots where the binding might not have caught the back layer. Give your Double oven mitt a good press with a steam iron to flatten the seams and help the binding lay perfectly. Because you followed the Double oven mitt – Pattern precisely, the result should be a symmetrical, high-quality accessory that provides full protection from your fingertips to your opposite fingertips, making your kitchen chores much safer.
4. Care, Maintenance, and Safety Tips for Oven Mitts
To keep your Double oven mitt in top condition, proper care is essential. Since it is made of cotton based on a high-quality Double oven mitt – Pattern, it should be machine washable. However, you should avoid using fabric softeners, as they can sometimes coat the fibers and reduce the heat-reflective properties of the specialized batting inside. Regularly washing your Double oven mitt removes grease and food particles that could potentially catch fire if they build up over time.
Always inspect your Double oven mitt for any signs of wear, such as thinning fabric or scorched spots. Even the best Double oven mitt – Pattern cannot protect you if the fabric has a hole in it. If you notice the insulation starting to bunch up or the stitching coming loose, it may be time to use your Pattern again to create a fresh replacement. Safety in the kitchen depends on the integrity of your protective gear, so never use a damaged mitt.
When using your Double oven mitt, remember that fabric is not waterproof. If the mitt gets wet, the water can conduct heat much faster, leading to a “steam burn.” Even though your Double oven mitt – Pattern includes heat-resistant layers, they are designed for dry heat. Always ensure your hands and the mitt are completely dry before reaching for a hot tray. This is a crucial safety rule that applies to any Double oven mitt, regardless of how well it was made.
One of the benefits of the Double oven mitt – Pattern is that it encourages you to use both hands. This naturally leads to better balance and less strain on your wrists when lifting heavy items. Encourage others in your household to use the Double oven mitt correctly by placing their hands deep into the pockets. The bridge of the mitt should rest over the top of the item being carried, providing a protective layer between the hot dish and your body, as intended by the Pattern.
If you decide to gift a Double oven mitt made from your Pattern, consider including a small care card. Explain the materials used and the importance of using 100% cotton for kitchen safety. Sharing the knowledge of why a Double oven mitt – Pattern is designed the way it is helps others appreciate the craftsmanship and the safety considerations that went into making such a practical and beautiful handmade item.
Finally, keep your Double oven mitt – Pattern in a safe place so you can use it again. Once you have mastered the basic construction, you can experiment with different quilting designs or even patchwork techniques to use up fabric scraps. The versatility of the Double oven mitt makes it a staple project for any sewist. By sticking to the fundamental safety principles of the Pattern, you can continue to create essential kitchen tools that are both stylish and life-saving.
Frequently Asked Questions (FAQ)
Why should I use a Double oven mitt instead of two separate ones?
A Double oven mitt provides a continuous bridge of protection between your hands. This means if a large pan accidentally touches your stomach or chest while you are carrying it, you are protected by the fabric. Additionally, it is much harder to lose one half of a Double oven mitt, and the design often provides a more stable grip on wide or heavy baking sheets.
Can I use polyester batting in my Double oven mitt – Pattern?
No, it is highly recommended to avoid 100% polyester batting. Polyester is a form of plastic and can melt when exposed to high temperatures, which could cause severe burns. Always use 100% cotton batting or a specialized heat-resistant batting like Insul-Bright that is specifically rated for oven mitt use.
How long should the body of the Double oven mitt be?
A standard Double oven mitt – Pattern usually calls for a length between 30 and 35 inches. This allows enough room to comfortably reach across a standard oven or a large roasting pan without the fabric being too tight. You can adjust the length of your Pattern based on your own height and the width of your appliances.
Is it hard to sew through all those layers?
It can be a bit thick for some domestic sewing machines. To make it easier, use a walking foot, which helps feed all the layers of the Double oven mitt through the machine at the same speed. Also, using a fresh 90/14 or 100/16 denim needle will help pierce the layers without skipped stitches or broken thread.
Can I put a Double oven mitt in the dryer?
Yes, if you used 100% cotton and heat-resistant batting as suggested in the Double oven mitt – Pattern, it should be fine in the dryer on a medium heat setting. However, air drying can help preserve the shape of the binding and the integrity of the heat-reflective film inside for a longer period.
What is the best fabric for the exterior?
Heavy-weight cotton fabrics like quilting cotton, canvas, or barkcloth are excellent choices. They are durable, easy to sew, and take well to the quilting required in a Double oven mitt – Pattern. Avoid anything with a loose weave that might allow heat to pass through too easily.
Conclusion
In this article, we have explored the essential steps to creating a professional and safe Double oven mitt – Pattern. We discussed the vital importance of choosing 100% cotton and heat-resistant insulation to ensure your hands and body stay protected from high temperatures. We also looked at the technical layout of a Pattern, the step-by-step assembly including quilting and binding, and how to maintain your finished Double oven mitt for years of safe kitchen use.
By following these guidelines, you can create a high-quality, functional tool that is far superior to mass-produced alternatives.