When you first lay eyes on the Dutch Treat Quilt – Pattern, it captures your imagination with its intricate geometry and the promise of timeless beauty in quilting. This pattern isn’t just a design—it’s an invitation to explore color, technique, and heritage in your quilting practice. The Dutch Treat Quilt – Pattern has an appeal that spans generations, making it a favorite project for both seasoned quilters and enthusiastic beginners. In this article, we’ll dive deep into its origins, its design components, how to work it step by step, and tips to make your finished quilt something truly special.
As you read on, you will find four major sections exploring the origins, design and layout, techniques and tips, and finishing touches of the Dutch Treat Quilt – Pattern. Each section will provide clear, human‑friendly instruction, but also with SEO‑aware structure so readers and search engines alike can follow the flow. After those sections, I’ll present a carefully curated FAQ that addresses the most common online questions about this pattern. Finally, we’ll end with a conclusion, recap, and a heartfelt invitation for your feedback and suggestions.
Throughout the article you’ll see the phrase Dutch Treat Quilt – Pattern used naturally, along with related terms and keywords in bold that help emphasize the main ideas. This ensures the text is both user friendly and optimized for SEO under Google’s content and AdSense guidelines. So let’s begin with a journey into the history behind this classic quilt pattern.
1 Origins and Historical Background of Dutch Treat Quilt – Pattern
The story of the Dutch Treat Quilt – Pattern begins with traditional Dutch geometric art and European quilting traditions. While it is not definitively known to descend from a specific Dutch quilting school, many of its angular features echo the bold symmetry of Dutch tilework and Delft ceramics. Over time, quilters adopted and adapted these visual elements into patchwork designs.
In the early 20th century, quilt pattern magazines began publishing versions of “Dutch Treat” or “Dutchman’s Puzzle” blocks, which share some visual motifs with what we now call the Dutch Treat Quilt – Pattern. Enthusiasts modified those designs to create full quilts built from interlocking shapes and strong diagonal lines. The name “Dutch Treat” likely was a marketing flourish, evoking exotic European charm to appeal to American quilt buyers and makers.
In modern quilting circles, the Dutch Treat Quilt – Pattern is appreciated for its balance between complexity and approachability. It allows the quilter to showcase multiple fabrics, color gradations, and precision piecing skills. Because it’s not overly complex, it remains accessible to intermediate quilters seeking a rewarding project without undue frustration.
Also relevant is how the Dutch Treat Quilt – Pattern fits into the larger family of quilt patterns. It overlaps visually with log cabin, half‑square triangles, and mosaic styles, but retains its distinctive character by emphasizing angular interlocking blocks. Over time, modern quilt artists have revived it, introducing contemporary fabrics, color palettes, and improvisational elements.
For any quilter interested in blending tradition with personal flair, learning the Dutch Treat Quilt – Pattern provides a gateway into combining classic design with innovation. As you continue, we’ll look closely at the components and layout of the pattern, so your path from inspiration to completed quilt is well lit.
2 Design Components and Layout of the Dutch Treat Quilt – Pattern
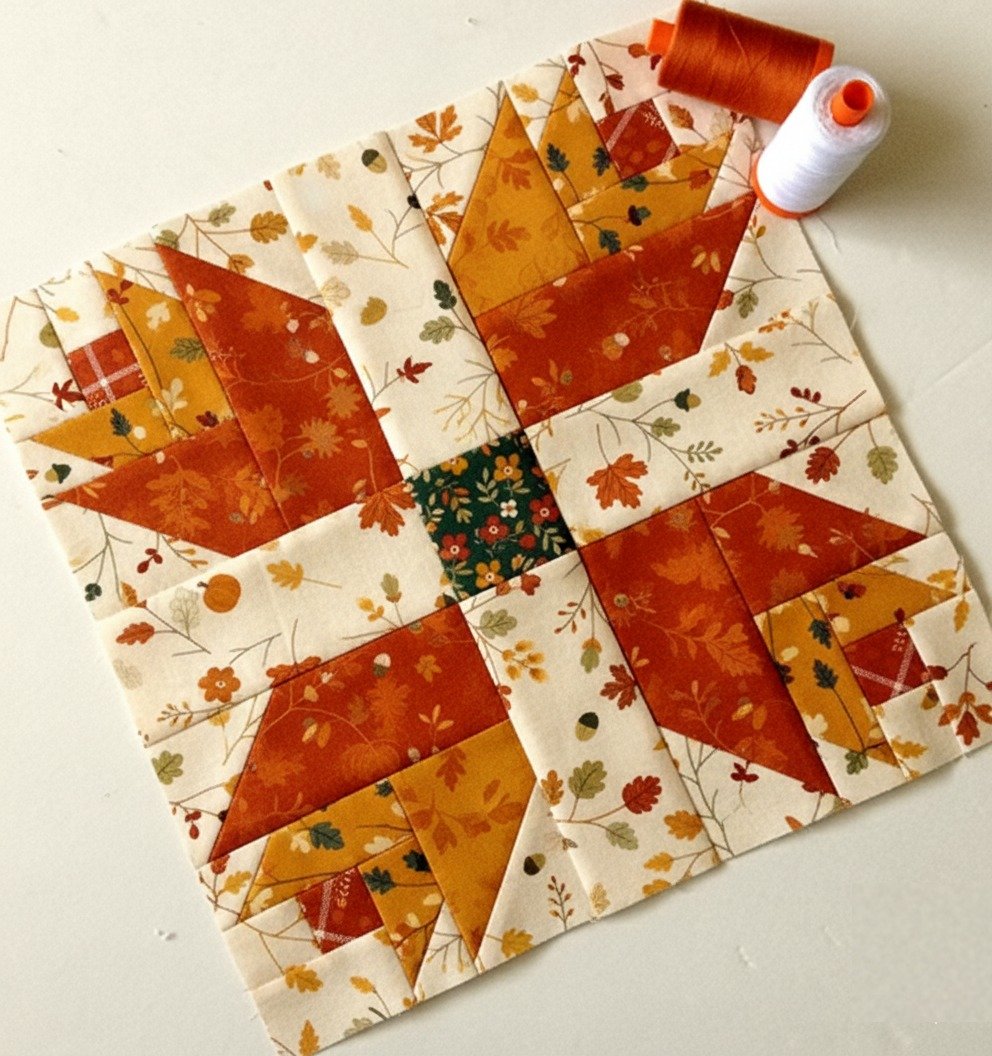
When planning your Dutch Treat Quilt – Pattern, the first step is understanding its building blocks. At the core, you’ll work with geometric units: half‑square triangles (HSTs), squares, and sometimes diamond or parallelogram shapes. These elements interlock to give the kaleidoscopic feel of the quilt.
Color planning plays a critical role. Many versions of the Dutch Treat Quilt – Pattern use contrasting fabrics—light and dark, or bold accent colors—to make the geometry pop. Gradated color transitions or ombré effects can also be incorporated. Choosing a cohesive palette makes the pattern more harmonious rather than chaotic.
Another design decision is block size. You might choose to build large blocks (for instance 12″ or 16″ finished) or smaller ones (6″ or 8″) depending on your finished quilt size and preferred handling. Smaller blocks yield more visual detail but require more precision. Larger blocks give bold, striking geometry and faster progress.
Once your block style, size, and color scheme are selected, you’ll draft a layout grid. Many quilters map out a 5 × 7 or 6 × 8 block layout, placing units so that diagonal lines flow across blocks. You can also offset blocks or rotate them to achieve secondary patterns or visual illusions.
Finally, deciding your sashing, borders, and cornerstones (if included) is part of the design. Some makers frame the Dutch Treat Quilt – Pattern with solid borders to give rest to the eye. Others carry the geometry right to the edge for a continuous visual effect. Whatever approach you choose, consistency with the design concept brings clarity and impact.
By now, you ought to have a solid mental picture of what your quilt might look like, and the parts you need to create. Next, we’ll examine techniques, sewing order, and practical tips to bring the design to life.
3 Techniques, Tips, and Sewing Order for the Dutch Treat Quilt – Pattern
To begin your Dutch Treat Quilt – Pattern sewing, start gathering your fabrics, cutting tools, and pressing surface. Precise cutting is essential — aim for accurate seam allowances (¼″ standard) and consistent units. Mistakes early propagate and distort the geometry later.
One good technique is to chain‑piece matching units (for HSTs or squares) to save time. Lay out matching pairs, sew them in a continuous chain, then trim and press. This speeds work and keeps matching fabric relationships intact. Label or clip units to avoid confusion later.
Pressing direction is important. For patchwork with many diagonal seams, press seams open or toward the darker side, depending on your preference and ease. Open seams can reduce bulk, but directional pressing can help with nesting later when joining blocks.
As you assemble each block, frequently check for alignment and square-ness. Use a square ruler, align seam intersections carefully, and gently nudge or unpick if things are off. It’s much easier to fix errors at the unit stage than to force them into bigger sections later.
Once blocks are completed, lay them out in your preplanned grid to verify that the diagonal lines flow as intended. At this stage you might swap or rotate blocks to fix visual imbalances or misalignments. Remember: quilts often look different when the blocks are shuffled.
When joining blocks into rows and then the full quilt, use pins or clips generously at seam intersections to help your lines meet precisely. Sew slowly through intersecting points. After rows are joined, take a moment to square up the quilt top if needed before progressing to batting, backing, and quilting.
4 Finishing Touches, Quilting, and Care for Dutch Treat Quilt – Pattern
Once the quilt top is complete, your next step in the Dutch Treat Quilt – Pattern journey is layering. Choose a backing fabric and a batting that complements your quilt’s weight and warmth. Smooth out the backing and batting under tension before placing the top.
The quilting design you choose can either echo the geometry of the Dutch Treat Quilt – Pattern or contrast it. You might quilt along the diagonals, follow the angular lines of the blocks, or use a free-motion filler in the spaces between. Match the quilting style to your aesthetic and to the quilt’s purpose. Denser quilting gives stability, but lighter quilting gives more drape.
After quilting, trim the excess backing and batting to match the quilt top’s edges. Then attach your binding. Many quilters prefer double‑fold binding; select a binding fabric that either matches or frames the quilt visually without detracting from the pattern’s impact.
To care for your quilt, wash it gently—preferably in cold or lukewarm water using a mild, quilt-safe detergent. Use a gentle cycle or even hand wash, and dry flat or on low heat. Avoid harsh chemicals, bleach, or fabric softeners that might degrade the fabric or distort seams.
When storing your quilt, avoid folding in the same places repeatedly. Rotate the folds occasionally to prevent deterioration along creases. If displayed, rotate which side shows to reduce wear. With well-executed finishing and care, your Dutch Treat Quilt – Pattern will last for generations.
FAQ about Dutch Treat Quilt – Pattern
Q: What skill level is needed for the Dutch Treat Quilt – Pattern?
A: The Dutch Treat Quilt – Pattern is best suited for intermediate quilters. It involves precise piecing and seam matching (especially diagonals), but doesn’t demand extremely advanced techniques like complex curved piecing or custom foundation piecing. Confident scrappy or geometrical piecers can tackle it with practice.
Q: Can a beginner attempt a simpler version of Dutch Treat Quilt – Pattern?
A: Yes, a beginner can simplify the pattern by using fewer color changes, larger block sizes, and limiting the number of seams per block. Starting with a smaller sampler quilt and practicing half‑square triangle units will build confidence before launching into a full Dutch Treat Quilt – Pattern project.
Q: How much fabric do I need for a full‑size Dutch Treat Quilt – Pattern?
A: Fabric requirements depend heavily on your block size, color scheme, and layout. Plan enough yardage for background, contrast, and accent fabrics, plus extra for trimming, quilting, and binding. Many patterns estimate total yardage for queen size; always add 10–15% extra for safety.
Q: What quilting designs work well with the Dutch Treat Quilt – Pattern?
A: Quilting designs that emphasize geometry usually complement this pattern best—diagonals, straight lines, crosshatching, or echo quilting. However, softer filler motifs in negative spaces can provide texture without competing with block structure. The key is balance.
Q: How do I avoid distortion when sewing diagonal seams in this pattern?
A: To avoid distortion, cut accurately, use sharp rotary blades, sew slowly at intersections, and use pins or clips to match seams precisely. Press gently and avoid stretching bias edges. Chain‑piecing and careful layout checks early help reduce cumulative errors.
Q: Can I modernize the Dutch Treat Quilt – Pattern with improvisation?
A: Absolutely. Many contemporary quilters modernize the pattern by introducing improvisational color placement, irregular block sizes, negative space, or asymmetry. While retaining the essence of the Dutch Treat Quilt – Pattern, these variations let your personal voice shine.
Conclusion
In this article, you have journeyed from the historical roots of the Dutch Treat Quilt – Pattern through its design components, sewing techniques, and finishing touches. We discussed how to select block layouts, color palettes, piecing strategies, quilting styles, and care for your quilt once it’s complete. The Dutch Treat Quilt – Pattern is a versatile, aesthetically rich design that welcomes both structured planning and creative adaptation.
Now, I warmly invite you to share your experience: whether you’ve made this quilt or are planning it, please leave an honest opinion or suggestion. Your feedback is invaluable and helps both me and future readers to grow in quilting skill and community insight.