This Easter Egg Placemat Tutorial- Pattern is the perfect way to bring a touch of seasonal charm and handmade warmth to your dining room table this spring. Creating your own table linens allows you to customize your decor with specific colors and textures that store-bought items simply cannot match. Whether you are hosting a festive brunch or just want to brighten up your daily meals, a quilted or sewn placemat is a functional piece of art that protects your furniture while showcasing your creative skills.
If you have been searching for a rewarding project, this Easter Egg Placemat Tutorial- Pattern offers a straightforward approach to holiday crafting that is accessible for beginners and seasoned sewists alike. The egg shape is iconic for the season, symbolizing renewal and new beginnings, which makes it a delightful motif to work with during the spring months. By following a structured pattern, you can ensure that each placemat is uniform in size while still playing with a variety of fabric scraps to create a “scrappy” or coordinated look.
Mastering the Easter Egg Placemat Tutorial- Pattern involves understanding the basics of template tracing, fabric selection, and edge finishing. In the following sections, we will dive deep into the materials you need, the step-by-step construction process, and how to add professional touches like quilting or applique. This comprehensive guide is designed to help you produce high-quality home decor that adheres to the best crafting standards, ensuring your finished product is both durable and beautiful for years to come.
1. Essential Materials for Your Easter Egg Placemat Tutorial- Pattern
Before you begin sewing, gathering the right supplies is the most important step in ensuring a smooth crafting experience. For this Easter Egg Placemat Tutorial- Pattern, you will primarily need high-quality cotton fabric in various spring shades like pastel pink, mint green, and lemon yellow. Since these items will likely encounter food spills, choosing washable, colorfast fabrics is essential for longevity and easy maintenance.
In addition to your main fabrics, you will need insul-bright or cotton batting to give the placemats structure and heat resistance. A sturdy interfacing can also be used if you prefer a stiffer feel for your table setting. The batting acts as the filling of your “fabric sandwich,” providing the necessary thickness to protect your wooden or glass surfaces from warm plates and heavy cutlery.
Precision is key when working with curved shapes, so ensure you have a sharp rotary cutter and a high-quality cutting mat. Tracing the pattern onto your fabric requires a fabric marker or tailor’s chalk that disappears with heat or water. Having these specialized tools on hand prevents frayed edges and ensures that your egg shapes are perfectly symmetrical and professional-looking.
Don’t forget the smaller notions that make a big difference, such as coordinating thread and quilting pins or clips. Using a walking foot on your sewing machine is highly recommended when sewing through multiple layers of fabric and batting. This specific attachment helps feed the layers through the machine evenly, preventing the dreaded “puckering” that often happens with thicker projects.
For those who want to add extra flair, consider incorporating decorative ribbons, lace, or rick-rack into your design. These embellishments can be sewn across the “egg” to mimic the look of a decorated Easter egg. These small details are what turn a basic Easter Egg Placemat Tutorial- Pattern into a personalized masterpiece that reflects your unique style and attention to detail.
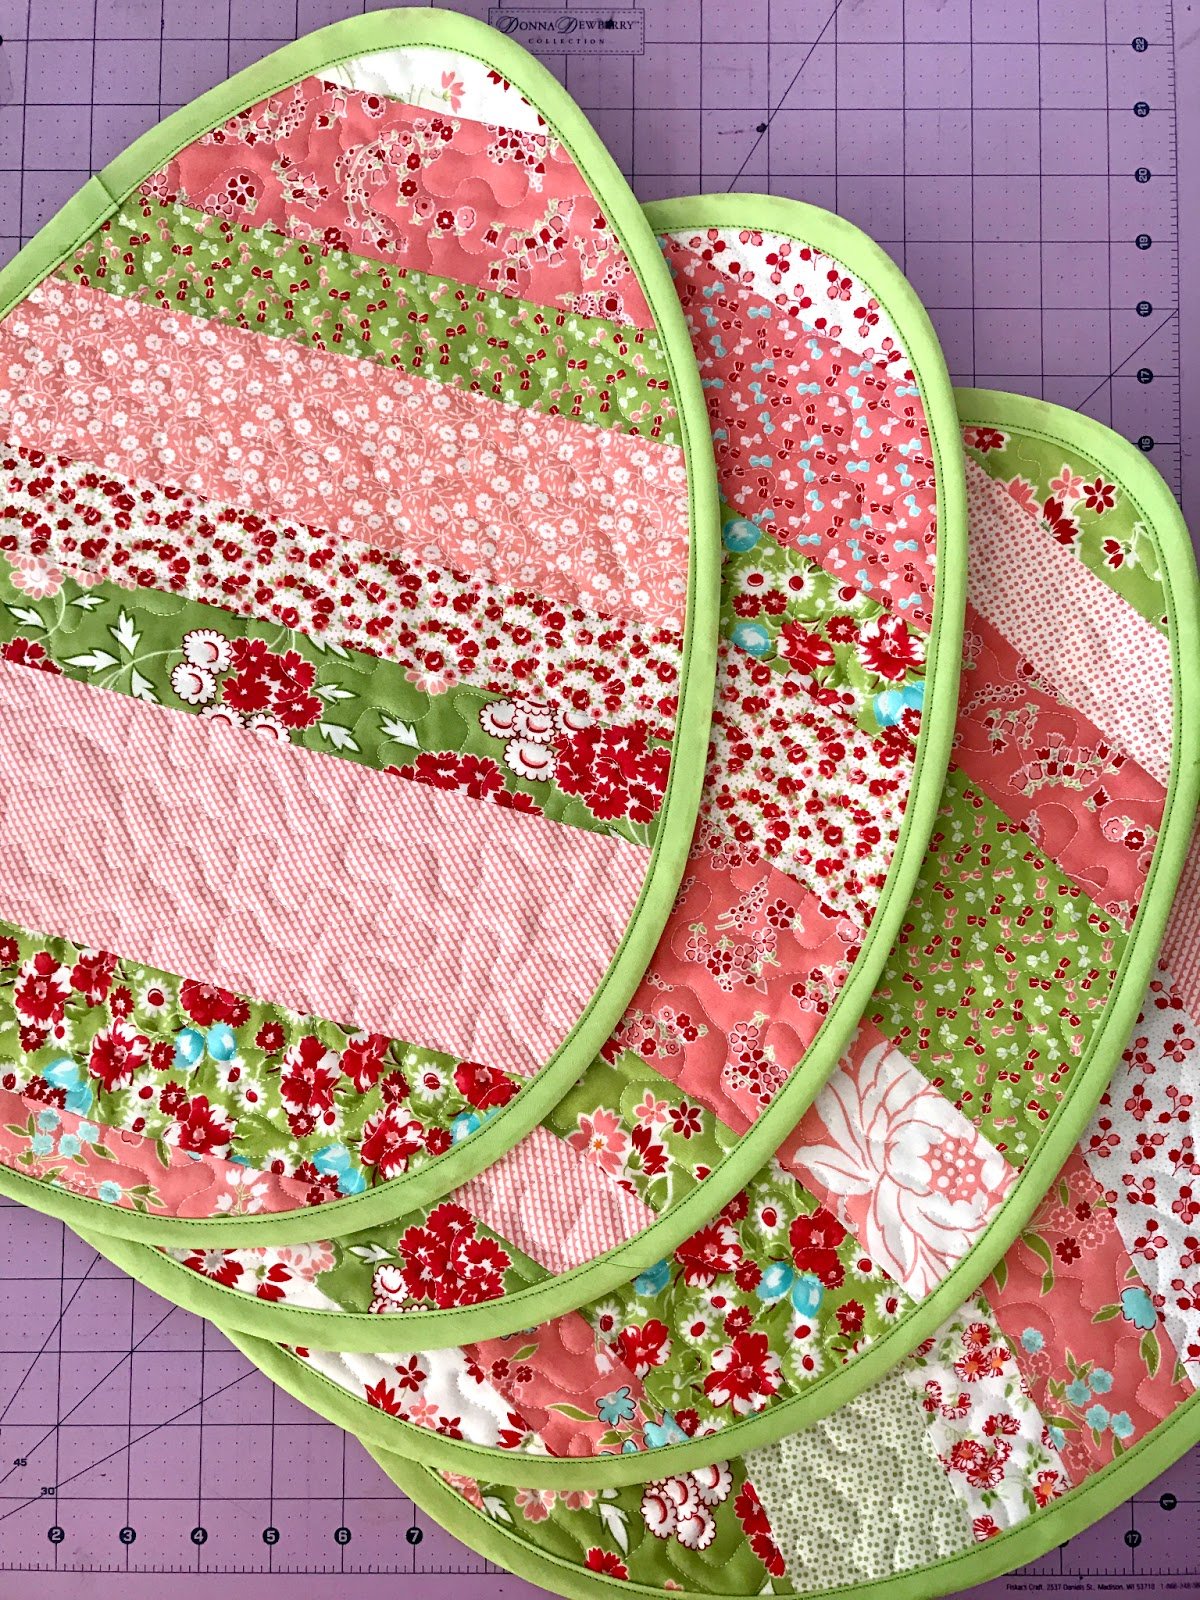
Lastly, you will need a printed or hand-drawn template of an oval egg shape. Most standard placemats are roughly 12 by 18 inches, so your egg should fit comfortably within those dimensions. You can create your own pattern by folding a large piece of paper in half and cutting a semi-oval to ensure perfect symmetry once unfolded, providing the base for your entire project.
2. Preparing and Cutting Your Fabric Pattern
The first active step in the Easter Egg Placemat Tutorial- Pattern is preparing your fabric by pre-washing and ironing. Cotton fabrics are prone to shrinking, so washing them beforehand ensures your placemats won’t warp or change shape after their first trip through the laundry. Once dry, a crisp press with a hot iron makes the cutting process much more accurate and manageable.
Lay your fabric out flat on your cutting mat and place your Easter Egg Placemat Tutorial- Pattern template on top. If you are making a set of four or six, you can fold your fabric to cut multiple layers at once, provided your scissors or rotary cutter are sharp enough. Be mindful of the fabric grain to ensure the placemats lay flat and don’t stretch out of shape over time.
For each placemat, you will need to cut one front piece, one back piece, and one piece of batting. If you are using a scrappy technique, you might sew several strips of fabric together first to create a “new” sheet of fabric before cutting out the egg shape. This Easter Egg Placemat Tutorial- Pattern is a fantastic way to use up leftover fabric from previous spring projects.
When cutting the batting, some crafters prefer to cut it slightly smaller (about a quarter-inch) than the fabric pieces. This technique, known as reducing bulk in the seams, makes it much easier to turn the placemat right side out and results in a flatter, cleaner edge. Precision during the cutting phase is the foundation of a successful Easter Egg Placemat Tutorial- Pattern.
If your design includes applique, such as smaller flowers or geometric shapes on the front of the egg, cut those pieces now. Using a fusible web on the back of these smaller pieces will help them stay in place while you sew. Planning your layout before you reach the sewing machine is a hallmark of an optimized sewing workflow and leads to better results.
Once all your pieces are cut, organize them into piles for each individual placemat. This keeps your workspace tidy and ensures you don’t accidentally mix up front and back panels. Taking the time to be methodical during the preparation stage of the Easter Egg Placemat Tutorial- Pattern will save you significant time and frustration during the assembly phase.
3. Assembling the Layers and Sewing the Edges
Now that your pieces are ready, it is time to assemble the “sandwich” for your Easter Egg Placemat Tutorial- Pattern. Place the batting down first, then lay the back fabric on top with the right side facing up. Finally, place the front fabric on top with the right side facing down. This “right sides together” method is standard for projects that will be turned inside out.
Pin or clip the layers securely around the entire perimeter of the egg shape. It is helpful to mark a 3-inch opening on one of the flatter sides of the egg. This gap is vital because it is where you will turn the placemat right side out after sewing. In this Easter Egg Placemat Tutorial- Pattern, leaving the opening on a curve can make closing it more difficult, so choose a straighter section.
Using a quarter-inch seam allowance, sew slowly around the edge of the egg. Because you are sewing a curve, you may need to stop frequently with the needle down to pivot the fabric slightly. Maintaining a consistent distance from the edge is crucial for a smooth, rounded Easter Egg Placemat Tutorial- Pattern that looks identical to the others in your set.
After sewing, it is important to notch the curves. Use your scissors to cut small V-shaped snips into the seam allowance around the rounded ends, being careful not to cut the stitches. This allows the fabric to expand and sit flat once turned. This small professional trick is what separates a DIY look from a high-quality Easter Egg Placemat Tutorial- Pattern result.
Reach between the two fabric layers and carefully pull the placemat right side out through the opening you left. Use a turning tool or a blunt chopstick to gently push out the edges along the seams. Once the shape is turned, give the entire placemat a firm press with your iron, ensuring the raw edges of the opening are tucked neatly inside.
To finish the edges, you can either hand-stitch the opening closed using a ladder stitch or perform a topstitch around the entire placemat. Topstitching about an eighth of an inch from the edge not only closes the gap but also gives the Easter Egg Placemat Tutorial- Pattern a crisp, finished look. This step also helps keep the internal batting from shifting during use.
4. Final Touches and Quilting Your Placemat
The final stage of the Easter Egg Placemat Tutorial- Pattern involves adding decorative quilting and ensuring the piece is durable. Quilting isn’t just for aesthetics; it “tacks” the layers together so the fabric doesn’t bunch up when washed. You can choose simple straight-line quilting, a diamond grid, or even free-motion designs that follow the curves of the egg.
If you are a beginner, following the lines of your fabric pattern or sewing simple horizontal lines across the egg is the easiest way to finish. Use a longer stitch length for quilting to achieve a more defined, hand-crafted look. This textural element adds depth to your Easter Egg Placemat Tutorial- Pattern and makes the colors of the fabric pop under dining room lights.
For a more advanced look, try echo quilting, where you sew lines that mimic the outer shape of the egg, moving progressively inward. This draws the eye toward the center of the placemat and emphasizes the holiday theme. Regardless of the style you choose, ensure your tension settings are correct so the stitches look beautiful on both the front and the back.
Once the quilting is complete, trim any stray threads and give the placemat one final press with steam. Steam helps set the stitches into the fabric, giving the project a polished, store-quality appearance. At this point, your Easter Egg Placemat Tutorial- Pattern is officially ready to be featured on your Easter table or given as a thoughtful handmade gift.
Consider making a matching table runner or cloth napkins using the leftover scraps from your placemats. Coordination is a great way to elevate your interior design for the holidays. Since you now have the pattern and the skills, creating a full set is a quick and satisfying project that can be completed in a single weekend.
Finally, remember to care for your handmade items properly. Because this Easter Egg Placemat Tutorial- Pattern uses cotton and batting, it should be washed on a gentle cycle and laid flat to dry or tumbled on low heat. With proper care, these festive placemats will become a cherished part of your family’s holiday traditions for many spring seasons to come.
Frequently Asked Questions (FAQ)
What is the best fabric for an Easter Egg Placemat?
The best fabric is 100% cotton. It is easy to sew, handles heat well from warm plates, and comes in an endless variety of Easter-themed prints and colors.
Can I make this tutorial without a sewing machine?
Yes, you can sew the Easter Egg Placemat Tutorial- Pattern by hand using a backstitch for the main seams and a running stitch for the quilting, though it will take significantly longer.
How do I make the placemat heat resistant?
To make your placemat heat resistant, use a layer of Insul-Bright batting along with standard cotton batting. This material has metallic fibers that reflect heat away from your table.
What size should the egg template be?
A standard egg template for a placemat should be approximately 12 inches wide and 16 to 18 inches tall to accommodate a dinner plate, silverware, and a glass.
Is this project suitable for absolute beginners?
Absolutely! Because an egg is a simple geometric shape without sharp corners or complex angles, it is one of the best projects for someone just learning to sew curves.
Can I use felt instead of cotton fabric?
Yes, felt is a great alternative for a no-sew or simple-stitch version of the Easter Egg Placemat Tutorial- Pattern. However, keep in mind that felt is harder to wash than cotton.
Conclusion
In this article, we have explored the complete process of creating a festive table setting using the Easter Egg Placemat Tutorial- Pattern. We covered everything from selecting the right cotton fabrics and batting to the technical steps of sewing curves, notching seams, and adding decorative quilting.
By following this guide, you now have the knowledge to create a set of durable, beautiful, and unique placemats that will brighten any spring celebration. Handmade decor adds a level of personality and love to a home that mass-produced items simply cannot replicate.