Looking for a fun and practical project? This Easy Charm Pack Tote Tutorial – Pattern is the perfect way to turn beautiful pre-cut fabrics into a functional and stylish tote bag. Charm packs are a favorite among quilters and crafters because they offer coordinated fabric squares that make designing easy — and in this tutorial, you’ll learn exactly how to turn them into your new favorite tote.
Whether you’re a beginner just starting to sew or an experienced maker looking for a quick and satisfying project, this guide is made for you. The charm pack makes the cutting process easier, saving time and reducing waste. Plus, with our detailed Easy Charm Pack Tote Tutorial – Pattern, you’ll create a handmade bag that’s great for everyday use, gifting, or even selling.
In this article, you’ll find step-by-step instructions, helpful tips, and creative inspiration to help you sew a tote bag that’s not only beautiful but also durable and practical. We’ll also answer common questions in our FAQ section and summarize everything at the end so you can review and feel confident as you create your own tote.
1. Why Use a Charm Pack for Tote Bags?
A charm pack is a bundle of pre-cut fabric squares, usually measuring 5×5 inches. These packs typically include a variety of prints from the same fabric collection, making them ideal for cohesive, colorful projects. When making a tote, this is a huge time-saver and design boost.
Using a charm pack tote pattern simplifies fabric coordination. You won’t have to spend hours matching colors and patterns at the fabric store — it’s all done for you! This is especially helpful if you’re new to sewing or feel unsure about combining fabrics.
One major benefit is the reduction in cutting time. Since each piece is already cut to a standard size, all you need to do is lay them out and start sewing. It’s a great way to dive right into the creative process without the prep work.
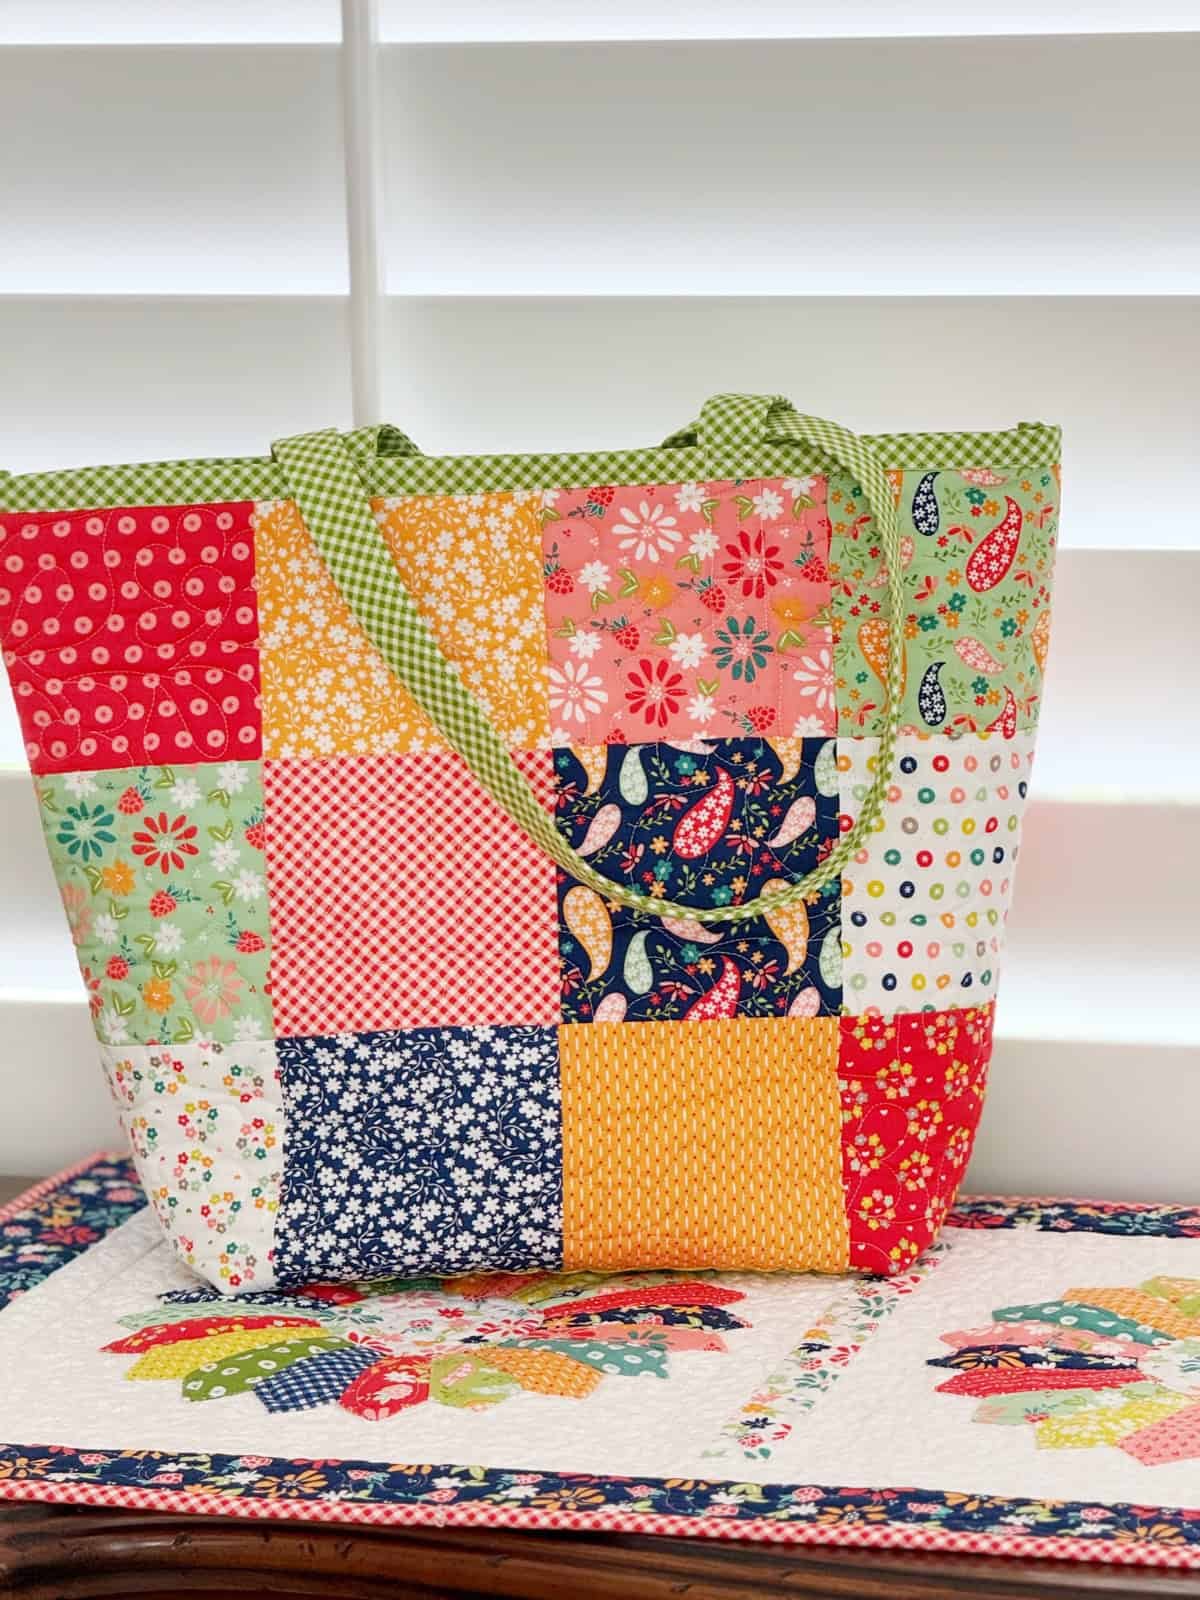
Totes made from charm packs are highly customizable. You can choose a classic grid layout or go for a random, patchwork design. Either way, it adds personality and texture to your tote while making use of every square.
This method also reduces fabric waste. Since the squares are pre-measured and precision-cut, you avoid scraps that often come from cutting yardage manually. That means more eco-conscious crafting!
Most importantly, charm packs make tote-making accessible. With this Easy Charm Pack Tote Tutorial – Pattern, even a beginner can follow along confidently, making it an excellent weekend project with beautiful results.
2. Preparing Your Materials and Layout
Before you start sewing, it’s essential to gather all necessary materials for your Easy Charm Pack Tote Tutorial – Pattern. Having everything ready will make the process smoother and more enjoyable.
Here’s what you’ll need: one charm pack (typically includes 42 pieces), lining fabric, fusible interfacing (for structure), coordinating thread, sewing pins or clips, rotary cutter (optional), and a sewing machine. You may also want fabric for handles or pre-made straps.
Begin by deciding how many charm squares you’ll use for each side of the tote. A common layout is 5 squares across by 4 squares down, making 20 squares per side. This creates a good-sized tote without being bulky.
Lay out your charm squares on a flat surface and play with the arrangement. This is your chance to create a color flow or random patchwork effect. Take a picture once you’re happy with the layout — it helps keep you on track while sewing.
Press your squares with an iron to remove any creases. This step is important for accurate seams. Smooth, flat squares ensure your finished tote will have a neat and professional appearance.
Don’t forget the lining and interfacing. Cut these to match the final size of your outer charm-pack panels. The lining adds a clean interior look, and the interfacing gives your tote structure and durability, helping it stand up instead of slouching.
Lastly, prepare your straps. You can use cotton webbing, canvas strips, or make your own from coordinating fabric. Standard strap length is around 22 inches each, but feel free to adjust based on your comfort and style preference.
3. Sewing the Tote Exterior and Lining
Now that everything is prepared, it’s time to start sewing your Easy Charm Pack Tote Pattern step by step. Take your time and enjoy the process — it’s about creating something both useful and beautiful.
Start by sewing your charm squares into rows. Use a ¼ inch seam allowance for consistency. Press the seams to one side or open them, depending on your preference. Repeat until all rows are assembled.
Once the rows are complete, sew them together to form a full panel. You’ll create two panels — one for the front and one for the back of the tote. Take your time aligning the seams so your squares match up nicely at the intersections.
Attach your fusible interfacing to the wrong side of each charm panel following the manufacturer’s instructions. Iron-on interfacing adds essential structure, especially if you plan to carry books or groceries in your tote.
Place the front and back panels right sides together and sew along the sides and bottom. Press the seams, and optionally, box the corners by sewing a triangle across each bottom corner to give your bag depth and a flat base.
Now move on to the lining. Cut it to the same size as the outer panels. Sew the lining pieces together in the same way, but leave a 3–4 inch gap at the bottom for turning the bag right-side out later.
Next, assemble your handles. If you’re using fabric handles, fold them lengthwise, sew along the edge, and turn them inside out. Press flat and topstitch for extra strength. If you’re using pre-made straps, make sure they’re evenly measured.
4. Assembling and Finishing Your Tote
The final stage of this Easy Charm Pack Tote Tutorial – Pattern is bringing everything together to create your finished bag. This is where all your preparation pays off.
Pin the straps to the right side of the tote, positioning them a few inches from each side seam. Make sure they’re aligned evenly and aren’t twisted. Baste them in place with a temporary stitch to hold them securely.
Place the outer tote inside the lining with right sides facing each other, ensuring the straps are tucked inside. Align the top edges and side seams, then pin or clip everything together.
Sew around the top edge of the bag using a ½ inch seam allowance. Go slowly around the straps to ensure strength and stability. Backstitch at the start and end for reinforcement.
Turn the tote right side out by pulling it through the opening in the lining. Gently push out the corners and edges, then sew the gap in the lining closed either by hand or machine.
Tuck the lining into the bag and give everything a good press. Topstitch around the top edge of the bag — this gives a professional finish and helps keep the lining in place.
Your charm pack tote is now complete! Enjoy your beautiful handmade creation. It’s perfect for groceries, books, beach trips, or daily errands. Plus, you now have the confidence and skills to make more!
FAQ – Easy Charm Pack Tote Tutorial – Pattern
Q1: What exactly is a charm pack?
A: A charm pack is a bundle of pre-cut 5″x5″ fabric squares, often containing 40–42 pieces from a coordinated fabric collection. They’re great for patchwork projects like totes and quilts.
Q2: How many charm squares do I need for a tote?
A: A standard tote uses about 40 squares (20 per side), though you can adjust based on your desired size.
Q3: Do I need interfacing for a charm pack tote?
A: Yes, interfacing adds structure to your tote, making it more durable and allowing it to hold its shape better.
Q4: Can I sew a charm pack tote by hand?
A: It’s possible, but it will take more time and effort. A sewing machine is recommended for cleaner, faster results.
Q5: What is the best fabric for the lining?
A: Lightweight cotton or quilting cotton works well. It should complement the charm pack’s colors and be durable enough for daily use.
Q6: How do I clean a handmade charm pack tote?
A: Spot clean or gently hand wash in cold water. Air dry to maintain the shape and fabric quality.
Conclusion
This Easy Charm Pack Tote Tutorial – Pattern has guided you through every step — from choosing and laying out your charm squares to sewing and finishing your custom tote. Using a charm pack not only makes the project simpler but also more creative and visually cohesive.
Whether you’re crafting for yourself, as a gift, or to sell at markets, this tote is a rewarding project that blends beauty with function. We hope you’ve enjoyed learning and feel inspired to keep sewing.
We’d love to hear from you! Leave a sincere opinion or suggestion below — your feedback helps us improve future tutorials and inspire more makers like you. Happy sewing!