Making a Fabric Bunny Basket – Pattern is one of the most delightful ways to welcome the spring season and prepare for festive celebrations. Whether you are looking to create a personalized gift for a loved one or simply want to add a touch of handmade charm to your home decor, this project offers the perfect blend of utility and whimsy. In this guide, we will walk through everything you need to know to master this sewing tutorial and produce a professional-looking result.
When you dive into a Fabric Bunny Basket – Pattern, you are engaging in a creative process that allows for endless customization. From choosing the perfect pastel fabrics to selecting the right interfacing for stability, every step is an opportunity to express your unique style. This particular DIY craft has gained immense popularity because it serves as both a functional storage solution and a beautiful decorative piece that children and adults alike will cherish.
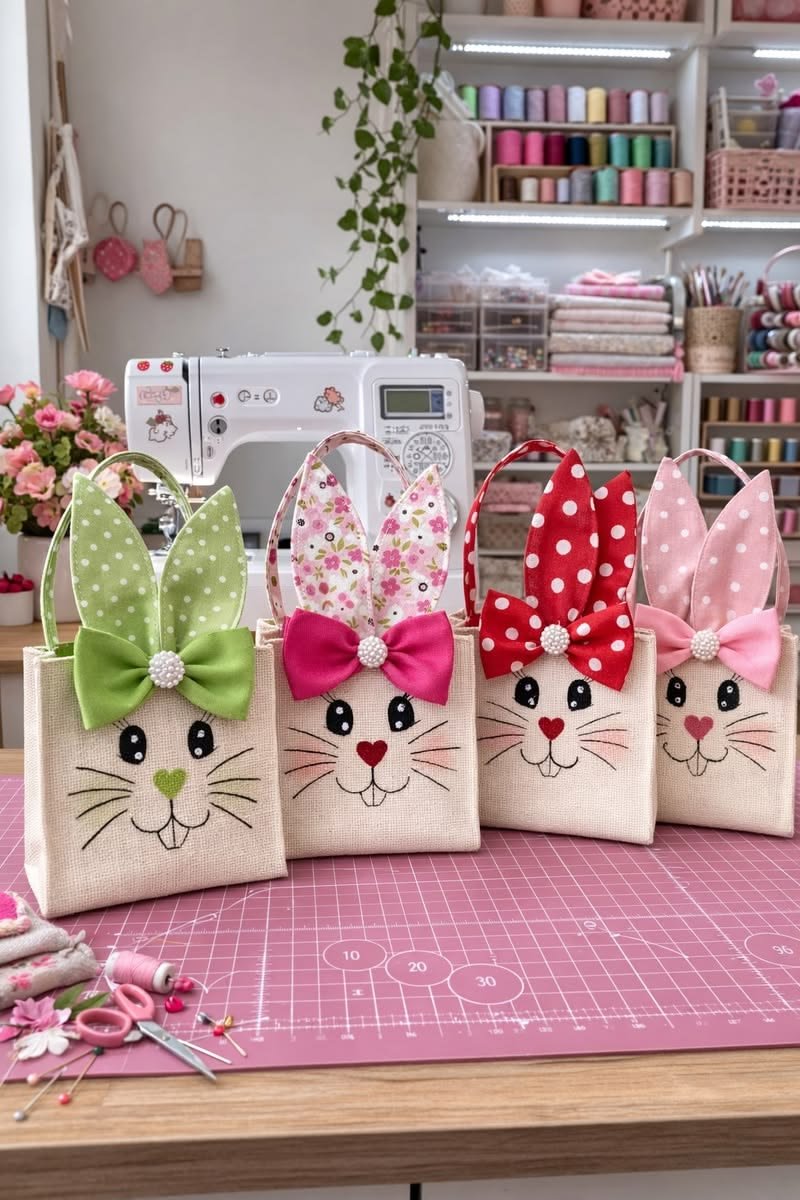
The beauty of a Fabric Bunny Basket – Pattern lies in its versatility and the joy it brings during the construction phase. Using high-quality cotton fabric and some basic sewing supplies, you can transform simple materials into a structured, adorable basket featuring iconic long ears. Throughout this article, we will focus on SEO-friendly sewing tips and detailed instructions to ensure your project is a resounding success, meeting all the requirements for a high-quality, engaging piece of digital content.
1. Choosing the Right Materials for Your Fabric Bunny Basket – Pattern
Selecting the appropriate textiles is the foundational step in executing a successful Fabric Bunny Basket – Pattern. For the exterior, most quilters and crafters prefer 100% cotton prints because they are easy to handle and come in a vast array of spring-themed designs. You might consider floral patterns, polka dots, or even a solid linen blend for a more modern, rustic aesthetic.
To ensure your basket stands upright and maintains its shape, the use of fusible fleece or a heavy-duty interfacing is absolutely essential. Without proper support, the bunny ears may flop over, and the basket walls might collapse. Using iron-on stabilizers allows you to bond the support directly to the fabric, making the sewing process much smoother and preventing shifting during assembly.
Don’t forget the interior lining, which provides a clean finish to your handmade basket. Many makers choose a contrasting color to give the Fabric Bunny Basket – Pattern a “pop” when someone looks inside. Light-colored fabrics work best for linings if you plan to fill the basket with colorful treats, as they provide a neutral backdrop that makes the contents stand out beautifully.
For the bunny’s features, you can get creative with embroidery floss, fabric markers, or even small buttons. If the basket is intended for a small child, it is highly recommended to use satin-stitch embroidery for the eyes and nose to avoid any choking hazards. Safety is a crucial aspect of any textile pattern designed for family use.
Thread selection also plays a vital role in the durability of your Fabric Bunny Basket – Pattern. A strong all-purpose polyester thread in a matching or neutral shade will ensure that the seams can withstand the weight of eggs, candies, or small toys. Double-stitching the handle attachments is a professional tip that adds longevity to your sewn creation.
Finally, gather your basic sewing notions, including sharp fabric shears, wonder clips (which are often better than pins for thick layers), and a marking pen. Having these tools ready before you start the Fabric Bunny Basket – Pattern will save you time and help you maintain a steady workflow as you move through the construction phases.
2. Cutting and Preparing the Bunny Ear Templates
The most iconic feature of the Fabric Bunny Basket – Pattern is undoubtedly the ears. To begin, you will need to create or print a bunny ear template that is proportionate to the size of your basket base. Precision in cutting these pieces is what gives the final product its characteristic “cute” factor, so take your time during this stage of the cutting process.
You will typically need four ear pieces: two from the main exterior fabric and two from the lining or accent fabric. By mixing and matching these, you create a dynamic look for your Fabric Bunny Basket – Pattern. Once cut, apply a layer of thin interfacing to the wrong side of the exterior ear pieces to give them enough stiffness to stand tall.
When sewing the ear pieces together, place the right sides facing each other and use a small seam allowance. It is helpful to leave the bottom straight edge open for turning. After stitching, remember to clip the curves carefully; this simple step allows the fabric to lay flat once turned right-side out, preventing bunching around the tips of the ears.
Once turned, give the ears a crisp press with a hot iron. This is a great time to add a decorative topstitch around the edge. Topstitching not only looks professional but also helps the Fabric Bunny Basket – Pattern keep its shape over time. Some crafters even add a layer of crinkle material inside the ears for a sensory experience if the basket is for a baby.
Positioning the ears is the next critical task. They should be centered on one side of the basket or placed on opposite sides depending on the specific design variations you prefer. Most Fabric Bunny Basket – Pattern instructions suggest basting them to the top edge of the exterior fabric before the lining is attached to ensure they stay perfectly aligned.
The preparation stage is also when you should prepare the basket handles. These are usually long strips of fabric reinforced with interfacing. Consistent width is key here; using a rotary cutter and a quilt ruler ensures that your handles look symmetrical and balanced, adding to the overall quality of your Fabric Bunny Basket – Pattern.
3. Assembling the Main Basket Body and Base
The structure of your Fabric Bunny Basket – Pattern usually consists of a main rectangular body piece and a circular or square base. Creating the cylindrical shape requires sewing the short ends of your main fabric together to form a tube. Consistency in your seam allowance is vital here to ensure the body fits the base perfectly without any puckering.
Attaching the base to the body is often considered the trickiest part of the Fabric Bunny Basket – Pattern. To make it easier, divide both the base and the bottom of the body into four equal quadrants and mark them with pins. Matching these “north, south, east, and west” points will help you distribute the fabric evenly as you sew around the circular seam.
Repeat this entire process for the lining fabric, but with one important modification: leave a 3-inch to 4-inch gap in the side seam of the lining. This opening is essential for “birthing” the basket later on. This technique is common in bag making and ensures that all the raw edges are hidden inside the Fabric Bunny Basket – Pattern for a clean look.
If you want a more “boxy” look for your basket, you can use a technique called boxing corners. This involves pinching the corners of a flat-bottomed bag and sewing across them. It adds depth and stability to your Fabric Bunny Basket – Pattern, allowing it to sit flat on a table or shelf without tipping over when filled.
Before joining the exterior and the lining, make sure your handles and ears are securely basted in place. They should be pointing downward, “sandwiched” between the right sides of the exterior and lining fabrics. This part of the Fabric Bunny Basket – Pattern construction requires careful pinning to ensure you don’t accidentally sew over a stray ear tip.
Sewing around the top rim is the final major structural step. Go slowly, especially when moving over the thick layers where the ears and handles are attached. Using a heavy-duty needle (size 90/14) can help your sewing machine glide through the multiple layers of fabric and interfacing required for a sturdy Fabric Bunny Basket – Pattern.
4. Finishing Touches and Customization Tips
After sewing the top rim, reach through the gap you left in the lining and carefully pull the exterior fabric through. This moment is always the most satisfying part of the Fabric Bunny Basket – Pattern project! Once turned, push the lining down into the basket and use a turning tool or a chopstick to crisply poke out the seams and the tips of the ears.
The gap in the lining can be closed with a quick topstitch using your machine or a ladder stitch by hand for a completely invisible finish. A hand-sewn closure is often preferred in premium handmade crafts as it demonstrates a higher level of attention to detail and craftsmanship in your Fabric Bunny Basket – Pattern.
Pressing the top edge of the basket is crucial. A well-pressed rim allows for a beautiful final topstitch around the entire circumference. This row of stitching not only keeps the lining from rolling outward but also adds significant structural integrity to the Fabric Bunny Basket – Pattern, helping it stay open and accessible.
Now comes the fun part: adding the face! You can use iron-on vinyl, embroidery, or even fabric paint. For a classic look, a simple “Y” shape for the nose and mouth and two small dots for eyes give the Fabric Bunny Basket – Pattern a sweet, minimalist expression. Adding a small pom-pom on the back for a tail is another adorable touch.
Consider adding a personalized label or a small ribbon bow to one of the ears. Customization is what sets your work apart in the world of online craft sales. If you are making these for a home business, these small details increase the perceived value of your Fabric Bunny Basket – Pattern significantly.
Finally, think about how you will display or gift your creation. Filling it with shredded paper, fabric scraps, or traditional Easter grass provides a great base for treats. Your completed Fabric Bunny Basket – Pattern is now a functional piece of art, ready to bring smiles to whoever receives it.
FAQ – Frequently Asked Questions
What is the best fabric for a Fabric Bunny Basket – Pattern?
The best choice is a medium-weight quilting cotton. It is breathable, easy to sew, and comes in many patterns. You should always pair it with a fusible stabilizer to give the basket the necessary structure.
How do I make the bunny ears stay upright?
To keep the ears standing tall, use a heavy-duty interfacing or two layers of mid-weight fusible fleece. You can also insert a piece of plastic canvas or craft wire inside the ear if you want them to be poseable.
Is this pattern suitable for beginners?
Yes! A Fabric Bunny Basket – Pattern is an excellent project for beginner sewists. It teaches fundamental skills like sewing curves, using interfacing, and assembling a lining, all within a small and manageable scale.
Can I wash my fabric basket?
If you used cotton fabric and washable interfacing, you can gently hand wash the basket or use a delicate machine cycle. It is best to air dry it and then give it a quick press with an iron to restore its shape.
How long does it take to complete this project?
On average, a Fabric Bunny Basket – Pattern takes about 1 to 2 hours from cutting to the final stitch. As you become more familiar with the steps, you can easily “mass-produce” several baskets in a single afternoon.
What size should the basket be?
Standard baskets are usually 6 to 8 inches in diameter. However, the beauty of a Fabric Bunny Basket – Pattern is that you can scale the dimensions up or down to create mini treat bags or large toy storage bins.
Conclusion
In this article, we have explored the comprehensive steps to creating a beautiful and sturdy Fabric Bunny Basket – Pattern. From the initial selection of high-quality fabrics and interfacing to the intricate details of assembling the bunny ears and the main body, you now have the knowledge to create a professional-grade handmade gift. We covered essential sewing techniques like clipping curves, boxing corners, and the importance of topstitching for both durability and aesthetics.
This project is not only a fantastic way to practice your sewing skills but also a wonderful opportunity to create something meaningful and lasting. We hope this guide inspires you to start your own DIY sewing project today.