This Fabric Door Stop Tutorial – Pattern is the perfect guide for anyone looking to combine home utility with a touch of personal flair. If you have ever dealt with a door that refuses to stay open on a breezy day, or one that slams shut unexpectedly, you know how essential a good doorstop can be. Instead of opting for a cold, industrial wedge, creating a handmade fabric doorstop allows you to match your interior decor while utilizing those beautiful fabric scraps you’ve been saving in your sewing room.
The beauty of following a Fabric Door Stop Tutorial – Pattern lies in its simplicity and the endless possibilities for customization. Whether you prefer a modern minimalist look using heavy linen or a cozy farmhouse aesthetic with floral cotton, the structural integrity remains the same. This project is incredibly beginner-friendly, requiring only basic sewing machine skills and a few household materials, making it a fantastic weekend project for crafters of all levels.
In this comprehensive guide, we will dive deep into every aspect of the Fabric Door Stop Tutorial – Pattern, from selecting the right interfacing to choosing the best weighted filling. We aren’t just making a bag of sand; we are crafting a durable, stylish home accessory that serves a practical purpose. By the end of this article, you will have all the knowledge needed to create a weighted doorstop that looks professional and functions perfectly in any room of your house.
1. Choosing the Best Materials for Your Fabric Door Stop Tutorial – Pattern
The foundation of a successful Fabric Door Stop Tutorial – Pattern starts with selecting a durable upholstery fabric. Since this item will be sitting on the floor and potentially kicked or moved frequently, you want a material that can withstand wear and tear. Canvas, denim, and outdoor fabrics are excellent choices because they provide the necessary “body” to hold the weight without sagging or tearing over time.
When working with a Fabric Door Stop Tutorial – Pattern, you must also consider the internal lining. If you are using a fine-grain filling like sand or rice, a simple cotton shell might leak over time. Adding a layer of fusible interfacing to your fabric pieces not only prevents leaks but also gives the doorstop a crisp, structured shape that keeps it looking neat even after months of use.
The “weight” in your weighted doorstop is perhaps the most critical component. While some people use poly-pellets, others prefer more eco-friendly or budget-friendly options like dried beans, gravel, or play sand. If you choose sand, it is a pro-tip to seal it inside a Ziploc bag before placing it inside your fabric cover to ensure no grit ever escapes onto your floors.
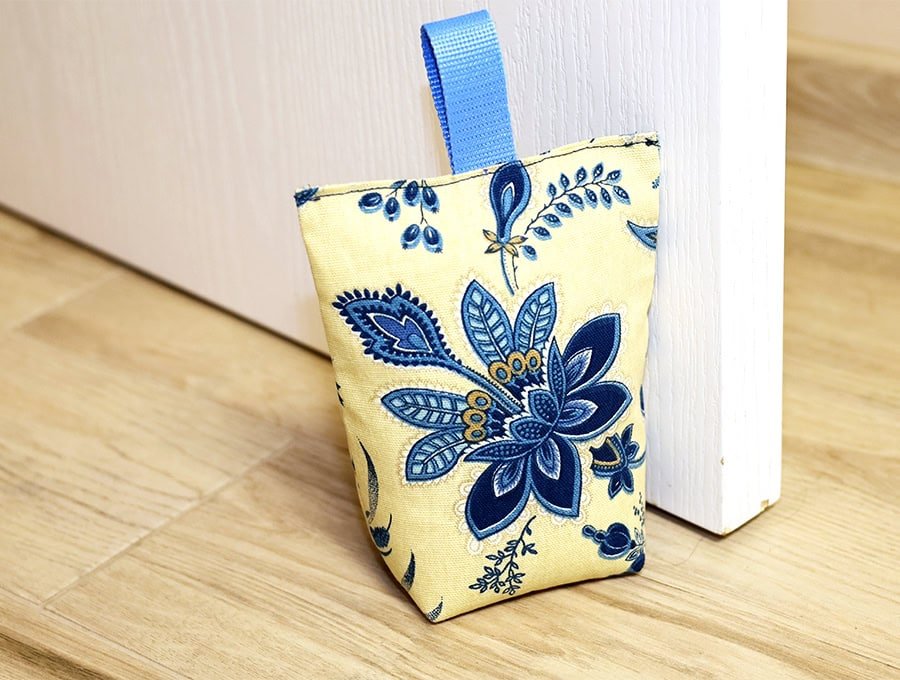
Don’t forget the aesthetic details when gathering your supplies. Since this Fabric Door Stop Tutorial – Pattern is highly visible, think about adding a decorative handle made of cotton webbing, leather, or a sturdy braid of fabric. This makes the doorstop easy to pick up and move from room to room, adding both functionality and a high-end “boutique” look to your finished piece.
Your sewing tools will also play a role in the quality of the finish. Ensure you are using a heavy-duty sewing needle (size 90/14 or 100/16) if you are working with thick fabrics like canvas. Using a high-quality polyester thread is also recommended over cotton thread, as it has more “give” and is less likely to snap under the pressure of the heavy filling inside the doorstop.
Lastly, consider the pattern dimensions. A standard Fabric Door Stop Tutorial – Pattern usually results in a cube or a pyramid shape roughly 6 to 8 inches tall. However, the beauty of DIY is that you can scale the sewing pattern up or down depending on the weight of the door you need to hold. A heavy fire door will require a much larger and heavier version than a light bedroom door.
2. Step by Step Construction of the Fabric Door Stop Tutorial – Pattern
To begin the assembly of your Fabric Door Stop Tutorial – Pattern, you will first need to cut your fabric pieces according to the template. For a classic cube shape, you will need six squares of equal size, plus seam allowances. Consistency is key here; using a rotary cutter and a quilting ruler will ensure your edges are perfectly straight, which makes the final sewing process much smoother.
Once your pieces are cut, the next phase of the Fabric Door Stop Tutorial – Pattern involves preparing the handle. If you are adding a top handle, pin it to the center of what will be your top panel. Secure it with a few stay-stitches within the seam allowance. This ensures that when you sew the panels together, the handle is perfectly centered and won’t slip out of place.
Now, it is time to start pinning and sewing. With right sides together, begin sewing your side panels to the bottom panel. Using a 1/2 inch seam allowance is standard for this type of project, as it provides enough strength to hold the weight. Always remember to backstitch at the beginning and end of every seam to prevent the weight of the filling from pulling the stitches apart.
The most technical part of the Fabric Door Stop Tutorial – Pattern is “boxing” the corners if you are using a one-piece pattern, or simply joining the final side seams. You want to sew the panels together until you have a shape that resembles an open box. Leave the top panel partially unsewn or leave a 2-3 inch gap on one of the vertical seams to allow for turning and filling.
Before turning the fabric right side out, trim the corners of your seam allowances. This reduces bulk and allows for sharp, crisp corners once the Fabric Door Stop Tutorial – Pattern is finished. Carefully turn the project through the opening you left, using a turning tool or a chopstick to gently push the corners out so they are nice and pointy.
The final construction step in this Fabric Door Stop Tutorial – Pattern is the filling. Insert your weighted bag or pour your pellets into the fabric shell until it is firm and holds its shape. Once full, use a ladder stitch (invisible stitch) to hand-sew the opening closed. This creates a seamless finish that makes your DIY doorstop look like it was bought from a high-end home goods store.
3. Customizing Your Pattern for Different Home Styles
One of the best things about a Fabric Door Stop Tutorial – Pattern is how easily it adapts to your personal style. If you love the minimalist or Scandi style, try using a neutral-toned heavy linen and a simple leather strap for the handle. The raw, organic texture of the fabric becomes the focal point, making the doorstop a subtle yet sophisticated addition to your home.
For those who enjoy a shabby chic or farmhouse look, the Fabric Door Stop Tutorial – Pattern can be executed using floral prints or ticking stripes. Adding a bit of lace trim or a decorative wooden button near the handle can enhance the rustic charm. These small details transform a simple utility item into a piece of home decor that adds warmth to your living space.
If you are making this for a nursery or a child’s room, the Fabric Door Stop Tutorial – Pattern can be turned into something whimsical. Use bright colors or animal-print fabrics. You could even modify the pattern slightly to add felt ears or a tail, turning the doorstop into a weighted plushie that keeps the door from pinching little fingers while adding a playful touch to the room.
For a modern or industrial aesthetic, consider using faux leather or vinyl with your Fabric Door Stop Tutorial – Pattern. These materials are incredibly easy to wipe clean and have a sleek, professional finish. When sewing with these “sticky” fabrics, using a teflon foot on your sewing machine will prevent the fabric from dragging and ensure your stitches remain even and beautiful.
Seasonality is another great way to use the Fabric Door Stop Tutorial – Pattern. You can create a “wardrobe” of doorstops for your home—using festive prints for the holidays, spooky patterns for Halloween, or bright citrus colors for the summer. Since they don’t require much fabric, they are an affordable way to update your seasonal decor without a major commitment.
Don’t be afraid to experiment with texture and patchwork. If you are an avid quilter, use your Fabric Door Stop Tutorial – Pattern as an opportunity to create a “quilt block” for each side of the doorstop. This is an excellent way to use up those pre-cut squares (charms) and showcase your quilting skills on a smaller, 3D canvas that guests will definitely notice.
4. Maintenance and Longevity of Your Fabric Doorstop
Once you have completed your Fabric Door Stop Tutorial – Pattern, you want it to last for years. The biggest threat to a fabric doorstop is dust and floor grime. To combat this, you might consider applying a fabric protector spray (like Scotchgard) once the project is finished. This creates a barrier that repels liquids and prevents dirt from grinding into the fibers.
If you know your doorstop will be in a high-traffic area, you can modify the Fabric Door Stop Tutorial – Pattern to include a removable cover. By sewing an inner “bean bag” to hold the weight and an outer decorative shell with a zipper or velcro closure, you make the item fully washable. When the cover gets dirty, simply unzip it and toss it in the laundry.
The type of filling you chose during the Fabric Door Stop Tutorial – Pattern process also affects maintenance. If you used organic materials like rice or beans, it is vital to keep the doorstop in a dry environment. Moisture can lead to mold or attract pests. If you live in a humid climate, sticking to inorganic fillers like glass beads or plastic pellets is the much safer, long-term choice.
Over time, the filling in your weighted doorstop may settle, causing the fabric to look a bit “slumped.” To fix this, you can simply massage the doorstop to redistribute the weight, or if you left a discreet opening, add a bit of polyester fiberfill (stuffing) to the top. This “plumps” the doorstop back up, keeping the silhouette of your Fabric Door Stop Tutorial – Pattern looking sharp.
For those with hardwood or laminate floors, consider the bottom of your doorstop. To prevent the Fabric Door Stop Tutorial – Pattern from sliding on very slick surfaces, you can sew a piece of non-slip fabric (the kind used for the bottom of slipper socks) to the base. This adds an extra layer of “grip,” ensuring that even a heavy door won’t push the doorstop out of the way.
Finally, remember that a handmade doorstop makes a wonderful gift. Now that you have mastered the Fabric Door Stop Tutorial – Pattern, you can whip these up for housewarming parties, teacher gifts, or craft fairs. They are a practical, thoughtful, and unique item that showcases your sewing talent while providing the recipient with something they will actually use every single day.
FAQ – Frequently Asked Questions
1. What is the best weight for a fabric doorstop?
Ideally, a doorstop should weigh between 2 to 4 pounds (1-2 kg). This is heavy enough to hold most interior doors open without being so heavy that it is difficult to move. For heavier exterior doors, you may need to increase the weight to 5 pounds.
2. Can I wash my fabric doorstop in the machine?
Only if you created a removable cover. If the weight (like sand or beans) is sewn directly into the fabric, you should only spot clean the exterior with a damp cloth and mild detergent to avoid damaging the filling or causing mold.
3. What is the cheapest filling for a weighted doorstop?
Dried rice or play sand are usually the most budget-friendly options. However, if you use sand, ensure it is thoroughly dried and sealed in a plastic bag first to prevent it from leaking through the fabric seams.
4. How much fabric do I need for this project?
You generally need less than half a yard of fabric. This makes the Fabric Door Stop Tutorial – Pattern an excellent scrap-busting project for using up leftover material from larger sewing tasks.
5. Do I need a special sewing machine for thick fabrics?
Most standard home sewing machines can handle canvas or denim as long as you use the correct needle. A denim needle (100/16) and a slower sewing speed will help you get through multiple layers of thick fabric without skipped stitches.
6. Can I make this without a sewing machine?
Yes! While a machine is faster, you can absolutely sew a Fabric Door Stop Tutorial – Pattern by hand using a backstitch for strength. It will take longer, but the result will be just as sturdy if your stitches are small and tight.
Conclusion
Creating your own home accessories is a rewarding experience, and this Fabric Door Stop Tutorial – Pattern is a perfect example of how form meets function.
We have covered everything from selecting heavy-duty fabrics and secure fillings to the step-by-step construction and customization for your specific interior design style. By following these steps, you’ve learned how to turn simple materials into a durable, weighted doorstop that adds character to any room.