Materials Needed
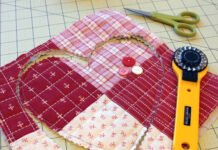
Before you begin crafting your Fabric Triangle Christmas Tree, it’s important to gather all your materials. Having everything ready will streamline your process and make it more enjoyable. Here’s what you will need:
- Fabrics: Choose a selection of holiday-themed fabrics in various colors and patterns. For a cohesive look, opt for cotton quilting fabric that complements each other.
- Batting: Lightweight batting will help give your tree structure and volume.
- Sewing Supplies: Gather a rotary cutter, cutting mat, ruler, pins, and scissors for accurate cutting and sewing.
- Sewing Machine: A reliable sewing machine is essential for sewing your triangles together.
- Wooden Base or Cone: To support your fabric tree, consider using a wooden base or a foam cone as the structure.
Having your materials organized will set the stage for a successful crafting experience. This preparation will help you focus on the fun parts of creating your Fabric Triangle Christmas Tree.
Choosing Your Quilt Patterns
The next step in creating your Fabric Triangle Christmas Tree is selecting the quilt patterns that will make your design unique. There are numerous options to choose from, so let’s explore some ideas:
- Traditional Patterns: Classic quilt patterns like stars, stripes, and polka dots can give your tree a timeless feel. These patterns are easy to work with and lend themselves well to a festive theme.
- Seasonal Fabrics: Look for fabrics that feature Christmas motifs, such as snowflakes, ornaments, or reindeer. Using seasonal patterns can instantly elevate the holiday spirit in your decor.
- Mixing Patterns: Don’t be afraid to mix different quilt patterns. Combining various prints can create a visually interesting tree that showcases your personality and creativity.
Selecting your patterns is a crucial step that will significantly affect the final look of your tree. Take the time to choose fabrics that resonate with you and will bring joy throughout the holiday season.
Cutting Your Fabric
With your patterns chosen, it’s time to cut your fabric into triangles. Accurate cutting is essential for achieving the best results. Follow these steps to ensure precision:
- Measuring and Marking: Use a ruler to measure and mark your fabric. For a typical triangle, you might cut 6-inch squares that can be turned into 6-inch triangles. Mark the diagonal line to guide your cutting.
- Cutting the Triangles: Using a rotary cutter, carefully cut along the marked lines to create your triangles. You’ll need multiple triangles depending on the size of your tree and the number of layers you want.
- Additional Shapes: Consider cutting larger or smaller triangles for different layers of your tree. This variation will add depth and interest to your design.
Taking your time during the cutting process will ensure that each triangle is uniform and cleanly cut. This attention to detail will pay off in the overall appearance of your finished tree.
Preparing the Triangles
Once you’ve cut your fabric into triangles, the next step is to prepare them for assembly. This process involves organizing and possibly adding any embellishments. Here’s how to do it:
- Organizing by Size and Pattern: Sort your triangles by size and fabric pattern. This organization will make it easier to assemble your tree and ensure a balanced look.
- Ironing the Triangles: Press each triangle with an iron to remove any wrinkles. This step will make your fabric easier to work with and help maintain a neat appearance in your final product.
- Adding Embellishments: If you want to add decorative elements such as beads, buttons, or embroidery, now is the time. Adding these details can enhance the uniqueness of each triangle and contribute to the overall charm of your tree.
Preparing your triangles with care will ensure a smoother assembly process later on. A well-organized workspace will keep you focused and make the project more enjoyable.
Assembling the Fabric Tree
Now that your triangles are ready, it’s time to assemble your Fabric Triangle Christmas Tree. This step is where your design truly comes to life. Follow these instructions to create your tree:
- Choosing the Base: If you’re using a foam cone or wooden base, start by securing it to your work surface. This will provide stability as you build your tree.
- Starting from the Bottom: Begin attaching your largest triangles to the base of the tree. Use pins or hot glue to secure them in place. Work your way around the base, overlapping the triangles slightly for a fuller appearance.
- Layering: Continue layering smaller triangles on top, gradually working your way up to the tip of the tree. Make sure to vary the colors and patterns for a dynamic and eye-catching design.
Assembling the tree requires patience and creativity. Take your time to position each triangle to achieve the desired effect, and don’t hesitate to make adjustments as needed.
Adding the Finishing Touches
Once your tree is fully assembled, it’s time to add those finishing touches that will make it truly special. These details can elevate your Fabric Triangle Christmas Tree to a new level. Here are some ideas:
- Creating a Tree Topper: Consider making a simple star or bow to place at the top of your tree. This can be made from fabric or even felt, adding a whimsical touch to your creation.
- Adding a Skirt: A fabric skirt at the base of the tree can tie the entire look together. You can use coordinating fabric to create a circular skirt that complements your triangle patterns.
- Personalization: Add personal touches such as family initials, holiday greetings, or small ornaments. These unique details will make your tree a cherished decoration for years to come.
Finishing your project with thoughtful touches not only enhances its aesthetic appeal but also adds a personal connection to your creation. Enjoy the process of making it uniquely yours!
Displaying Your Fabric Tree
With your Fabric Triangle Christmas Tree complete, it’s time to find the perfect spot to display it. Showcasing your creation can add warmth and cheer to your home. Here are some display ideas:
- Mantel Decor: Place your tree on the mantel above your fireplace for a charming focal point. This area is often a gathering spot during the holidays, making it an ideal location for your creation.
- Entryway Accent: Position your tree in your entryway to greet guests as they arrive. A well-placed tree can set a festive tone and create a welcoming atmosphere.
- Table Centerpiece: Use your tree as a centerpiece on your dining table or coffee table. Surround it with candles or holiday-themed decorations to enhance the festive ambiance.
Taking time to find the perfect display spot can amplify the joy your Fabric Triangle Christmas Tree brings to your home. Enjoy the warmth and cheer it adds to your holiday celebrations.
Conclusion
Creating a Fabric Triangle Christmas Tree is a rewarding project that adds a unique and personal touch to your holiday decor. Through this tutorial, you have learned how to select fabrics, cut and assemble triangles, and incorporate your own creative touches. The joy of crafting is not only in the final product but also in the process itself. Embrace your creativity and enjoy celebrating the season with your beautiful, handmade tree!


