The Flutter Quilt Pattern is a beautiful and versatile quilting design that brings a sense of movement and vibrancy to any quilt.
Whether you’re a beginner or an experienced quilter, this pattern offers endless possibilities to express creativity while creating something truly special.
In this article, we will dive deep into the details of the Flutter Quilt Pattern, explore its unique features, and provide step-by-step guidance on how to make your own.
Understanding the Flutter Quilt Pattern is essential for quilters who want to take their craft to the next level. With its distinct design and vibrant elements, the pattern makes a bold statement in any space. By the end of this article, you will be equipped with the knowledge to confidently start your own Flutter Quilt, whether you’re making it for a personal project or as a gift for a loved one.
Not only is the Flutter Quilt Pattern visually stunning, but it’s also a fantastic way to experiment with fabric combinations. The pattern’s flexibility allows quilters to incorporate different colors, textures, and styles, making each quilt a unique work of art. This pattern is perfect for quilters who enjoy both traditional and modern designs. Keep reading to learn all about this incredible pattern, how to create it, and some of the best tips for success.
1. What is the Flutter Quilt Pattern?
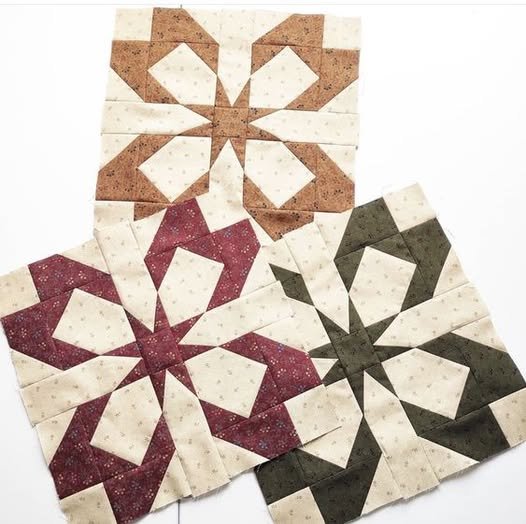
The Flutter Quilt Pattern is a modern quilt design that features a series of fluttering shapes or blocks, often resembling the delicate wings of a butterfly. The pattern’s dynamic movement and eye-catching arrangement make it a favorite among quilters who want to add a pop of excitement to their projects. At its core, the Flutter pattern uses a variety of fabric shapes that come together in a way that looks like they are in mid-motion, creating a sense of lightness and grace.
The key to the Flutter Quilt Pattern is its combination of geometric shapes and soft curves, which allow the quilt to flow naturally. This makes the pattern ideal for creating quilts that are both visually appealing and full of energy. The pattern can be tailored to suit any fabric style, whether you prefer bold, contrasting colors or a more muted, pastel palette. In any case, the quilt’s flow and movement remain consistent, ensuring a striking end result.
One of the reasons the Flutter Quilt Pattern is so popular is its versatility. It can be used to create quilts for all types of occasions, from baby quilts to bed-sized quilts, and even wall hangings. The pattern is adaptable enough to work with various types of fabrics, from solids to prints, and can be as simple or complex as you choose. Whether you want a minimalist look or a more intricate design, the Flutter Quilt Pattern can accommodate your personal style.
2. Materials You’ll Need to Make the Flutter Quilt Pattern
Before you start working on your Flutter Quilt Pattern, it’s essential to gather the right materials. Proper preparation will make the process much smoother and more enjoyable. Here’s a list of the key materials you will need:
- Fabric: Choose a variety of fabrics that complement each other. Consider using fabrics with different patterns, colors, and textures to create a dynamic look. You will need several yards of fabric, depending on the size of the quilt you’re making. For a traditional look, choose fabrics like cotton, but if you’re aiming for something modern, explore fabrics like linen or voile.
- Quilt Batting: This is the layer of insulation that sits between the quilt top and the quilt backing. Quilt batting is available in different weights and thicknesses, so choose one that matches the desired feel and warmth of your finished quilt.
- Quilt Backing Fabric: This fabric will form the backside of your quilt. You can either choose a fabric that complements the front of the quilt or go for something entirely different to create a contrast.
- Rotary Cutter and Cutting Mat: A rotary cutter will make cutting your fabric pieces more precise and efficient. Use a cutting mat to protect your work surface and ensure your fabric is cut accurately.
- Sewing Machine and Thread: You’ll need a sewing machine to stitch the quilt pieces together. Make sure to use quality quilting thread for durability and a neat finish.
- Quilting Ruler: A quilting ruler helps you measure and cut fabric pieces with precision. It’s essential for achieving clean, sharp lines and accurate angles in your quilt.
By gathering these materials before you start, you’ll have everything you need to complete your Flutter Quilt Pattern successfully. Be sure to select fabrics that resonate with your style and match the overall theme you want for your quilt.
3. Step-by-Step Guide to Making the Flutter Quilt Pattern
Now that you have your materials ready, let’s walk through the process of creating the Flutter Quilt Pattern. Here is a simple step-by-step guide to help you get started:
1. Cutting the Fabric Pieces
Begin by cutting your fabric into the required shapes and sizes. For the Flutter Quilt Pattern, you will need a variety of shapes, including triangles, squares, and rectangles. Using a rotary cutter and quilting ruler will ensure that each piece is precise. Make sure to follow the measurements specified in your pattern instructions.
2. Arrange the Fabric Pieces
Once your fabric pieces are cut, lay them out in the desired pattern. The arrangement of the blocks is crucial to the final look of the quilt. Play around with different placements until you find a design that feels balanced and harmonious. This is where you can really get creative with color and fabric combinations.
3. Stitch the Blocks Together
Start sewing the fabric pieces together to form the blocks of your Flutter Quilt Pattern. Use a ¼-inch seam allowance for consistency, and press the seams as you go to ensure a flat, neat finish. As you sew, make sure each block aligns perfectly.
4. Assemble the Quilt Top
After all the individual blocks are sewn together, arrange them in rows and stitch the rows together. Continue pressing the seams as you work to keep everything neat and even. Once all the rows are connected, you will have the top portion of your quilt ready.
5. Add the Quilt Batting and Backing
Once your quilt top is complete, it’s time to add the quilt batting and backing. Lay the quilt top on a flat surface, then place the batting on top and the quilt backing fabric underneath. Pin or baste the layers together, ensuring everything is aligned properly.
6. Quilting and Binding
Finally, sew through all three layers of the quilt to quilt it together. This can be done by hand or with a sewing machine. Once the quilt is quilted, finish it off by adding the quilt binding to the edges. This gives the quilt a clean and polished look.
4. Tips for a Successful Flutter Quilt Pattern
Creating a Flutter Quilt Pattern can be a rewarding experience, but there are a few tips that can help you achieve the best possible results:
- Use Quality Fabrics: The fabrics you choose will have a significant impact on the finished quilt’s appearance. Select high-quality fabrics to ensure your quilt is both beautiful and durable.
- Take Your Time: Quilting is a detailed process, so take your time with each step. Rushing through the project can result in mistakes, so be patient and focus on precision.
- Experiment with Color: The Flutter Quilt Pattern is an excellent opportunity to experiment with different color combinations. Don’t be afraid to mix and match bold and subtle shades to create a one-of-a-kind quilt.
- Press Your Seams: Pressing the seams as you go will keep your quilt looking neat and ensure that the blocks align correctly. It’s a small step that makes a big difference.
- Use a Quilting Foot: If you’re using a sewing machine, consider using a quilting foot to make the process easier. This foot helps to guide the fabric and creates even stitches.
- Practice Makes Perfect: If you’re new to quilting, don’t be discouraged if your first attempt isn’t perfect. The more you practice, the better you’ll become, so keep trying and improving your skills.
FAQ – Flutter Quilt Pattern
1. What is the Flutter Quilt Pattern? The Flutter Quilt Pattern is a modern quilt design that features blocks arranged in a way that resembles fluttering shapes or butterfly wings. It creates a dynamic, flowing look that adds energy to any space.
2. How difficult is the Flutter Quilt Pattern? The Flutter Quilt Pattern can be as simple or complex as you like. Beginners may find it a bit challenging but manageable with patience and practice. Experienced quilters will appreciate its versatility and the opportunity to experiment with design.
3. What fabrics are best for the Flutter Quilt Pattern? Cotton fabrics are a popular choice for the Flutter Quilt Pattern, but you can use any fabric you prefer. Consider using a mix of solids, prints, and textures to create visual interest.
4. Can I use the Flutter Quilt Pattern for a baby quilt? Yes, the Flutter Quilt Pattern works wonderfully for baby quilts. You can create a soft, colorful quilt that will make an adorable gift for any little one.
5. How do I finish the edges of a quilt? The final step in quilting is to add a quilt binding around the edges. This is done by folding the fabric over the edges, sewing it in place, and securing the corners with neat mitered seams.
Conclusion
In conclusion, the Flutter Quilt Pattern is a versatile and beautiful design that quilters of all skill levels can enjoy. Whether you’re creating a quilt for yourself or as a gift, this pattern allows for endless creativity and customization. With the materials, steps, and tips provided in this article, you can confidently create your own Flutter Quilt.
We hope this guide has been helpful in inspiring your next quilting project. Please feel free to leave a sincere opinion and any suggestions you might have. Happy quilting!