Creating a Garden Walk Quilt Block – Pattern is a delightful way to bring a touch of nature’s beauty into your quilting projects. This classic design captures the elegance and calm of a garden pathway through geometric precision and harmonious color blending. Whether you are a seasoned quilter or a beginner eager to explore new patterns, the Garden Walk Quilt Block offers a balance of simplicity and sophistication that makes it both achievable and rewarding. It’s perfect for crafting quilts, table runners, wall hangings, or even small decorative pieces.
The appeal of the Garden Walk Quilt Block – Pattern lies in its versatility and timeless charm. Inspired by garden layouts and floral symmetry, this pattern allows endless creativity with fabric choices and color arrangements. The design features clean lines and structured segments that, when combined, form a visually stunning block that resembles stepping stones or blooming petals arranged in a harmonious flow.
In this article, you’ll learn how to create the Garden Walk Quilt Block – Pattern from start to finish. We’ll go over fabric selection, cutting, assembly, and finishing touches while providing helpful tips to ensure your blocks come out neat and precise. Whether you’re quilting for fun, gifting, or selling, this guide will help you make a quilt block that looks as peaceful and beautiful as a real garden stroll.
1. Materials and Fabric Selection
Before you begin your Garden Walk Quilt Block – Pattern, it’s important to gather your materials and select the right fabrics. The choice of fabric and color will greatly influence the overall look of your quilt block, so take some time to plan your palette.
For a traditional and elegant look, consider using soft floral prints, leafy greens, and earthy tones. If you prefer a modern touch, bold contrasts like navy and coral or geometric patterns can give the Garden Walk Quilt Block a fresh and contemporary appeal. The key is to maintain a balanced mix of light, medium, and dark shades to create depth and visual interest.
You’ll need basic quilting supplies for this project: a rotary cutter, cutting mat, quilting ruler, sewing machine, and an iron. The block can be made using pre-cut fabric squares such as charm packs or jelly rolls, but you can also cut your own pieces from yardage. Make sure your fabrics are 100% cotton, as it’s the best choice for quilting due to its durability and easy handling.
Before cutting, iron your fabrics to remove wrinkles and ensure precise measurements. Quilting accuracy starts with clean, flat fabric, and a well-pressed piece will make your cuts sharper and your seams smoother.
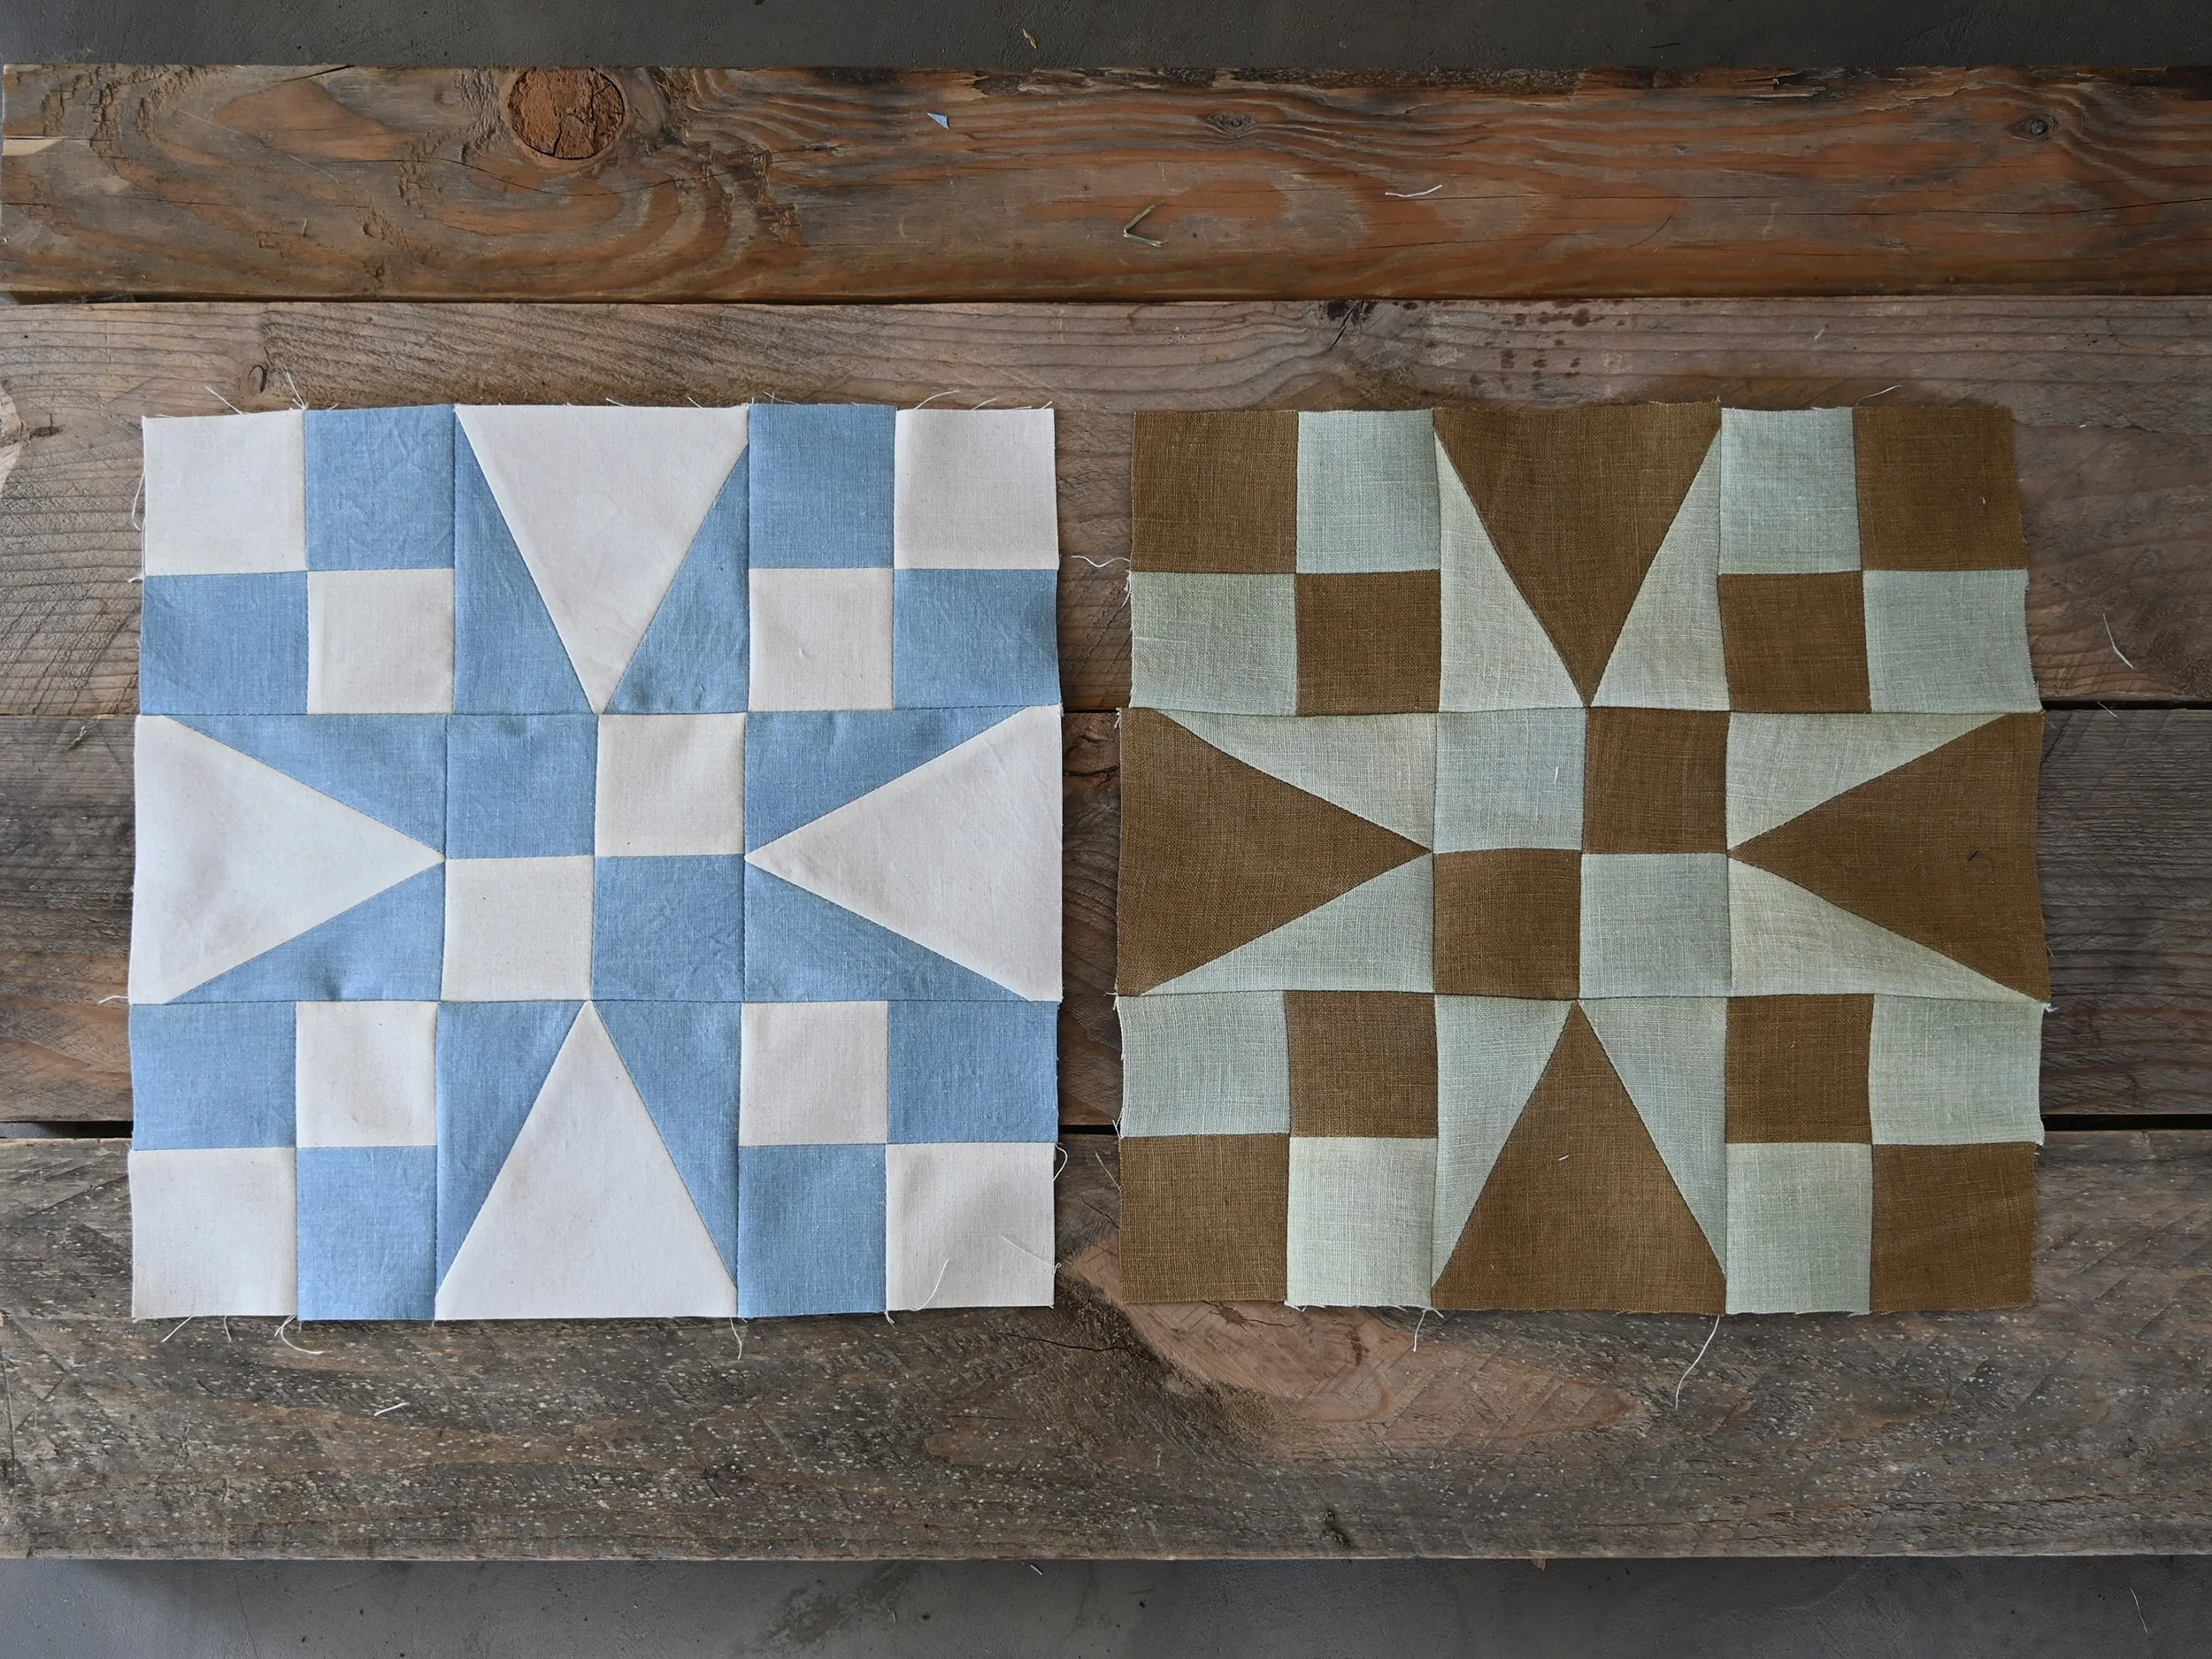
For each block, you’ll need several squares and rectangles in complementary colors. Most Garden Walk Quilt Blocks are made using a combination of half-square triangles (HSTs) and flying geese units, which form the petals and paths of the garden-inspired layout.
Once your materials are ready, organize your fabric pieces by color or pattern. Having your fabrics prearranged helps you visualize the final block and keeps your sewing process smooth and efficient.
2. Cutting and Piecing the Block
Now that your materials are ready, it’s time to begin the construction of your Garden Walk Quilt Block – Pattern. Precision in cutting and piecing is essential to ensure your block fits together perfectly and maintains clean lines.
Start by cutting your fabric according to the measurements outlined in your chosen block size. Typically, a Garden Walk Quilt Block measures between 9 and 12 inches finished, but you can adjust the size to fit your project. Use your rotary cutter and ruler to cut the squares and triangles accurately.
Next, begin assembling the half-square triangles (HSTs), which are a fundamental component of this pattern. To make HSTs, place two fabric squares right sides together, draw a diagonal line across the back of one square, and sew a seam ¼ inch on each side of the line. Cut along the line, press the seams open, and trim the units to the correct size.
After you have your HSTs ready, move on to creating the flying geese units. These add motion and direction to your Garden Walk Quilt Block, resembling stepping stones or flower petals radiating outward. Use the stitch-and-flip method for accuracy, and press seams open to avoid bulk.
Once all your units are pieced, arrange them on a flat surface in the Garden Walk layout. This design typically forms a symmetrical pattern with a strong central focus. Play with the placement until you achieve a balanced look that pleases your eye.
Finally, sew the rows together using a ¼-inch seam allowance, pressing seams after each row. Pay attention to alignment as you assemble the block—matching points precisely will give your finished Garden Walk Quilt Block a professional and polished appearance.
3. Creative Design Variations
One of the best things about the Garden Walk Quilt Block – Pattern is its flexibility. You can adapt it to suit different color themes, seasons, or personal styles, making it an ideal choice for creative experimentation.
If you prefer a soft, romantic look, use pastel shades like blush pink, lavender, and mint green. For a bold and modern design, choose contrasting colors such as black and white or navy and mustard. You can even create a scrappy version by using fabric remnants, giving your block a charming, eclectic feel.
Another variation involves changing the scale of the pattern. Try enlarging the block for a statement quilt or reducing it for small projects like placemats or coasters. The geometry of the Garden Walk Quilt Block remains appealing at any size.
You can also experiment with texture by mixing fabric types. While quilting cotton is the most common choice, adding linen or batik fabrics introduces interesting visual and tactile contrasts. Just make sure all fabrics are prewashed to avoid shrinkage differences later.
For an artistic touch, consider adding embroidered details or hand quilting along the seams. This can highlight the structure of the Garden Walk Quilt Block and bring extra character to your finished piece.
Lastly, if you’re planning a full quilt, arrange multiple Garden Walk blocks in alternating color schemes or rotate some of the blocks to create a dynamic, garden-path effect. The possibilities are endless, allowing you to express your creativity freely.
4. Finishing and Assembly Tips
Once you’ve completed your Garden Walk Quilt Block – Pattern, it’s time to focus on the finishing touches that will make your work shine. This includes assembling multiple blocks into a quilt, adding borders, and binding.
When joining multiple blocks, make sure all your seams align perfectly. Use pins or clips to keep rows in place while sewing. Consistent seam allowances are key to ensuring that your quilt top lays flat and looks professional.
Pressing is another important step. Always press your seams after sewing to set the stitches and reduce bulk. A well-pressed quilt block looks cleaner and is easier to quilt later.
If you want to add borders, choose fabrics that complement or contrast with your block colors. Borders can frame your quilt beautifully, giving it structure and definition.
Once your quilt top is complete, layer it with batting and backing fabric. Baste the layers together using pins or spray adhesive to prevent shifting during quilting. Then, quilt as desired—whether by hand or machine. Simple straight-line quilting works well for geometric blocks like the Garden Walk Quilt Block, enhancing the pattern’s symmetry.
Finish your quilt with a clean binding around the edges. Choose a binding fabric that ties the color scheme together, and hand-stitch or machine-sew it in place for a polished finish. Congratulations—you’ve completed your Garden Walk Quilt Block – Pattern masterpiece!
FAQ – Garden Walk Quilt Block – Pattern
1. Is the Garden Walk Quilt Block suitable for beginners?
Yes! The Garden Walk Quilt Block – Pattern is beginner-friendly, as it mainly involves basic shapes like squares and triangles. It’s a great way to practice accuracy and color coordination.
2. What size should my block be?
You can adjust the size depending on your project. Common sizes range from 9 to 12 inches finished, but the block can be resized easily by changing the fabric measurements.
3. How do I ensure my seams align perfectly?
Use a consistent ¼-inch seam allowance, press seams carefully, and pin intersections before sewing. This helps maintain accuracy throughout your block.
4. Can I use scraps for this pattern?
Definitely! The Garden Walk Quilt Block is ideal for using up fabric scraps. Mixing different prints and colors adds character and uniqueness to your design.
5. What is the best quilting technique for finishing?
Straight-line quilting or diagonal quilting enhances the geometric beauty of this block. However, free-motion quilting can also add a beautiful textured finish.
Conclusion
The Garden Walk Quilt Block – Pattern is a timeless design that combines geometry, color, and creativity in a way that never goes out of style. Whether you’re quilting for relaxation, home décor, or as a heartfelt gift, this pattern provides a satisfying and inspiring project from start to finish. With the right fabrics, attention to detail, and a bit of patience, your quilt blocks will come together beautifully—like a walk through a serene, blooming garden.
If you enjoyed this guide, please share your honest opinions and suggestions in the comments below. We’d love to hear about your experiences with the Garden Walk Quilt Block – Pattern and see how you’ve brought your own creative touch to this classic quilting design!