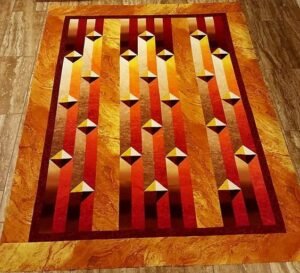
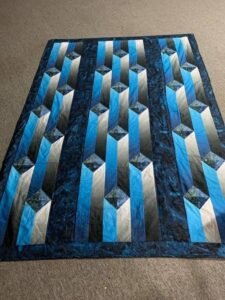
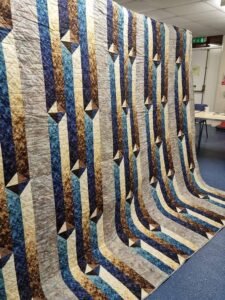
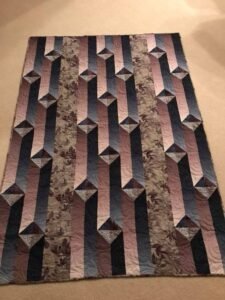
Quilting is a timeless craft that offers endless possibilities for creativity, and the Gentlemen’s Agreement Quilt is a perfect example of a classic pattern that combines elegance and simplicity.
This traditional quilt pattern is characterized by sharp, geometric shapes and a clean, balanced design, making it a versatile option for both modern and vintage styles.
In this step-by-step tutorial, we’ll walk you through how to create your own Gentlemen’s Agreement Quilt, from choosing fabrics and cutting pieces to assembling and finishing your quilt.

Choosing Your Materials for the Gentlemen’s Agreement Quilt
Before you begin, gathering the right materials is key to a successful quilting project. The Gentlemen’s Agreement Quilt is often made with a combination of solid colors and subtle prints to highlight the geometric design, but you can choose your own fabric palette based on your personal style.
- Fabric Selection: For this quilt, you’ll need three contrasting fabrics: one for the background, one for the main pattern, and one for the accents. Traditional color combinations include neutral tones like beige or gray for the background, with dark and medium tones for the pattern pieces. You’ll need around 3 yards of background fabric, 2 yards for the main pattern, and 1 yard for the accent fabric.
- Quilting Tools: In addition to fabric, you’ll need basic quilting supplies such as a rotary cutter, a cutting mat, a quilting ruler, and pins. These tools will help you achieve clean, precise cuts and ensure that your quilt pieces come together smoothly.
- Backing and Batting: Don’t forget to select a backing fabric and batting for your quilt. You’ll need approximately 3.5 yards of backing fabric and enough batting to cover the finished size of your quilt. The batting will add warmth and softness, while the backing fabric should complement the colors on the front.
By carefully selecting your materials, you’ll set the foundation for a beautiful quilt that’s both functional and visually striking. Once you’ve gathered everything, it’s time to start cutting and assembling your quilt pieces.
Cutting Your Fabric – Gentlemen’s Agreement Quilt Block
The Gentlemen’s Agreement Quilt is made up of repeated blocks that feature sharp angles and clean lines. Accurate cutting is crucial for this pattern, as it ensures that the pieces will fit together seamlessly. Here’s how to cut your fabric for the quilt blocks.
- Cutting the Background Fabric: Begin by cutting your background fabric into 5-inch squares. You’ll need a total of 48 squares for a standard-sized quilt (around 60 x 72 inches). This will form the base for each quilt block and provide a neutral canvas that allows the darker fabrics to stand out.
- Cutting the Main Pattern Fabric: Next, cut your main pattern fabric into 5-inch squares as well. You’ll need 24 squares. These will be paired with the background fabric to create half-square triangles, which form the central design of the quilt pattern.
- Cutting the Accent Fabric: Finally, cut the accent fabric into 2.5-inch wide strips. You’ll need enough strips to border each block and to create sashing between the blocks. These accents will provide contrast and help define the overall layout of the quilt.
Carefully measuring and cutting your fabric is one of the most important steps in any quilting project. Taking your time during this stage will make assembling the quilt much easier later on.

Sewing the Half-Square Triangles
The half-square triangle (HST) is a fundamental component of the Gentlemen’s Agreement Quilt. This versatile shape is used to create the geometric pattern that defines the quilt’s classic look. Here’s how to sew the HSTs for your quilt blocks.
- Pairing Your Squares: Take one square of background fabric and one square of the main pattern fabric. Place them right sides together, aligning the edges. Using a pencil or fabric marker, draw a diagonal line from one corner to the opposite corner on the wrong side of the fabric.
- Sewing the Diagonal: Sew a seam 1/4 inch away from both sides of the diagonal line. This creates two parallel seams. Once you’ve sewn along both sides, use your rotary cutter to cut along the drawn diagonal line, splitting the square into two triangles.
- Pressing the Seams: Open the triangles and press the seam allowances toward the darker fabric. This will give you two half-square triangles from each pair of fabric squares. Repeat this process until you’ve created enough HSTs for your quilt. For a standard-sized quilt, you’ll need a total of 48 HSTs.
The half-square triangles are the building blocks of the Gentlemen’s Agreement Quilt. Their crisp lines and sharp angles are what give the pattern its distinctive look, so take care to sew and press them accurately.
Assembling the Quilt Blocks
Now that your half-square triangles are complete, it’s time to assemble them into quilt blocks. Each block in the Gentlemen’s Agreement Quilt is composed of four HST units, arranged to create a diamond or star shape, depending on your chosen layout.
- Block Layout: Lay out four HSTs in a square formation, making sure the dark triangles create a central diamond shape. The lighter triangles should form a frame around the dark diamond. Play around with different orientations until you’re happy with the look.
- Sewing the Block: Sew the HSTs together in pairs, using a 1/4-inch seam allowance. Once you have two pairs, press the seams and sew the pairs together to complete the block. Repeat this process for all of your blocks.
- Adding the Accent Strips: After completing your blocks, it’s time to add the accent strips. Cut your 2.5-inch wide accent strips to match the length of each side of the quilt block. Sew the strips to the sides of each block, creating a border around the design.
Once all your blocks are assembled and bordered, you’ll have the core components of your quilt pattern ready for layout and assembly.

Arranging and Joining the Quilt Blocks
Arranging the blocks and joining them together is where your Gentlemen’s Agreement Quilt really comes to life. The layout you choose can significantly impact the overall design, so take time to experiment with different arrangements.
- Block Placement: Lay out your blocks in rows, alternating the direction of the diamond shapes for a dynamic, interlocking design. You can also create a uniform layout with all the diamonds aligned in the same direction for a more structured look.
- Adding Sashing: To give the quilt a more defined and organized appearance, add sashing strips between the blocks. Cut 2.5-inch wide strips of your accent fabric and sew them between the blocks, both vertically and horizontally. This will separate each block and add visual interest.
- Sewing the Rows Together: Once you’ve arranged your blocks and added the sashing, sew the rows together to complete the quilt top. Press the seams as you go to ensure a smooth and even finish.
By carefully arranging and joining your blocks, you’ll create a cohesive design that showcases the geometric beauty of the quilt pattern.
Quilting and Finishing the Gentlemen’s Agreement Quilt
With the quilt top assembled, it’s time to move on to quilting and finishing. This stage involves layering the quilt top with batting and backing fabric, then securing everything with quilting stitches.
- Layering the Quilt: Begin by laying out your backing fabric, wrong side up, and smoothing out any wrinkles. Place the batting on top, followed by the quilt top, right side up. Pin or baste the layers together to prevent shifting during quilting.
- Quilting the Layers: There are several quilting methods to choose from, depending on the look you want. Straight-line quilting, echoing the lines of the quilt blocks, is a popular choice for the Gentlemen’s Agreement Quilt. You can also opt for free-motion quilting to add intricate patterns and texture.
- Binding the Quilt: After quilting, trim any excess batting and backing fabric from the edges. To finish the quilt, cut binding strips from your accent fabric, fold them in half lengthwise, and sew them around the edges of the quilt. This will give the quilt a clean, polished edge.
Quilting and binding are the final steps in completing your Gentlemen’s Agreement Quilt, transforming it from a collection of fabric pieces into a functional and beautiful finished product.
Customizing Your Gentlemen’s Agreement Quilt
One of the best things about quilting is the ability to customize your design to suit your personal taste. The Gentlemen’s Agreement Quilt is no exception, offering plenty of opportunities for creativity.
- Experiment with Colors: While traditional versions of the quilt use muted tones, feel free to experiment with bright colors or bold prints for a more modern look. The contrast between the dark and light fabrics is what makes the design stand out.
- Adjust the Size: The standard Gentlemen’s Agreement Quilt is around 60 x 72 inches, but you can easily adjust the size by adding or subtracting blocks. Make a larger quilt by adding more rows or create a smaller lap quilt by reducing the number of blocks.
- Add Personalized Embellishments: Consider adding personalized touches such as embroidered initials, decorative quilting stitches, or even a border of appliqué. These customizations can turn your quilt into a one-of-a-kind keepsake.
By customizing your quilt, you’ll create a piece that’s not only beautiful but also uniquely yours.

Conclusion
The Gentlemen’s Agreement Quilt is a classic quilt pattern that offers both simplicity and sophistication. By following this step-by-step tutorial, you can create your own version of this timeless quilt, from selecting the perfect fabrics to cutting, sewing, and finishing.
Whether you’re an experienced quilter or a beginner looking for a new challenge, this pattern is an excellent project that results in a striking, elegant quilt.
With endless possibilities for customization, the Gentlemen’s Agreement Quilt is a wonderful addition to any home or a thoughtful, handmade gift. So grab your supplies and start stitching today!

