The Great Granny Pincushion Quilt – Pattern is a fun and colorful project that can add both beauty and functionality to your sewing space.
Whether you’re an experienced quilter or just starting out, this pattern offers an enjoyable challenge and a rewarding result.
Combining the charm of traditional granny squares with a useful pincushion design, this quilt is both practical and a delight to make.
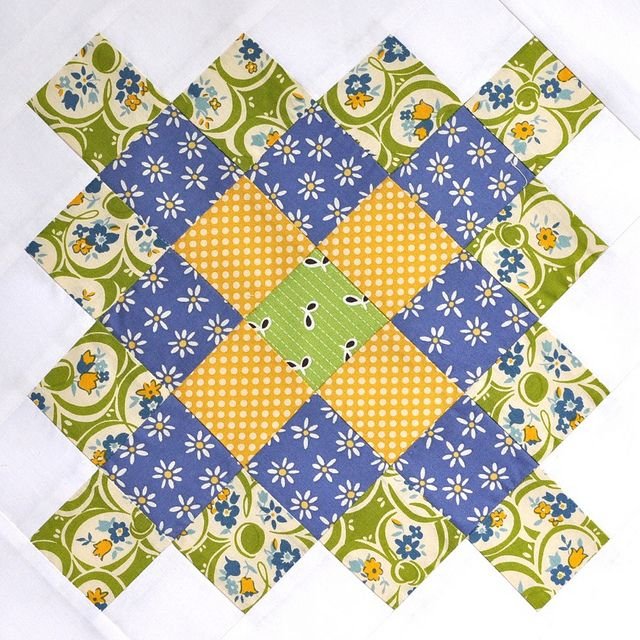
This quilt pattern is perfect for those who love mixing fabrics, playing with colors, and showcasing their quilting skills. It’s an excellent way to recycle fabric scraps, making it both an eco-friendly and cost-effective project. The finished Great Granny Pincushion Quilt serves as a perfect decorative piece for your sewing room, while also being an ideal pincushion to keep your sewing supplies organized.
In this article, we’ll walk you through the process of making your very own Great Granny Pincushion Quilt, from gathering the materials to assembling the quilt blocks and adding the finishing touches. With this detailed guide, you’ll have a beautiful quilt to showcase in no time.
1. Materials You Need for the Great Granny Pincushion Quilt
Before diving into the Great Granny Pincushion Quilt – Pattern, it’s essential to gather all the necessary materials for the project. With the right tools, you’ll find the quilting process more enjoyable and efficient. Below is a list of the materials required for making this quilt:
- Fabric: For the granny square design, you will need a variety of fabric squares in different colors and patterns. Choose a mix of light, medium, and dark fabrics to create depth and contrast. Fabric from your scrap bin is perfect for this, as it will allow you to experiment with various patterns.
- Backing Fabric: A solid piece of fabric for the quilt’s backing is essential. Select a fabric that complements your granny square blocks and adds to the overall aesthetic of the quilt.
- Batting: Quilting batting is the layer of padding that adds thickness to the quilt. Choose a lightweight or medium-weight batting depending on how thick you want your quilt to be. Cotton batting is a popular choice for its softness and breathability.
- Thread: You’ll need quilting thread to sew the blocks together. A high-quality cotton thread that matches your fabric colors is ideal for a neat and durable finish.
- Needles: Use quilting needles for piecing together the fabric blocks. These needles are designed to easily stitch through multiple layers of fabric and batting.
- Pins and Pincushion: For keeping your fabric pieces in place as you sew, pins and a pincushion are essential. The pincushion can also be a part of the quilt design, which adds an extra layer of fun to the project.
With these materials in hand, you’re all set to start the Great Granny Pincushion Quilt project and create something beautiful and functional!
2. Step-by-Step Instructions for Making the Great Granny Pincushion Quilt
Now that you have all your materials ready, it’s time to begin the quilt-making process. Below, you will find step-by-step instructions to help guide you through creating the Great Granny Pincushion Quilt – Pattern:
- Create the Granny Squares: Begin by cutting your fabric into squares of the appropriate size (usually 3 to 5 inches). Each granny square should consist of three to four colors, with each color creating a distinct ring around the center. Assemble your granny squares using a basic crochet or quilt-as-you-go method, ensuring each square is uniform in size.
- Arrange the Squares: Once you have several granny squares completed, lay them out in a pleasing arrangement. Play around with color placement until you are happy with the balance of light and dark fabrics. This step is crucial to ensuring your quilt has a harmonious design.
- Sew the Granny Squares Together: Start by sewing the squares together in rows. Use a quarter-inch seam allowance and press the seams flat as you go. When joining rows, ensure that the seams line up properly to create a neat, even finish.
- Prepare the Quilt Top: After all the rows are sewn together, carefully press the quilt top to eliminate any wrinkles. This is the moment where you can make any final adjustments to the placement of your squares to ensure that the overall design looks balanced and well-organized.
- Add the Batting: Lay your quilt top on top of the batting. Cut the batting to the size of the quilt top, ensuring there is a bit of extra around the edges. The batting will provide the softness and texture that makes the quilt cozy and comfortable.
- Attach the Backing: Now, lay your backing fabric over the quilt top and batting, with the right sides of the fabric facing out. Pin the layers together to secure them before you start sewing the quilt sandwich. Begin sewing around the edges, leaving a small seam allowance. Once completed, the quilt will be ready for binding.
By following these steps, you’ll be on your way to creating a stunning Great Granny Pincushion Quilt that you can be proud of!
3. Adding the Pincushion Element to Your Quilt
The unique feature of the Great Granny Pincushion Quilt – Pattern is the addition of a pincushion as part of the quilt. This makes it both practical and decorative. Here’s how to incorporate the pincushion into your quilt design:
- Make a Pincushion Block: To add a pincushion to the quilt, create a small, separate block that can be attached to the quilt. This can be a small square or circle made from fabric scraps, and you can stitch it with a button or embroidery to create a focal point.
- Position the Pincushion: Decide where to place your pincushion block within the quilt layout. The pincushion can be placed in a corner or along the edge of the quilt for easy access when sewing.
- Sew the Pincushion: Once you’ve attached the pincushion to the quilt, sew it down securely, ensuring that it stays in place. You may also choose to add extra padding to the pincushion to make it more functional and supportive.
- Personalize the Pincushion: Add your personal touch to the pincushion by embellishing it with decorative stitches, beads, or even a small patch of lace. This will make your quilt even more unique and give it that handcrafted charm.
- Use the Pincushion: Once the quilt is finished, you can start using the pincushion for its intended purpose. It’s the perfect tool for holding needles, pins, and other sewing accessories, making your quilting process more efficient and organized.
- Final Touches: To complete your Great Granny Pincushion Quilt, add any final touches such as quilting the layers together or adding a decorative border to the quilt. Once finished, you will have a beautiful and functional quilt that includes a handy pincushion right at your fingertips.
Incorporating the pincushion element into your quilt makes the Great Granny Pincushion Quilt not only a beautiful piece but also a useful tool for your sewing space.
4. Tips for Making the Perfect Great Granny Pincushion Quilt
While making the Great Granny Pincushion Quilt – Pattern, it’s important to keep a few tips in mind to ensure your quilt turns out just as you envision:
- Choose Complementary Fabrics: Selecting fabrics that complement each other is key to creating a harmonious quilt. Choose a mix of solids and prints that blend well together to create a balanced look.
- Press as You Go: Pressing your seams as you sew is an essential step that will give your quilt a professional appearance. It ensures that the seams are flat and smooth, helping the quilt top lie evenly.
- Use Quality Batting: The batting you choose can affect the quilt’s feel and durability. Opt for a high-quality cotton or polyester blend batting for a soft yet durable finish.
- Take Your Time with the Pincushion: Don’t rush the pincushion element. Take time to make it as neat and functional as possible. Add extra stuffing if needed, and make sure it’s securely attached to the quilt.
- Use a Quilting Guide: When quilting the layers together, use a quilting guide or a walking foot to help ensure even stitching. This will give your quilt a professional finish.
- Personalize Your Quilt: Don’t be afraid to add personal touches, such as embroidery or applique. The Great Granny Pincushion Quilt is a great way to express your creativity and make the quilt truly your own.
FAQ about the Great Granny Pincushion Quilt – Pattern
Q1: Is the Great Granny Pincushion Quilt – Pattern suitable for beginners? Yes, this pattern is beginner-friendly as long as you are comfortable with basic quilting techniques such as piecing and sewing simple blocks.
Q2: Can I use different fabrics for the granny squares? Absolutely! Feel free to mix and match fabrics in any way you like. The variety of fabrics will give the quilt a unique and personalized look.
Q3: How do I make my pincushion block more decorative? You can embellish your pincushion block with embroidery, buttons, or even small patches of lace to give it a special touch.
Q4: What type of batting should I use? Cotton or polyester batting works well for this quilt. Choose a medium-weight batting for a balanced look and feel.
Q5: Can I adjust the size of the quilt? Yes, you can adjust the size by adding or removing granny squares. Just make sure to maintain a consistent number of blocks and rows for a cohesive design.
Conclusion
The Great Granny Pincushion Quilt – Pattern is a charming and functional project that brings together the beauty of traditional quilting with a modern twist. By following the steps and incorporating your creativity, you can create a stunning quilt that will enhance your sewing space. Whether you’re a beginner or an experienced quilter, this pattern is a fun way to improve your skills and make something special. Share your thoughts and ideas in the comments below, and we hope you enjoy this creative quilting journey!