If you love quilting and want to create something filled with warmth, love, and creativity, the Hearts Quilt Block – Pattern is the perfect project. This timeless quilt design features beautiful heart-shaped blocks that symbolize affection, care, and passion—making it ideal for Valentine’s Day projects, wedding gifts, baby quilts, or simply to add a touch of love to your home decor.
The charm of the Hearts Quilt Block – Pattern lies in its versatility. You can create it using bold colors for a modern aesthetic or soft pastels for a vintage-inspired look. It’s a beginner-friendly pattern that teaches essential quilting techniques such as piecing, pressing, and block assembly, while still being engaging for experienced quilters who want to play with color combinations and layouts.
In this article, we’ll explore everything you need to know about creating the Hearts Quilt Block – Pattern—from materials and step-by-step instructions to creative variations and finishing tips. Whether you’re crafting a single heart block for a wall hanging or a full quilt made of hearts, this project will fill your sewing time with joy.
1. Materials and Preparation for the Hearts Quilt Block – Pattern
Before diving into your Hearts Quilt Block – Pattern, it’s essential to gather the right materials. This will help ensure accuracy and make the process smoother and more enjoyable.
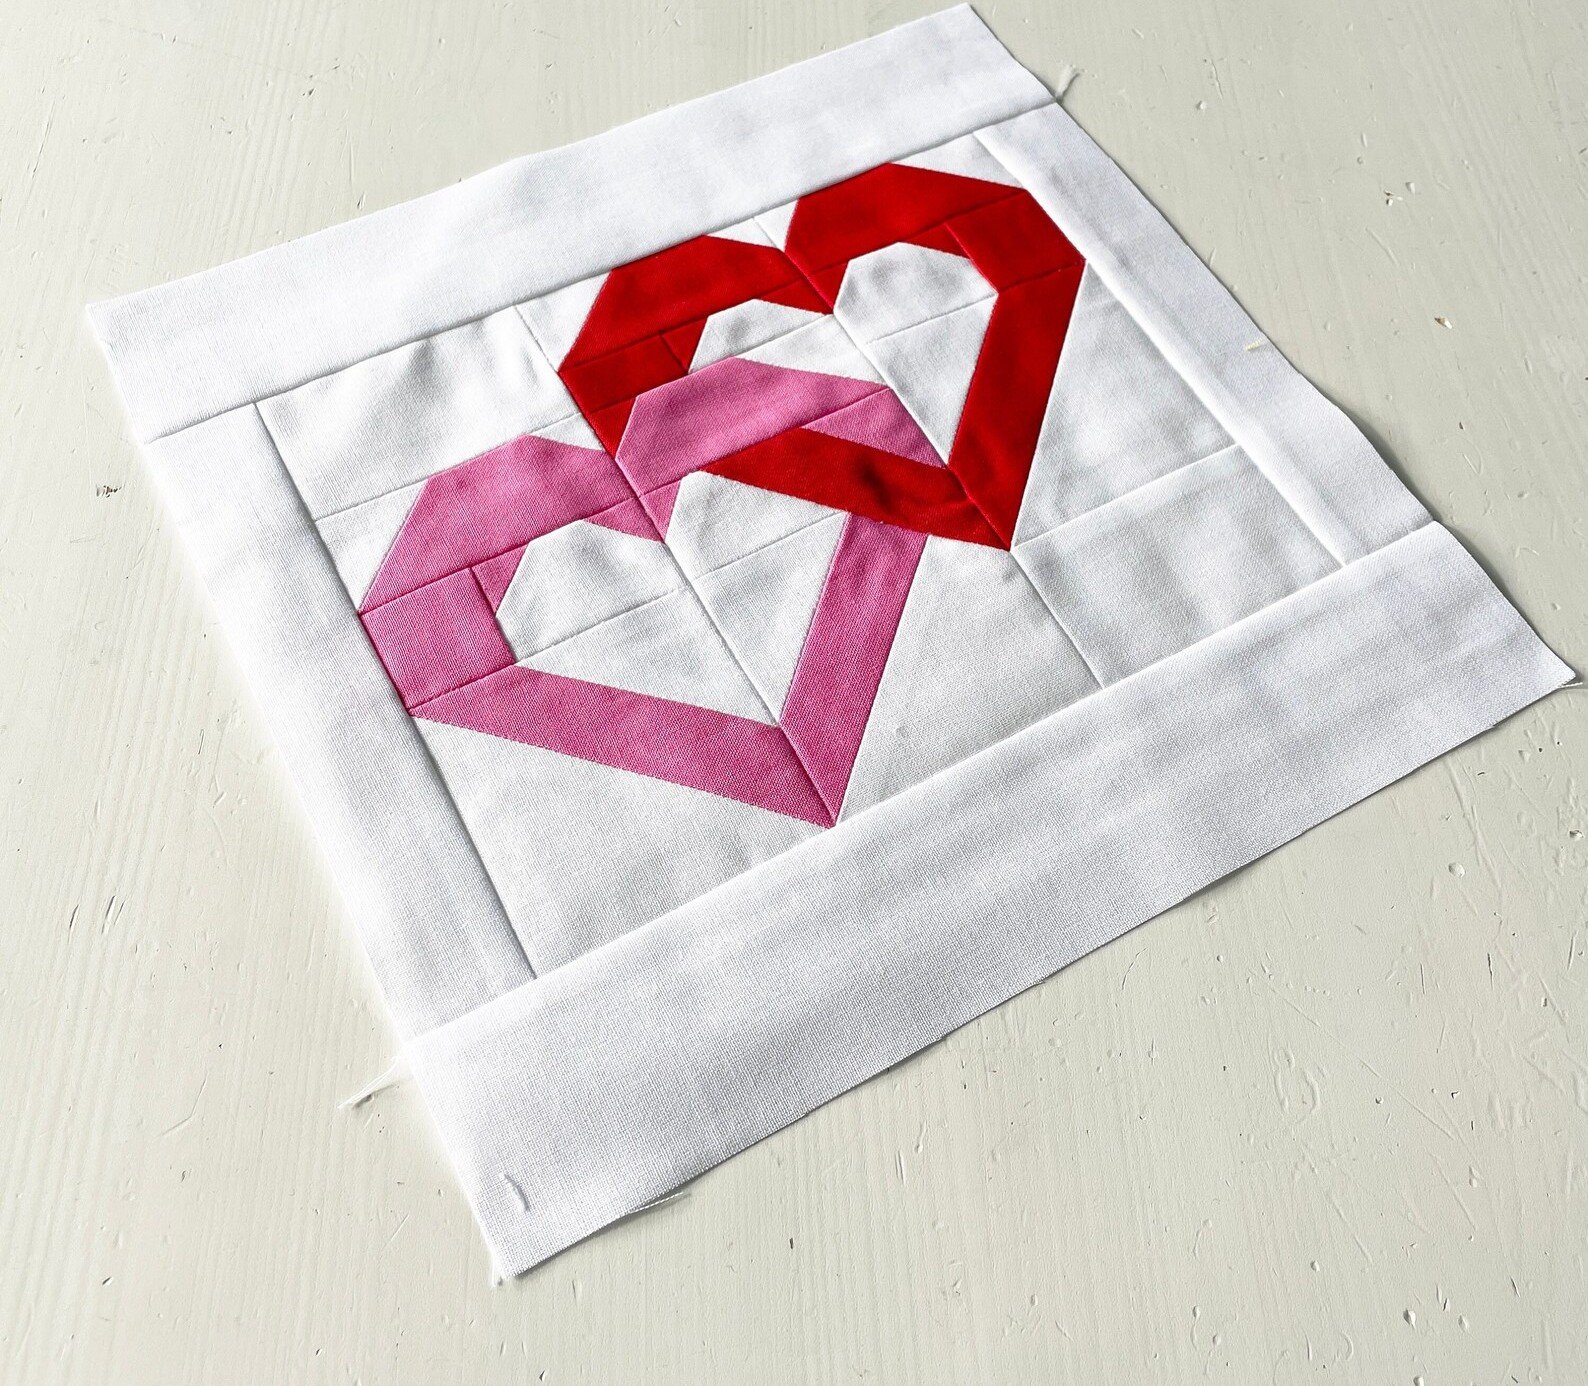
To start, you’ll need quality quilting cotton in at least two colors: one for the hearts and another for the background. Choose fabrics that contrast well so the heart shape stands out. Traditional red, pink, or white combinations work beautifully, but you can experiment with other color palettes such as navy and cream, teal and gray, or even rainbow hues for a vibrant twist.
You’ll also need basic quilting tools: a rotary cutter, cutting mat, quilting ruler, sewing machine, thread, and an iron. A ¼-inch seam foot can be helpful for maintaining consistent seam allowances throughout your project. Accurate cutting and stitching are key to achieving perfectly shaped hearts.
Pre-washing your fabric before cutting is recommended, as this prevents shrinkage and helps maintain color vibrancy. After washing, press your fabric with an iron to remove wrinkles and make cutting easier.
Next, prepare your pattern pieces. You can find printable templates for the Hearts Quilt Block – Pattern online or create your own using graph paper. Most heart quilt blocks are built from half-square triangles and rectangles, so precision in cutting these shapes is vital for a clean final look.
Once your materials are ready, lay out your fabric pieces to visualize how the colors will blend together. This step ensures that you’re happy with your color balance before you begin sewing.
2. Step-by-Step Instructions for Sewing the Hearts Quilt Block – Pattern
Now that your materials are prepared, it’s time to sew your Hearts Quilt Block – Pattern. The process is straightforward, and once you make one block, you’ll find it easy to create more for a full quilt.
Start by cutting out your fabric pieces according to the measurements of your pattern. A common block size is 12 inches square, but you can adjust based on your project. Each block typically consists of squares and rectangles that, when sewn together, form the heart shape.
To form the curved top of the heart, you’ll use half-square triangles (HSTs). Pair a background square with a heart-colored square, draw a diagonal line on the back of one, sew ¼ inch on each side of the line, and cut along the center. Press the seams open and trim the pieces to the correct size. Repeat this for all the HSTs you need.
Arrange your cut pieces on your workspace to create the heart shape. You’ll notice how the HSTs form the rounded top while rectangles and squares make the pointed bottom. Make sure everything is oriented correctly before sewing.
Sew the pieces together row by row, pressing each seam flat as you go. Then, join the rows together carefully, matching your seam points to maintain the heart shape. Press the final block flat once more when finished.
Your Hearts Quilt Block – Pattern is now complete! You can stop here and frame your block as a mini quilt, or continue making additional blocks to create a larger project. Repeat the process using different fabrics to make a colorful patchwork of hearts that reflects your personality.
3. Creative Variations for the Hearts Quilt Block – Pattern
One of the best things about the Hearts Quilt Block – Pattern is how adaptable it is. You can customize the design to fit any occasion, color scheme, or style preference.
For a romantic quilt, use shades of red, pink, and white. These classic Valentine’s Day colors instantly create a warm and loving vibe. You can alternate heart colors or even make gradient hearts that transition from dark to light tones.
If you prefer a modern aesthetic, go for minimalist colors like black, gray, and cream. Add metallic thread or gold accents for an elegant, contemporary look. Alternatively, you can make the hearts in bold jewel tones on a white background for a striking contrast.
The Hearts Quilt Block – Pattern is also perfect for scrap quilting. Gather fabric leftovers from previous projects and mix them together to create a vibrant mosaic of hearts. Each block will have its own personality, resulting in a quilt full of charm and memories.
You can also experiment with different block sizes. Larger hearts are ideal for quilts, while smaller ones work well for table runners, wall hangings, or pillow covers. You can even make a series of mini hearts to decorate tote bags or baby blankets.
For added creativity, try appliquéing your heart shapes onto a background fabric instead of piecing them. This technique allows for more fluid curves and gives your quilt a softer, handcrafted look. Add decorative stitching around the edges for extra flair.
Finally, consider using embroidery or embellishments to personalize your hearts. You can stitch names, initials, or small motifs inside each heart, making your project even more meaningful.
4. Assembling and Finishing Your Hearts Quilt Project
Once you’ve completed your Hearts Quilt Block – Pattern pieces, it’s time to assemble them into a full quilt or wall hanging. Proper assembly and finishing will give your project a professional touch.
Begin by arranging your completed heart blocks on a flat surface. Experiment with the layout until you find a pattern that looks balanced and cohesive. You can align the hearts in neat rows, alternate directions, or create a scattered design for a whimsical effect.
Sew the blocks together, row by row, pressing the seams open as you go. Be sure to maintain consistent seam allowances so that the blocks align perfectly. Once all the blocks are joined, add sashing (strips of fabric between the blocks) if desired. This helps separate the designs and gives your quilt a clean, framed look.
Next, add borders around the edges of the quilt top. Borders not only enhance the design but also help square up the quilt. Choose a complementary color or print that ties your heart blocks together visually.
Once the quilt top is finished, layer it with batting and backing fabric. Baste the layers together using safety pins or temporary spray adhesive to keep them from shifting. Then, quilt through all layers by sewing straight lines, diagonal grids, or free-motion patterns.
Finally, bind the edges of your quilt with binding strips. Fold them neatly around the edges and stitch in place to give your quilt a polished finish. After binding, your Hearts Quilt Block – Pattern project is ready to be displayed, gifted, or cherished for years to come.
This beautiful project not only showcases your sewing skills but also spreads love and positivity through handmade craftsmanship.
FAQ – Hearts Quilt Block – Pattern
1. Is the Hearts Quilt Block – Pattern suitable for beginners?
Yes! It’s an excellent beginner project because it uses basic shapes like squares and half-square triangles.
2. What size should each heart block be?
You can make your blocks any size you like, but 12-inch squares are a common choice for quilts.
3. Can I make this quilt by hand instead of with a machine?
Absolutely! Hand sewing is a wonderful way to slow down and enjoy the process—it just takes a bit longer.
4. How do I make sure my heart shapes are symmetrical?
Careful cutting and accurate seam allowances are key. Using a quilting ruler and pressing seams helps maintain symmetry.
5. What colors work best for this quilt pattern?
Traditional reds and pinks are classic, but modern color schemes like blue and gray or rainbow designs also look stunning.
Conclusion
The Hearts Quilt Block – Pattern is more than just a sewing project—it’s a heartfelt expression of creativity, love, and craftsmanship. Whether you’re quilting a gift for someone special or creating a cozy accent for your home, each heart block you make carries a personal touch that will be treasured for years.
By following the steps and customization ideas shared in this article, you can design a quilt that’s both meaningful and visually stunning. Remember, quilting is as much about the process as it is about the final result—so enjoy every stitch along the way.
We’d love to hear your honest opinions and suggestions about this Hearts Quilt Block – Pattern! Share your experiences in the comments and let us know how your quilt turned out. Happy quilting!