The Herringbone Braid Quilt Block – Tutorial is your gateway to creating one of the most visually stunning and dynamic designs in the world of quilting. This pattern, often referred to as a French braid, mimics the intricate weave of a traditional braid or the skeletal structure of a herring fish, offering a sense of continuous movement and flow that simple squares just can’t replicate. Whether you are looking to create a striking table runner, a bold border, or a full-scale masterpiece, mastering the Herringbone Braid Quilt Block – Tutorial will elevate your sewing projects from standard to professional-grade craftsmanship.
Quilting is an art form that thrives on precision and color play, and the Herringbone Braid Quilt Block – Tutorial is the perfect canvas for experimenting with both. By using long strips of fabric sewn at specific angles, you create a 3D effect that draws the eye upward and outward, making it a favorite for those who love modern geometric aesthetics. While it might look intimidatingly complex at first glance, the secret lies in the repetitive, rhythmic nature of the construction, which becomes quite meditative once you find your “sewing groove.”
In this comprehensive guide, we are going to dive deep into every aspect of the Herringbone Braid Quilt Block – Tutorial. We will cover everything from the initial fabric selection—which is crucial for making the braid “pop”—to the final trimming techniques that ensure your block stays perfectly square and flat. This Herringbone Braid Quilt Block – Tutorial is designed to be accessible for intermediate quilters while providing enough technical depth to satisfy seasoned pros looking to refine their strip piecing skills and seam allowance accuracy.
1. Selecting Fabrics and Preparing Your Materials
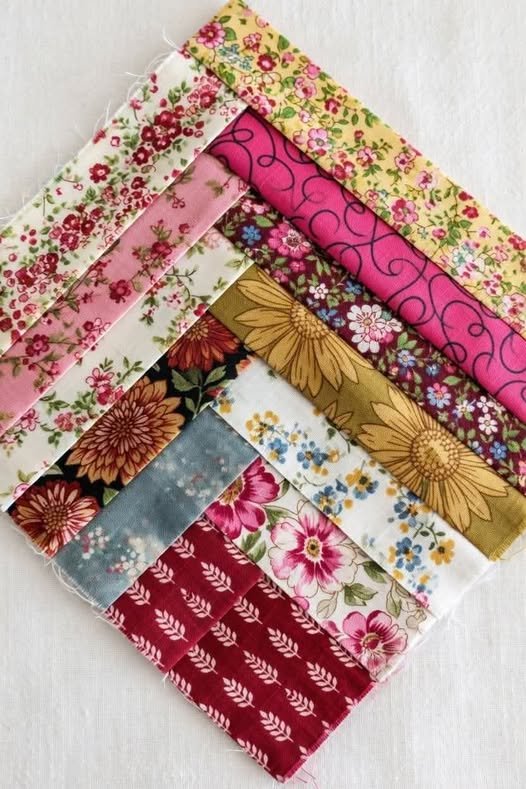
The soul of a successful Herringbone Braid Quilt Block – Tutorial lies in the contrast between your chosen fabrics. To make the “braid” visible, you should select a variety of prints or solids that have different values—light, medium, and dark. High-contrast fabrics ensure that each “wing” of the braid stands out against the next, preventing the design from looking like a muddy blur of color.
Before you touch your sewing machine, you must focus on fabric preparation. Always start by pressing your fabric with a good steam iron to remove any wrinkles or distortions. Since the Herringbone Braid Quilt Block – Tutorial relies on straight lines and consistent widths, even a small fold in the fabric can throw off the entire alignment of the braid as it grows.
Standard measurements for a classic braid involve cutting strips that are typically 2.5 inches wide, making this an excellent project for using Jelly Rolls or scrap fabric. In this Herringbone Braid Quilt Block – Tutorial, we recommend cutting your strips to a consistent length—usually between 5 and 7 inches—depending on how wide you want the finished braid column to be. Consistency is the key to a professional finish.
Don’t forget the starter square. Every braid needs a foundation, usually a small square of fabric (often 2.5″ x 2.5″) placed at the very top or bottom. This square acts as the anchor for the first two strips. Choosing a neutral solid color for the starter square can help ground the design, allowing the colorful “braid” pieces to take center stage throughout the Herringbone Braid Quilt Block – Tutorial.
Organization is your best friend when working through a Herringbone Braid Quilt Block – Tutorial. Lay out your strips in the order you plan to sew them. Many quilters prefer a gradient or ombré effect, moving from light to dark, while others prefer a “scrappy” look. By pre-sorting your strips, you avoid the frustration of realizing you used two identical prints right next to each other.
Lastly, ensure you have a sharp rotary cutter and a high-quality quilting ruler. Precision cutting is the silent partner of the Herringbone Braid Quilt Block – Tutorial. If your strips vary even by an eighth of an inch, the braid will begin to lean or curve, making it difficult to join multiple blocks together later in the assembly process.
2. Mastering the Step-by-Step Construction Process
To begin the actual sewing portion of the Herringbone Braid Quilt Block – Tutorial, take your starter square and your first fabric strip. Align the end of the strip with the top edge of the square, right sides together. Use a strict 1/4 inch seam allowance, which is the gold standard for all quilting projects. This ensures that the geometry of the braid pattern remains intact.
Once the first strip is attached, press the seam toward the darker fabric. Now, take your second strip and place it on the adjacent side of the starter square, overlapping the end of the first strip you just sewed. This “overlapping” technique is what creates the signature herringbone weave look. This Herringbone Braid Quilt Block – Tutorial relies on this alternating left-right-left-right rhythm.
As you continue the Herringbone Braid Quilt Block – Tutorial, you will notice the block growing in a V-shape. It is vital to keep your tension even. Avoid pulling or stretching the fabric as it passes under the presser foot. Because some of these seams are on the bias (the diagonal grain of the fabric), they are prone to stretching, which can cause the quilt block to ripple or wave.
Finger-pressing is a great intermediate step, but for the Herringbone Braid Quilt Block – Tutorial, a hot iron is better. Pressing after every single strip is added might seem tedious, but it is the difference between a puckered mess and a crisp, flat quilt top. Accurate pressing ensures that the “points” of your braid align perfectly down the center of the column.
Repeat the process of adding strips to the left side, then the right side. You will see the braid column getting longer and longer. In this Herringbone Braid Quilt Block – Tutorial, the length of the column is entirely up to you. You can stop after six strips for a small block or keep going until you have enough length for a full-sized bed runner or a decorative border.
A common mistake in the Herringbone Braid Quilt Block – Tutorial is losing track of the 90-degree angle. Every so often, use your acrylic ruler to check that your center line is staying straight. If you notice the braid starting to “drift” to one side, it usually means your seam allowance has become inconsistent. Correct it early to save time and fabric later.
3. Trimming and Squaring Up the Braid Column
Once you have reached your desired length, your Herringbone Braid Quilt Block – Tutorial will have jagged, “stair-step” edges on both sides and at the bottom. To make this into a usable quilt block, you must square up the unit. This step is where the magic happens, turning a messy-looking strip-pieced unit into a clean, professional Herringbone Braid Block.
Start by laying your braid column on a large cutting mat. Find the center points of your starter square and the center of the “V” intersections all the way down the braid. Using a long quilting ruler, align the center line of the ruler with these “V” points. This ensures that your finished Herringbone Braid Quilt Block – Tutorial is perfectly symmetrical and not lopsided.
Decide on the final width of your column. For example, if you want a 4-inch wide finished braid, you should trim 2.25 inches from the center line on both sides (adding a 1/4 inch for the seam allowance). Carefully cut along the ruler with your rotary cutter. Seeing those jagged edges fall away is one of the most satisfying parts of the Herringbone Braid Quilt Block – Tutorial.
Next, you need to square up the top and bottom. The top is easy since it starts with a square, but the bottom will have two strips sticking out. Align your ruler perpendicular to your side cuts and trim the bottom straight across. This creates a clean rectangle, making your Herringbone Braid Quilt Block – Tutorial ready to be joined with other blocks or sashing.
During this stage of the Herringbone Braid Quilt Block – Tutorial, be mindful of your seam intersections. You don’t want to trim so close that you cut off the “points” of your braid. Leaving that quarter-inch “float” at the edges allows you to sew the block to another piece of fabric without losing the beautiful geometric tips of the herringbone design.
If you are making multiple blocks for a larger project, try to trim them all to the exact same dimensions. Using a template can be very helpful here. Consistency in the trimming phase of the Herringbone Braid Quilt Block – Tutorial ensures that when you go to assemble the full quilt top, all your braids line up perfectly, creating a seamless “woven” look across the entire surface.
4. Advanced Tips for Design and Layout
Now that you’ve mastered the basic construction of the Herringbone Braid Quilt Block – Tutorial, it’s time to get creative. One popular variation is the Scrappy Braid, where no two strips are the same. This is a fantastic way to use up your “stash” and creates a vibrant, eclectic look. The key to a successful scrappy Herringbone Braid Quilt Block – Tutorial is maintaining a consistent color temperature (all warms or all cools).
Another sophisticated approach is the Monochromatic Braid. By using various shades of a single color—like navy, royal, sky, and baby blue—you create a sophisticated, modern look. In this version of the Herringbone Braid Quilt Block – Tutorial, the texture of the “weave” becomes the star of the show, rather than the individual patterns of the fabric.
Consider adding sashing between your braid columns. Sashing (strips of solid fabric, usually white, gray, or black) provides “breathing room” for the eyes. When you apply the Herringbone Braid Quilt Block – Tutorial to a full quilt, sashing prevents the braids from looking too cluttered and helps the geometric pattern stand out from across the room.
You can also play with the width of the strips. While 2.5 inches is standard, using thinner 1.5-inch strips creates a much more intricate, “tight” braid that looks stunning on smaller items like pillows or quilted bags. This Herringbone Braid Quilt Block – Tutorial technique scales beautifully, though thinner strips require even more attention to seam accuracy.
Don’t forget about directionality. You can sew your braids so they all point “up,” or you can alternate them so one column points up and the next points down. This creates a “zigzag” or chevron effect across the quilt top. Exploring these layout options is what makes the Herringbone Braid Quilt Block – Tutorial such a versatile tool in a quilter’s repertoire.
Finally, think about your quilting design (the stitching that holds the layers together). Following the lines of the braid with “stitch-in-the-ditch” or echoing the “V” shapes with topstitching can emphasize the movement of the pattern. We hope this Herringbone Braid Quilt Block – Tutorial inspires you to push your creative boundaries and try something new with your next project!
FAQ: Frequently Asked Questions
What is the difference between a Herringbone Braid and a French Braid quilt?
In the quilting world, these terms are often used interchangeably. Both refer to the method of sewing strips onto a central square in an alternating fashion to create a woven, V-shaped appearance. Some people use “French Braid” specifically when referring to a gradient color flow.
Do I need a special ruler for the Herringbone Braid Quilt Block – Tutorial?
No special rulers are strictly required, though a long 6″ x 24″ acrylic ruler is very helpful for trimming the long columns straight. There are “braid rulers” available on the market that help cut the initial strips at specific angles, but a standard ruler and rotary cutter work perfectly fine for beginners.
How do I prevent my braid columns from curving?
Curving usually happens due to “fabric creep” or stretching the bias edges. To prevent this, always press your iron straight down rather than sliding it across the fabric. Also, ensure your 1/4 inch seam is consistent; even a slight variation can cause the column to “banana” or curve to one side.
Can I use different widths of strips in the same braid?
While you can, it makes the math and alignment significantly harder. For the best results with this Herringbone Braid Quilt Block – Tutorial, it is highly recommended to keep all your strips the same width so that the “points” of the braid align perfectly down the center.
Is this pattern beginner-friendly?
Yes! If you can sew a straight line and keep a consistent seam allowance, you can do this. It is a great “next step” project for beginners who have mastered basic squares and want to try something that looks much more complex than it actually is.
What is the best way to choose colors for a Herringbone Braid?
Try the “squint test.” Put your fabrics together and squint your eyes. If the fabrics all blend into one gray blob, you need more contrast. You want a mix of “pops” (brights/lights) and “anchors” (darks/solids) to make the braid structure visible.
Conclusion
The Herringbone Braid Quilt Block – Tutorial is a rewarding project that combines the simplicity of strip piecing with the elegance of complex geometric design. Throughout this guide, we have explored the importance of fabric selection, the rhythm of construction, the necessity of precise trimming, and the endless possibilities for creative layouts. By following these steps, you can create a quilt that looks intricate and professional, regardless of your current skill level.
Remember that quilting is a journey of patience and practice. Your first braid might not be perfect, but with every strip you sew, your technique will improve. The Herringbone Braid Quilt Block – Tutorial is a versatile technique that you will find yourself returning to time and time again for various projects.