The Hexagon Pincushion – Tutorial is a project that perfectly blends geometric precision with the soft, tactile satisfaction of handmade sewing accessories. If you have ever found yourself constantly searching for a loose pin or struggling with a disorganized workspace, creating a Hexagon Pincushion is the ultimate solution to keep your sewing room tidy and stylish. This Hexagon Pincushion – Tutorial will guide you through every single step, ensuring that even a beginner can achieve a professional-looking result while learning the fundamentals of English Paper Piecing (EPP) and hand-sewing techniques.
Beyond its obvious utility, a Hexagon Pincushion serves as a canvas for your favorite fabric scraps, allowing you to experiment with color theory and texture without the commitment of a full-sized quilt. Following a structured Hexagon Pincushion – Tutorial is essential because it teaches you how to manage the unique 120-degree angles of a hexagon, ensuring the final product is symmetrical and durable. By the end of this guide, you will have a charming, functional sewing accessory that showcases your craftsmanship and keeps your most essential tools right where you need them.
In the world of modern quilting and DIY crafts, the Hexagon Pincushion – Tutorial remains one of the most popular patterns because of its versatility and portability. Whether you are using vintage floral prints or modern solids, the hexagon shape provides a timeless aesthetic that fits into any decor style. This SEO-optimized guide is designed to provide you with all the essential sewing tips, material lists, and step-by-step instructions required to master the art of the Hexagon Pincushion, ensuring your content remains relevant and highly searchable for fellow makers.
1 Understanding the Hexagon Pincushion – Tutorial Basics
The core of any successful Hexagon Pincushion – Tutorial starts with understanding the geometry of the shape itself. A hexagon consists of six equal sides, and when translated into fabric, it requires careful seam allowance management to ensure the points meet perfectly at the center.
Before you begin, you must gather your fabric scraps, which are the heart of this upcycling project. Selecting high-quality 100% cotton fabric is recommended because it holds a crease well, which is vital for maintaining the crisp edges of your hexagon templates.
This Hexagon Pincushion – Tutorial focuses on the English Paper Piecing method, a traditional technique where fabric is basted around paper shapes. Using cardstock templates provides the necessary rigidity to sew these intricate shapes together by hand with extreme accuracy.
Choosing the right sewing thread is another critical component of the Hexagon Pincushion – Tutorial basics. A fine but strong 50wt cotton thread or a polyester blend will allow your stitches to “disappear” into the fabric, creating a seamless and high-end look for your finished pincushion.
The “pincushion” element requires a dense stuffing material to ensure it can hold pins securely over time. While polyester fiberfill is a common choice, many experienced crafters following a Hexagon Pincushion – Tutorial prefer crushed walnut shells or emery sand for added weight and needle-sharpening properties.
Finally, remember that the Hexagon Pincushion – Tutorial is as much about the process as it is about the product. Taking your time with the fussy cutting—the process of centering a specific motif from your fabric onto the hexagon—can turn a simple accessory into a miniature piece of art.
2 Materials and Tools Needed for Your Project
To follow this Hexagon Pincushion – Tutorial effectively, you will first need six or seven hexagon paper templates, depending on whether you want a floral “grandmother’s flower garden” layout. You can easily print these or purchase pre-cut EPP papers to save time and ensure total uniformity.
Next, you will need a variety of fabric charms or scraps at least 2.5 inches square. In this Hexagon Pincushion – Tutorial, we emphasize using contrasting colors to make the geometric pattern pop, though a monochromatic palette can also look incredibly sophisticated and modern.
A high-quality sewing needle is non-negotiable for hand-sewing projects like the Hexagon Pincushion. We recommend a size 10 or 11 milliners needle, as it is long and thin, making it much easier to perform the whipstitch or ladder stitch required to join the fabric edges.
You will also need fabric scissors or a rotary cutter with a cutting mat to prepare your fabric pieces. Precision is key in this Hexagon Pincushion – Tutorial, so ensure your blades are sharp to avoid fraying the edges of your precious fabric scraps during the preparation phase.
Don’t forget the basting supplies, such as a fabric glue pen or basting thread. Many modern sewists prefer glue basting for the Hexagon Pincushion – Tutorial because it is faster, while traditionalists enjoy the meditative process of thread basting the fabric to the paper.
Lastly, have your filling material and a hand-sewing thimble ready. The thimble will protect your fingers as you push the needle through multiple layers of fabric and stuffing, ensuring that your Hexagon Pincushion – Tutorial experience remains comfortable from start to finish.
3 Step-by-Step Construction and Assembly
The first active step in the Hexagon Pincushion – Tutorial is basting your fabric to the paper templates. Place your paper in the center of the fabric’s wrong side, fold the edges over, and secure them with a basting stitch or a small amount of temporary fabric glue.
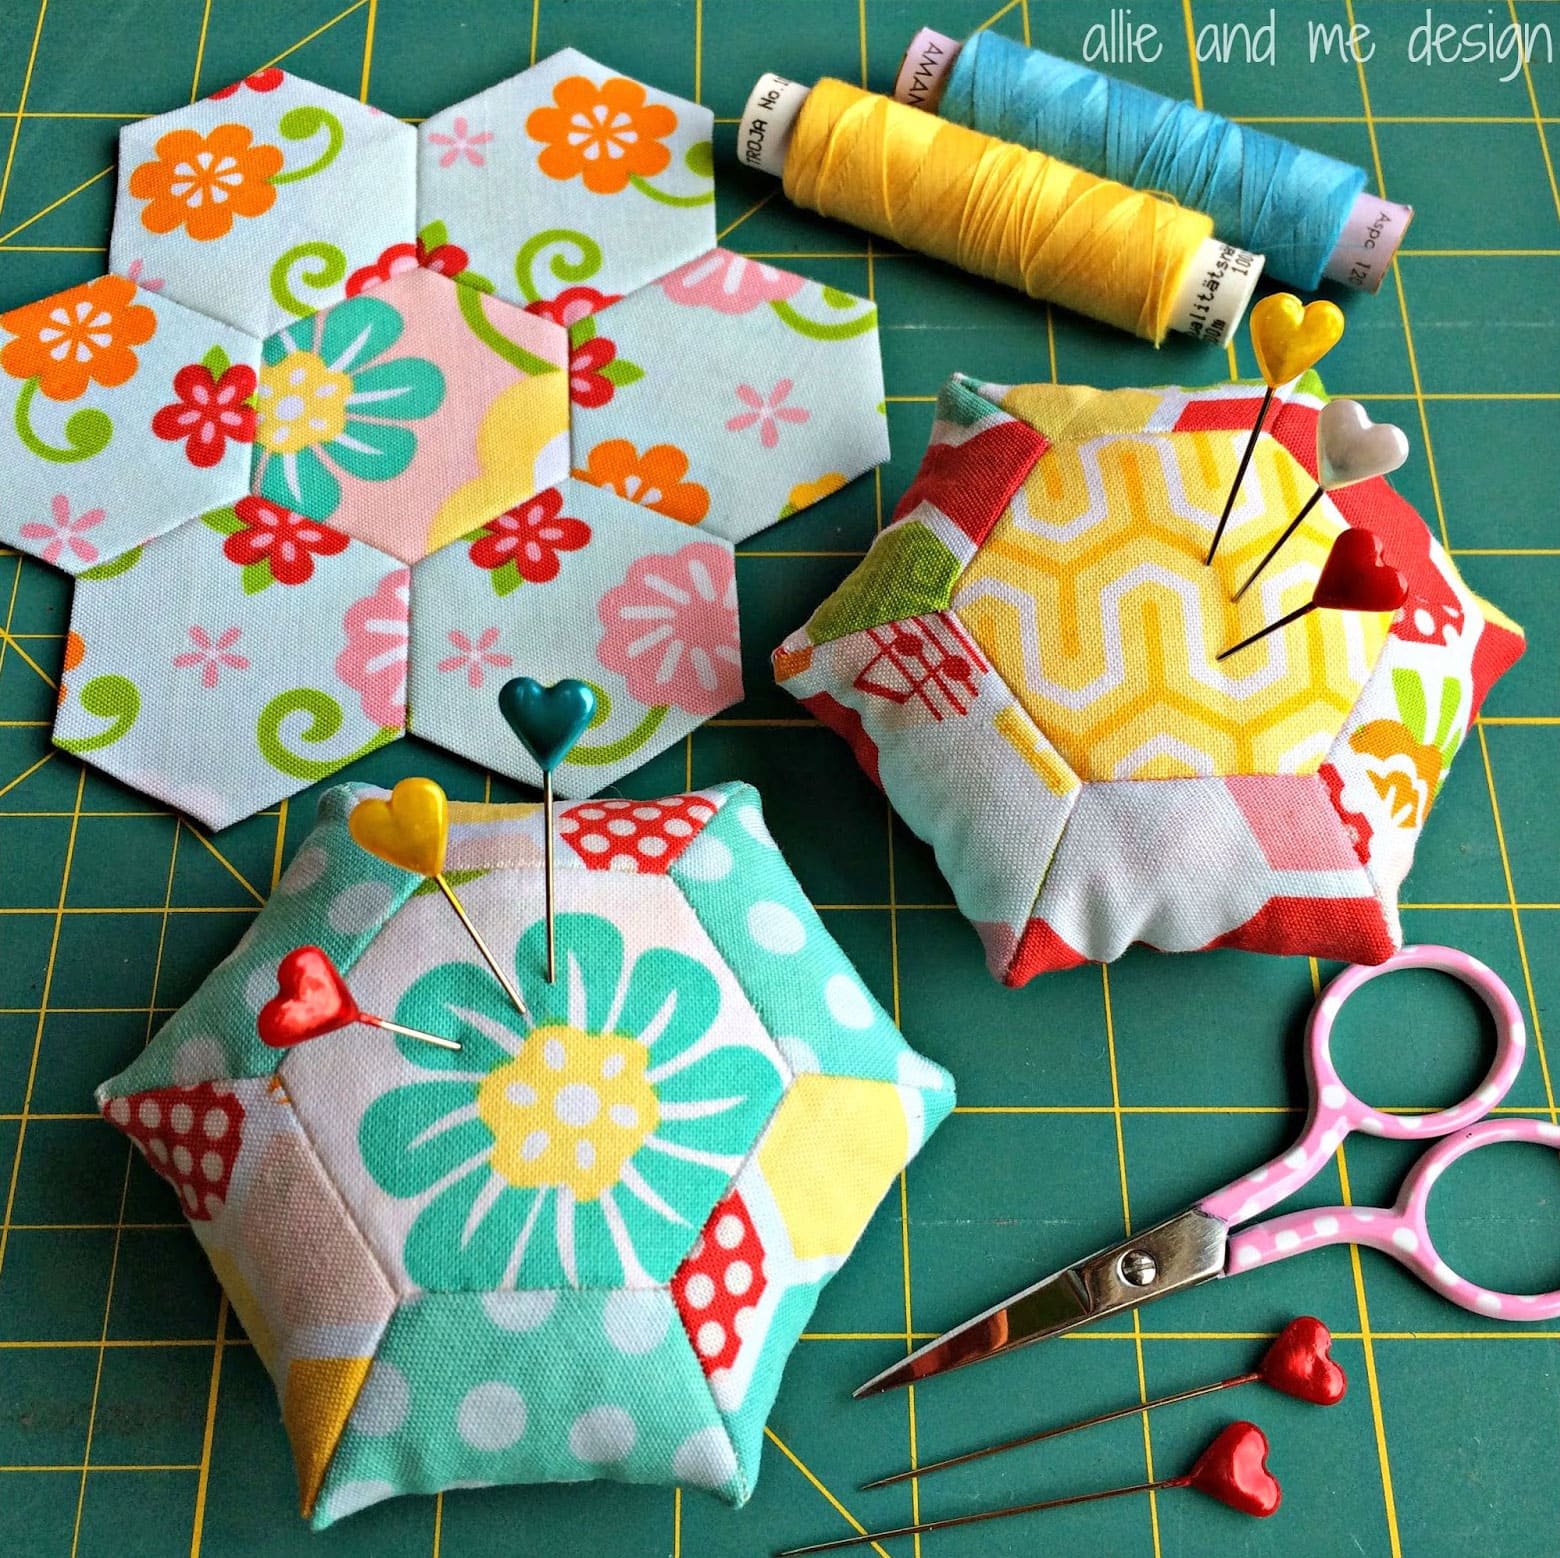
Once your hexagons are prepped, lay them out in your desired visual arrangement. For a standard Hexagon Pincushion, you will typically have one central hexagon surrounded by six others, which creates a larger, beautiful flower-like shape that forms the top of your cushion.
Now, begin joining the hexagons using a whipstitch. Hold two hexagons with their right sides together and sew along one edge, catching only a few threads of the fabric fold. This Hexagon Pincushion – Tutorial technique ensures that no stitches are visible on the front of the work.
After the top is assembled, repeat the process for the bottom of the cushion or use a solid piece of heavyweight felt or linen. Joining the top and bottom is the most exciting part of the Hexagon Pincushion – Tutorial, as you finally see the three-dimensional form of your project taking shape.
Leave a small opening about one inch wide before you finish the final seam. Carefully remove the paper templates using tweezers; the fabric will now hold its shape thanks to the pressed creases. This is a vital step in the Hexagon Pincushion – Tutorial to ensure the cushion remains soft and flexible.
Fill the cushion firmly with your chosen stuffing material. Use a chopstick or a stuffing tool to push the fill into the corners of the hexagons. To conclude the assembly portion of the Hexagon Pincushion – Tutorial, close the opening with an invisible ladder stitch for a perfect, professional finish.
4 Finishing Touches and Customization Ideas
To elevate your Hexagon Pincushion – Tutorial project, consider adding a decorative button to the center. By sewing a button through both the top and bottom and pulling the thread tight, you create a “tufted” look that adds depth and character to your handmade pincushion.
Another great way to customize your work is through embroidery. Before assembling the hexagons, you can add decorative top-stitching or small floral embroidery to the center piece, making your Hexagon Pincushion – Tutorial result truly one-of-a-kind and personalized.
If you want a more rustic look, try using linen fabric or repurposed denim. This Hexagon Pincushion – Tutorial is perfectly suited for sustainable crafting, allowing you to turn old clothing into a functional tool that will last for years in your sewing kit.
You can also vary the size of your hexagon templates to create different versions of the cushion. A tiny Hexagon Pincushion can be turned into a wearable finger pincushion, while a larger version can serve as a decorative pattern weight or a small table centerpiece.
For those who love organization, adding a small ribbon loop to the side of the cushion allows you to hang it from your sewing machine or a pegboard. This Hexagon Pincushion – Tutorial encourages you to think about how the tool will best serve your specific workflow and workspace layout.
Finally, consider making a set of these as gifts for your sewing friends. Because this Hexagon Pincushion – Tutorial is easy to follow and requires very little fabric, it is the perfect “mass-production” project for craft fairs or holiday exchanges, sharing the joy of handmade creativity with others.
Frequently Asked Questions (FAQ)
What is the best fabric to use for a Hexagon Pincushion?
The best fabric is quilting-weight cotton. It is easy to fold, holds a crease well, and comes in endless prints. Avoid stretchy fabrics like jersey or very thick fabrics like heavy canvas for your first Hexagon Pincushion – Tutorial attempt, as they can be difficult to manipulate around the small corners.
Do I have to sew this by hand?
While you can use a sewing machine for some parts, the English Paper Piecing (EPP) method used in this Hexagon Pincushion – Tutorial is designed for hand-sewing. Hand-sewing provides the precision needed for the sharp 120-degree angles of a hexagon, which can be very tricky to achieve on a standard machine.
What should I use to stuff my pincushion?
For a lightweight cushion, use polyester fiberfill. If you want a heavier, more stable cushion that also cleans and sharpens your pins, use crushed walnut shells or steel wool. Many followers of this Hexagon Pincushion – Tutorial also use a mix of both for the perfect weight and texture.
Can I wash my Hexagon Pincushion?
If you used polyester stuffing, you can gently hand wash the cushion and air dry it. However, if you used walnut shells or emery sand, do not get it wet, as the filling can clump or rust your pins. Always check your filling material before cleaning your handmade craft.
How long does it take to complete this tutorial?
A Hexagon Pincushion is a relatively quick project. For most crafters, completing the entire Hexagon Pincushion – Tutorial takes between two to four hours, depending on your hand-sewing speed and whether you choose to add extra embellishments like embroidery or buttons.
Conclusion
In this Hexagon Pincushion – Tutorial, we have covered everything from the basic geometry of English Paper Piecing to the final decorative touches that make your project unique.
You have learned how to select the right fabrics, prepare your templates, and assemble your pieces with an invisible whipstitch. Creating a Hexagon Pincushion is more than just making a tool; it is a way to practice patience and precision while producing something beautiful and useful for your creative journey. We hope this guide has inspired you to dive into your fabric stash and start stitching.