If you’ve ever wanted to learn how to make a wide headband with elastic – pattern, you’re in the right place. Whether you’re crafting for fashion, function, or fun, this beginner-friendly project is both stylish and practical. Wide headbands are a versatile accessory that can be worn during workouts, added to everyday outfits, or even given as handmade gifts. With just a few supplies and basic sewing skills, you can create your own custom headbands in no time.
The appeal of the wide headband with elastic lies in its comfort and adaptability. Unlike store-bought headbands, a handmade version lets you choose your own fabric, size, and pattern. The addition of elastic ensures a snug, secure fit without the discomfort that often comes with tight or poorly-sized accessories. Plus, making your own means you can match it to your wardrobe, your mood, or even seasonal styles.
In this article, we’ll walk you through how to make a wide headband with elastic – pattern, step by step. You’ll learn what materials you need, how to measure and cut your fabric, how to sew the pieces together, and how to make the headband fit perfectly. We’ll also include styling tips and variations to help you customize your design. Let’s get started and unlock the simple joy of handmade fashion accessories.
1. Materials Needed for a Wide Headband with Elastic – Pattern
Before diving into the process of how to make a wide headband with elastic – pattern, it’s essential to gather the right materials. A successful project starts with the basics, and this one is no different. You don’t need fancy tools—just a few sewing staples.
First, select your fabric. Cotton, jersey knit, or a soft stretch fabric works best for comfort and flexibility. These materials are breathable and gentle on the scalp, making them ideal for daily wear. A fat quarter is usually more than enough for one headband.
Next, you’ll need a piece of elastic. Choose a soft, non-roll elastic that is about 1 inch wide. The length of the elastic will depend on your head size, but typically ranges between 4 to 6 inches. This small addition helps keep the headband secure without making it too tight.
You’ll also need thread that matches your fabric, fabric scissors, pins or clips, and a sewing machine. If you don’t have a machine, hand sewing is possible—just make sure your stitches are strong and even.
Optionally, you might want a ruler or measuring tape and an iron for crisp edges and seams. Pressing your fabric before and after sewing helps achieve a clean, polished finish.
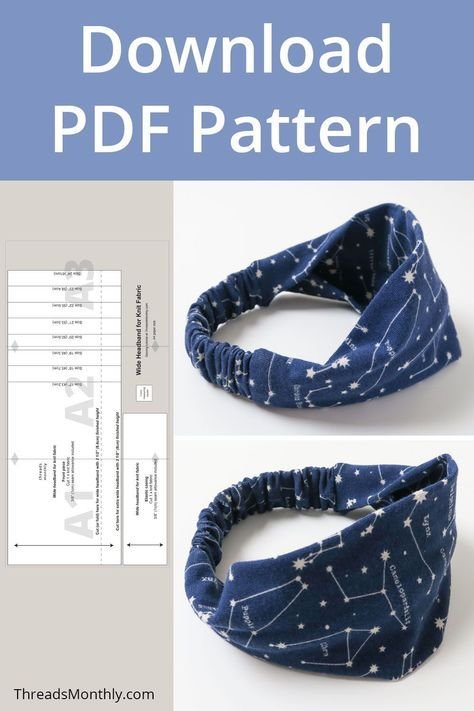
Having a printable wide headband with elastic – pattern template can also be helpful, especially if you’re new to sewing. You can find many free templates online or create your own by measuring your desired width and length.
Once everything is prepared and laid out, you’re ready to move on to the actual sewing. Taking the time to prepare your materials will make the entire process smoother and more enjoyable.
2. Step-by-Step Instructions: How to Make a Wide Headband with Elastic – Pattern
Let’s break down how to make a wide headband with elastic – pattern in clear, easy steps. You’ll find that with a little attention to detail, this project is as rewarding as it is fun.
Begin by cutting two pieces of fabric. The main piece should be around 18 to 20 inches long and 6 inches wide, depending on how wide and snug you want the headband. The second piece for the elastic casing should be about 9 inches long and 2.5 inches wide.
Fold both fabric pieces lengthwise with the right sides together and pin or clip along the open edges. Then, sew along the long edge of each, using a ¼ inch seam allowance. This will create two fabric tubes.
Turn both tubes right side out. Use a safety pin or turning tool to help pull the fabric through. Press the tubes flat with an iron to get a neat finish, especially along the seams.
Insert the elastic into the smaller tube using a safety pin, gathering the fabric as needed. Once the elastic is fully inserted, sew the ends of the elastic to the fabric to keep it from slipping out. This forms the back of the headband.
Now, take each end of the wide band and tuck it about ½ inch into the gathered elastic section. Pin securely in place, then stitch across the edge to secure the connection. You may want to sew a double seam for durability.
Finish your wide headband with elastic – pattern by trimming any loose threads and pressing the final seams. Try it on to ensure comfort and adjust the size if needed for future versions. Congratulations—you’ve just made your first custom headband.
3. Design Variations for Your Wide Headband with Elastic – Pattern
Once you’ve learned how to make a wide headband with elastic – pattern, the next step is to experiment with design variations. There’s no limit to how creative you can get with fabric choices, shapes, and embellishments.
One simple variation is the twisted front style. To create this, twist the main fabric tube once before attaching the elastic. This adds a stylish knot effect at the front, perfect for casual or chic looks.
You can also try different fabric textures. Velvet, silk, or ribbed knit adds a touch of luxury and sophistication. Each fabric behaves a little differently, so test your stitches on a scrap before making the full headband.
Adding embellishments like lace, beads, or embroidery can take your project to the next level. These details make your headband truly one-of-a-kind and are perfect for special occasions or gifts.
Change the width to suit your needs. A wider band offers more coverage and stays in place better during exercise, while a thinner band has a more delicate look. Experiment to find what works best for your style and comfort.
If you’re sewing for kids, you can reduce the length and width accordingly. Bright patterns and fun prints like polka dots or animal designs are popular with younger wearers.
Lastly, mix and match fabrics. Using contrasting colors for the main band and the elastic section can create a bold, modern look. This contrast can highlight your craftsmanship and design sense.
4. Tips for Sewing a Wide Headband with Elastic – Pattern Successfully
To master how to make a wide headband with elastic – pattern, it helps to follow a few sewing tips and tricks that make the process smoother and more precise.
Always prewash your fabric. This prevents shrinking after the first wash and softens the material, making it easier to work with. It also ensures that colors won’t bleed when the headband is washed later.
Use stretch stitches or a narrow zigzag stitch if you’re using stretchy fabric. These allow the seams to stretch with the fabric and prevent thread breakage when worn.
Backstitch at the beginning and end of your seams to keep them secure. This is especially important around the elastic area, which gets a lot of tension during use.
Keep your fabric flat and smooth while sewing. Wrinkled or bunched fabric can cause uneven seams and discomfort when worn. Take your time and press frequently.
Measure your head before cutting fabric. Everyone’s head size is different, and a custom fit makes the headband more comfortable. Don’t rely solely on generic templates—adjust as needed.
Practice makes perfect. Your first wide headband with elastic – pattern might not be flawless, and that’s okay. Each one you make will improve your technique and confidence.
FAQ: Common Questions About Making a Wide Headband with Elastic – Pattern
What is the ideal fabric for a wide headband with elastic?
Soft, stretchy fabrics like cotton knit, jersey, or spandex blends are ideal. They’re breathable, comfortable, and flexible enough to fit well without being too tight.
How long should the elastic be for an adult headband?
For an adult, 4 to 6 inches of elastic usually works well. Adjust based on personal preference and head size. It should be snug but not uncomfortable.
Can I make this headband without a sewing machine?
Yes, though it may take longer. Use strong hand stitches and be sure to secure the ends well, especially around the elastic area.
Is it okay to use non-stretch fabric for the band?
It’s possible, but not ideal. Non-stretch fabric may not conform as well to the head, which can result in discomfort. If using non-stretch fabric, the elastic portion becomes even more critical.
How do I keep the headband from slipping?
Use grippy fabric or add a small silicone strip inside. Choosing the right fit and fabric type also plays a major role in staying power.
Can I wash my handmade headband in the washing machine?
Yes, most fabric headbands can be machine washed. Use a gentle cycle and air dry to maintain shape and fabric quality.
Conclusion
Learning how to make a wide headband with elastic – pattern is a rewarding and useful DIY project for anyone who enjoys sewing or fashion. Not only do you get to personalize your accessories, but you also gain the satisfaction of wearing something made by hand. With just a few materials and a little creativity, you can create headbands for every outfit, mood, or occasion.
We hope this guide has helped you master the process and inspired you to try different styles and fabrics. If you enjoyed this tutorial or have ideas for improving it, we’d love to hear your honest opinion and suggestions. Share your experience in the comments and let us know what patterns or projects you’d like us to cover next!