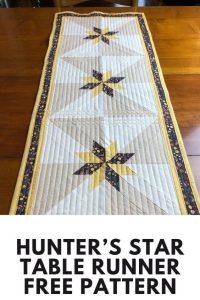
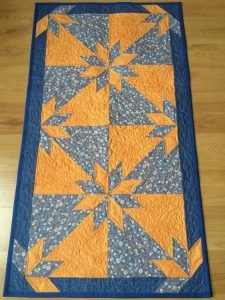
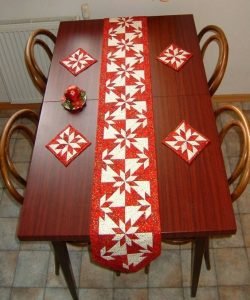
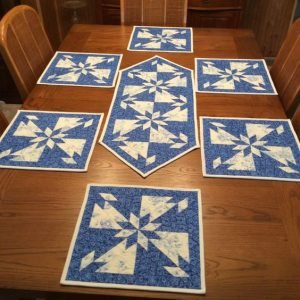
The Hunter Star quilt pattern is a timeless design that brings sophistication and elegance to any project. In this tutorial, we’ll guide you through creating a stunning Hunter Star Table Runner using the Northern Diamond Square variation.
This step-by-step guide will cover all the fabric cuts, measurements, and piecing techniques needed to bring this classic quilt pattern to life.
Whether you’re new to quilting or an experienced quilter looking for a new challenge, this project will enhance your skills and add a beautiful accent to your table.

Understanding the Hunter Star Quilt Pattern
The Hunter Star quilt pattern is beloved for its intricate design, which combines star shapes with sharp, angular pieces.
This pattern dates back to the 19th century and has remained popular due to its timeless appeal. The contrast between light and dark fabrics creates a striking visual effect, making the stars appear to pop out from the quilt.
To create the Hunter Star pattern, precise cutting and piecing are essential. The pattern is typically composed of diamonds and triangles that, when assembled, form the distinctive star shape. Understanding how these shapes interact is key to mastering this quilt pattern.
The Northern Diamond Square variation adds a unique twist by incorporating additional geometric elements, giving the table runner a modern yet classic look.
For this project, we’ll focus on creating a table runner that measures approximately 14 inches by 42 inches, perfect for adding a touch of elegance to your dining table.
The Hunter Star pattern is versatile and can be adapted to various sizes, but for this tutorial, we’ll stick to a manageable size that allows for detailed instruction.
Fabric Selection and Preparation
Choosing the right fabric is crucial to the success of your Hunter Star Table Runner. Since the pattern relies on contrast, select fabrics that clearly distinguish between the star shapes and the background.
Traditional choices include solid or tone-on-tone fabrics in light and dark shades, but feel free to experiment with prints or batiks if you want to add a unique twist.
You’ll need two main fabrics for this project: one for the stars and one for the background. For a table runner measuring 14 inches by 42 inches, you’ll need about 1 yard of each fabric. Additionally, consider selecting a coordinating fabric for the binding and backing. This will not only finish the quilt but also add an extra layer of style to your table runner.
Before you start cutting, it’s essential to prepare your fabrics properly. Wash and press the fabrics to remove any sizing and ensure they’re wrinkle-free. This step is especially important if you’re using fabrics with high contrast, as any shrinkage after washing could distort the pattern. Once your fabrics are prepared, you’re ready to move on to cutting.
Cutting the Fabric – Measurements and Techniques
Precision is key when cutting the fabric for the Hunter Star Table Runner. Start by cutting strips from your main fabrics. You’ll need four 2.5-inch strips of your star fabric and four 2.5-inch strips of your background fabric. These strips will be sub-cut into the diamonds and triangles that make up the star blocks.
Next, use a rotary cutter and a quilting ruler to cut the diamonds. From each strip, cut diamonds measuring 2.5 inches wide and 4.5 inches tall. You should have a total of 16 diamonds from each fabric. Accuracy in these cuts is crucial, as even a small deviation can affect the final appearance of the stars.
Once you’ve cut the diamonds, it’s time to cut the background triangles. These triangles will fill in the spaces between the star points and complete the Northern Diamond Square design. Cut eight 2.5-inch squares from the background fabric, then cut each square diagonally to create two triangles. You should end up with 16 triangles. With all your pieces cut, you’re ready to start assembling the quilt blocks.
Piecing the Quilt Blocks
Piecing the quilt blocks is where the Hunter Star pattern starts to come together. Begin by pairing a star diamond with a background triangle. Place the triangle right sides together with the diamond, aligning the long edge of the triangle with one side of the diamond. Sew the pieces together using a 1/4-inch seam allowance, then press the seam toward the diamond.
Repeat this process for the remaining diamonds and triangles. Once you’ve attached triangles to all the diamonds, you should have a total of 16 units. These units will form the basis of your Hunter Star blocks. The next step is to assemble these units into square blocks, each measuring 4.5 inches by 4.5 inches.
To assemble the square blocks, lay out four units so that the diamonds form the star shape in the center, with the triangles filling in the background. Sew the units together in pairs, and then sew the pairs together to complete the block. Press the seams carefully to ensure that the blocks lay flat and the points of the stars are crisp. Repeat this process to create a total of four blocks.

Assembling the Table Runner
With your Hunter Star blocks completed, it’s time to assemble the table runner. Arrange the blocks in a row, alternating the direction of the star points to create visual interest. Once you’re satisfied with the layout, sew the blocks together using a 1/4-inch seam allowance. Press the seams open to reduce bulk and ensure a smooth finish.
Next, add borders to the table runner to frame the Hunter Star blocks and bring the project to the desired size. Cut two strips of fabric for the side borders, each measuring 2.5 inches wide and the length of the table runner. Sew these strips to the long edges of the table runner, then press the seams toward the border.
For the top and bottom borders, cut two strips of fabric that are 2.5 inches wide and as long as the width of the table runner, including the side borders. Sew these strips to the top and bottom edges of the table runner, then press the seams toward the border. Your table runner top is now complete and ready for quilting.

Quilting and Finishing
Quilting is the final step that brings your Hunter Star Table Runner to life. Start by layering your quilt top with batting and backing fabric. Baste the layers together using your preferred method, whether that’s spray basting, pin basting, or hand basting. Make sure the layers are smooth and free of wrinkles.
For this project, a simple straight-line quilting pattern will enhance the geometric design of the Hunter Star blocks. Using a walking foot on your sewing machine, quilt along the seams of the blocks and borders, creating a grid that highlights the stars. You can also add additional quilting lines within the stars or borders for extra detail.
Once the quilting is complete, trim the excess batting and backing fabric, leaving a clean edge around the table runner. Finally, add binding to finish the edges of the quilt. Cut 2.5-inch-wide strips from your binding fabric, join them into one long strip, and sew the binding to the edges of the table runner. Fold the binding over to the back side and hand-stitch it in place for a polished finish.
Final Thoughts and Display Ideas
Congratulations! You’ve completed your Hunter Star Table Runner. This project not only showcases the beauty of the Hunter Star quilt pattern but also adds a handmade touch to your home decor. The Northern Diamond Square variation gives this classic design a modern twist, making it a versatile piece that complements both traditional and contemporary settings.

When displaying your table runner, consider pairing it with complementary table settings or seasonal decor. The bold star pattern makes it an excellent centerpiece for special occasions, while the neutral tones can be used year-round. Whether you choose to keep it for yourself or gift it to a loved one, this Hunter Star Table Runner is sure to be a cherished addition to any home.
This tutorial not only guides you through the process of creating a beautiful quilted table runner but also helps you develop essential quilting skills. By mastering the Hunter Star pattern, you’ll be well-equipped to tackle more complex quilt projects in the future. Happy quilting!

