The Owl potholder – pattern is a charming and practical project that brings creativity and function into your kitchen. Designed to resemble a cute owl, this potholder not only protects your hands and countertops from hot dishes but also adds a touch of personality to your cooking space.
It’s the perfect DIY gift for housewarmings or just a fun weekend project for yourself.Crocheting or sewing your own owl potholder allows you to customize colors, materials, and even size based on your kitchen decor or gift preferences.
This pattern is suitable for both beginners and experienced crafters, and it can be completed with minimal materials and time investment. Plus, you’ll get the satisfaction of creating something beautiful and useful with your own hands.
In this guide, we’ll walk you through the entire process—from gathering supplies and choosing materials to assembling your project and adding personal touches. By the end of this tutorial, you’ll feel confident in following the Owl potholder – pattern, and maybe even inspired to make a whole collection of whimsical potholders for every season or holiday.
1. Choosing Materials for Your Owl Potholder – Pattern
Before you begin working on the Owl potholder – pattern, it’s important to gather the right materials. The quality of your supplies will directly affect the safety, durability, and visual appeal of your finished potholder.
Start with cotton yarn or 100% cotton fabric, depending on whether you’re crocheting or sewing your potholder. Cotton is heat-resistant, washable, and safe to use around high temperatures—perfect for kitchen use.
You’ll need a hook size appropriate for your yarn weight if crocheting. For worsted weight cotton yarn, a 4.0 mm to 5.0 mm (G or H) hook works best. Using the right hook ensures your stitches are tight enough to protect your hands from heat.
If you’re sewing your potholder instead, prepare two layers of cotton fabric and one layer of insulated batting like Insul-Bright. This batting is designed for heat resistance, which makes it ideal for functional potholders.
You’ll also want a pair of sharp scissors, stitch markers (for crochet), a tapestry needle, and a sewing needle or machine for assembly. Safety should always be a priority when working with heat-related crafts, so be sure your materials are safe and durable.
Optional materials include buttons for the owl’s eyes, felt for extra details like feathers or beaks, and embroidery thread if you want to add textures or borders to your potholder.
2. Creating the Base Shape of the Owl Potholder
The heart of the Owl potholder – pattern is its base shape. Whether you’re crocheting or sewing, this round or oval base serves as the body of the owl and gives you the structure needed to build upon with details.
If crocheting, start by creating a magic circle. Work several rounds of single crochet (sc) or double crochet (dc), increasing evenly to form a flat circle approximately 6–8 inches wide. This circle becomes the owl’s body.
For a more oval shape, you can begin with a chain instead of a magic ring. Crochet around the chain, adding increases at each end to form a smooth oval that mimics the owl’s rounded form.
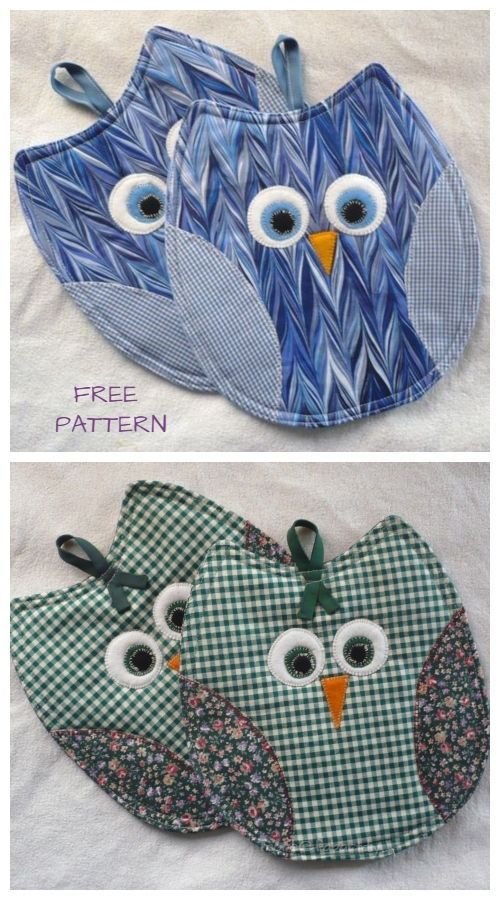
When sewing, cut two identical owl-shaped pieces from your cotton fabric, and one from your heat-resistant batting. You can use a printed template or draw your own based on a simple oval with ear tufts at the top.
Sandwich your batting between the two fabric layers, with the right sides of the fabric facing out. Pin in place and sew around the edges, leaving a small gap if you want to turn the potholder inside out for a cleaner finish.
Whether crocheting or sewing, reinforce the outer edge of your potholder with a border. For crochet, use a round of slip stitches or single crochets. For sewn pieces, a bias tape or double stitch border works well.
Once the base is complete, you’ll have a sturdy and adorable canvas to start adding owl-like features that will bring your potholder to life.
3. Adding the Owl’s Facial Features and Details
What sets the Owl potholder – pattern apart from other potholders is its whimsical and expressive face. The owl’s eyes, beak, and even feathers can be personalized to match your style and make your project extra fun.
Start with the eyes. Large, circular eyes are iconic in owl designs. Crochet or sew two white circles and attach black buttons, yarn, or felt for the pupils. Position them slightly apart near the top of the potholder for a cute, wide-eyed effect.
Next, add the beak. A small triangle made from yellow or orange yarn or fabric does the trick. Stitch it just below the eyes, pointing down for a realistic appearance. You can use basic embroidery or whip stitching to secure it.
Ears or feather tufts can be created with small triangle shapes attached to the top edges of the potholder. These are optional but add charm and character to your owl design.
Wings are another creative detail. You can crochet small leaf-like motifs or sew on oval pieces to each side of the body. Use contrasting colors or patterns to give your owl a colorful personality.
If you want to go the extra mile, use embroidery thread to stitch on feather textures or outline the eyes and wings. This gives a handcrafted look that makes your potholder unique.
Finish off by adding a loop at the top for hanging. A small crocheted chain or fabric loop sewn in place will let you easily display your owl potholder when it’s not in use.
4. Customization Ideas and Safety Tips
The Owl potholder – pattern is highly customizable, which means you can make it truly your own. You can also ensure it’s functional, durable, and safe with just a few thoughtful adjustments.
Try experimenting with seasonal colors. Make a bright yellow owl for spring, an orange and black one for Halloween, or a red-and-green owl for the holidays. This is a great way to keep your kitchen decor fresh year-round.
Use leftover yarn scraps to make multicolored owls. This not only reduces waste but adds a patchwork charm that’s very trendy in handmade items.
If you’re sewing, mix and match printed fabrics for the owl’s body, wings, and face. Floral patterns, polka dots, or even animal prints can add whimsy and depth to your design.
Always double-layer your potholder if you plan to use it for hot dishes. Single-layer crochet or fabric designs may not offer enough heat protection. Insulated batting is especially recommended for sewn versions.
Don’t use synthetic yarns like polyester or acrylic alone for functional potholders—they can melt under heat. Stick to 100% cotton or use blends with heat-resistant layers to maintain safety.
Before gifting or selling your potholder, test it yourself. Try it with a warm dish (not too hot) to ensure it provides enough insulation and holds up to real-world use. Quality control ensures confidence in your crafting.
FAQ – Frequently Asked Questions
Q1: Is the Owl potholder – pattern beginner-friendly?
Yes! The Owl potholder – pattern is suitable for beginners, especially if you know basic crochet stitches or simple sewing techniques. The shapes are easy, and the customization options are fun to explore.
Q2: Can I wash my owl potholder?
Absolutely. If made with 100% cotton yarn or fabric, your potholder is machine washable. However, air-drying is best to preserve shape and details like buttons or felt decorations.
Q3: What size should my potholder be?
Most potholders range from 6 to 8 inches in diameter or height. This size offers good coverage for handling hot items while being compact enough for storage or hanging.
Q4: Can I use acrylic yarn for this project?
Acrylic yarn is not recommended for functional potholders because it can melt under high heat. It’s fine for decorative versions, but for actual kitchen use, stick to cotton.
Q5: Is it safe to use buttons for the eyes?
Buttons are safe if the potholder is used decoratively. For functional use, it’s best to embroider or crochet the eyes to avoid heat-related risks or potential detachment during washing.
Q6: Can I sell potholders made from this pattern?
Yes! Handmade owl potholders are popular at craft fairs and online shops. Be sure your design is original or adapted from free-use sources if you plan to sell them commercially.
Conclusion
The Owl potholder – pattern combines charm, functionality, and creativity in one delightful project. Whether you crochet or sew, this pattern allows you to make a practical kitchen tool that also brings personality and warmth to your home. With easy-to-follow steps and endless customization options, it’s a perfect project for beginners and experienced crafters alike.
You’ve learned how to gather materials, build the base, add features, and customize your design for fun and function. Crafting your own owl potholder not only saves money but also allows for meaningful handmade gifts and home decor.
We’d love to hear your thoughts! If you enjoyed this guide or tried out the Owl potholder – pattern, leave your sincere opinion in the comments. Share your results or suggestions for future patterns—we’re always happy to connect with fellow creators!