Owl-shaped pincushion – tutorial projects are the perfect marriage of functionality and whimsy, transforming a basic sewing essential into a charming piece of handmade art for your workspace. Whether you are a seasoned seamstress or a beginner looking for a manageable weekend project, creating your own DIY owl pincushion allows you to repurpose fabric scraps while practicing precision stitching. In this comprehensive guide, we will explore the step-by-step process of assembling a professional-grade sewing accessory that is as sturdy as it is adorable.
The beauty of an owl-shaped pincushion – tutorial lies in its versatility, as you can customize the colors, textures, and sizes to match your personal aesthetic or sewing room decor. Many crafters find that handmade pincushions make excellent gifts for fellow makers because they are both practical and visually appealing. By following this step-by-step sewing guide, you will learn how to handle small curves, apply felt details, and stuff your project correctly to ensure it holds pins securely for years to come.
Before we dive into the technical details of our owl-shaped pincushion – tutorial, it is important to gather high-quality materials that will ensure a long-lasting result. Using 100% cotton fabric for the body and a dense filling like crushed walnut shells or polyester fiberfill will give your owl the weight and stability it needs to sit firmly on your desk. Let’s begin our journey into creative sewing by breaking down the assembly process into clear, manageable phases designed for maximum success.
1. Preparing Your Materials and Pattern Cutting
Starting your owl-shaped pincushion – tutorial requires careful preparation to ensure all your pieces align perfectly during the sewing phase. You will need two main body pieces, a small triangle of felt for the beak, and two circular pieces for the eyes. Choosing contrasting fabric patterns for the wings can add a layer of visual interest to your project.
Precision is key when you are dealing with a small-scale sewing project like this one. Use sharp fabric scissors or a rotary cutter to ensure your edges are clean and fray-free. Always remember to leave a small seam allowance of about 1/4 inch around your fabric pieces to prevent the stitching from pulling through the weave.
To keep your owl pincushion pattern organized, it helps to pin the paper templates directly to the fabric before cutting. This prevents the material from shifting, which is especially important when working with fleece or felt details. Once your pieces are cut, set them aside in groups so you don’t lose the smaller components like the beak or pupils.
Selecting the right sewing thread is also a vital part of the preparation process. A strong polyester thread in a coordinating color will provide the durability needed for a stuffed craft project. If you want the stitching to be a design feature, consider using a thicker embroidery floss for the owl’s eyes and wings.
Ironing your fabric before you begin the owl-shaped pincushion – tutorial is a step that many beginners skip, but it makes a world of difference. Flat, crisp fabric is much easier to feed through a sewing machine and results in a more professional-looking finished product. Taking the time to prep now saves frustration later in the assembly.
Finally, consider the weight of your sewing tool. Some crafters like to add a small pouch of dried lavender or poly-pellets at the bottom of the owl-shaped pincushion. This gives the owl a “weighted” feel, ensuring it doesn’t tip over when you are reaching for a needle during a busy quilting session.
2. Assembling the Owl Features and Face
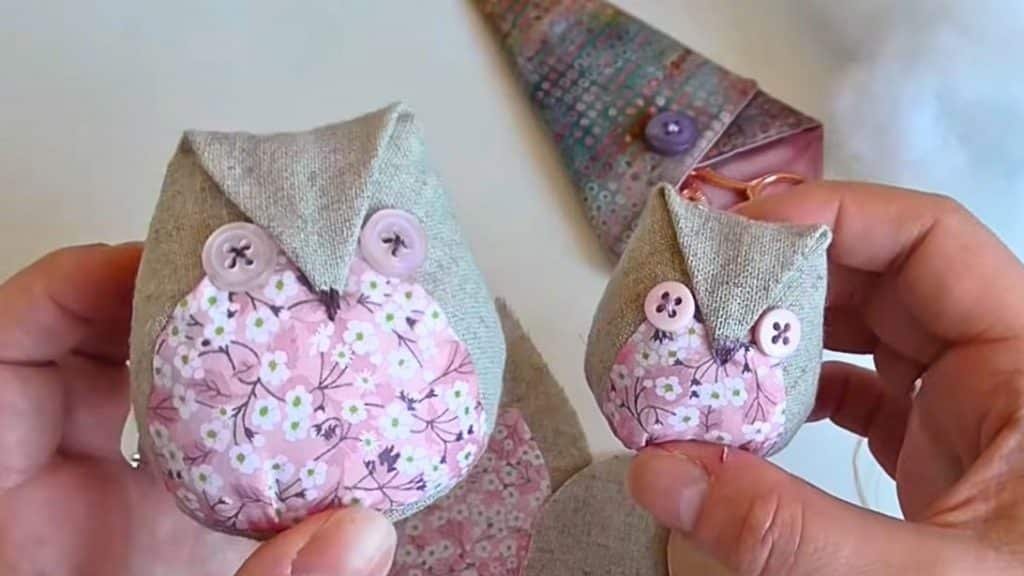
The most rewarding part of an owl-shaped pincushion – tutorial is seeing the personality of your creation come to life through its face. Start by positioning the felt eyes and beak on the right side of one of your body pieces. Using a zig-zag stitch or a hand-sewn blanket stitch will secure these small pieces firmly to the base fabric.
Layering is a great technique to use when crafting animal-themed sewing projects. You can place a larger white circle for the outer eye and a smaller black circle for the pupil to give your owl a wide-eyed, curious expression. This fabric appliqué technique is a fundamental skill that you can apply to many other crafts.
Once the eyes are secure, move on to the beak, which should be centered just below the eye line. In this owl-shaped pincushion – tutorial, the beak acts as a focal point, so ensure it is straight before you begin stitching. Small dabs of fabric glue can help hold these tiny pieces in place while you sew.
If you want to add more detail, you can use embroidery stitches to create “feathers” on the owl’s chest. Simple V-shaped stitches in a contrasting thread color can mimic the look of plumage and add a lovely handmade texture to the pincushion. This extra effort elevates the project from a simple craft to a piece of art.
Don’t forget the wings! You can either sew the wings into the side seams or appliqué them onto the front of the body. For this owl-shaped pincushion – tutorial, we recommend sewing them onto the front panel first to keep the side seams clean and easy to manage for beginner sewists.
Double-check all your decorative stitching before moving to the next stage. It is much easier to fix a crooked eye or a loose thread now than it is after the pincushion has been stuffed and closed. Taking your time with the facial features ensures your DIY owl looks professional and full of character.
3. Stitching the Body and Creating Structure
Now that the face is complete, it is time to join the front and back panels of your owl-shaped pincushion – tutorial. Place the two body pieces with their “right sides” facing each other. Pin them securely around the perimeter, leaving a 2-inch gap at the bottom for turning and stuffing.
Using a short stitch length on your sewing machine will provide extra strength to the seams. This is important because the pressure of the stuffing can sometimes pop stitches if they are too long. Carefully sew around the curves of the owl pattern, pivoting the fabric slowly to maintain a smooth shape.
After sewing, it is helpful to “clip the curves.” This involves making small snips into the seam allowance around the rounded sections, being careful not to cut the actual stitches. This technique allows the fabric to lay flat and creates a smooth, rounded edge when you turn the owl-shaped pincushion right-side out.
Turn the fabric through the gap you left at the bottom. You can use a dull pencil or a turning tool to gently push out the ears and the bottom corners. Once the owl is turned, give it a quick press with an iron to define the shape and prepare it for the stuffing process.
The structure of your owl-shaped pincushion – tutorial depends heavily on how you fill it. For a firm pincushion that keeps needles sharp, consider using emery sand or crushed walnut shells. If you prefer a softer, more decorative look, high-loft polyester fiberfill is the most popular choice among hobby crafters.
Ensure you push the stuffing into the very top of the ears first. Use small tufts of filling rather than one large clump to avoid a “lumpy” appearance. A well-stuffed owl pincushion should be firm to the touch but still have enough give to easily insert pins without resistance.
4. Finishing Touches and Closing the Seam
The final stage of the owl-shaped pincushion – tutorial involves closing the opening and adding any last-minute embellishments. To close the bottom gap, fold the raw edges inward so they align with the rest of the seam. Using an invisible ladder stitch by hand will create a clean finish that hides the thread.
Pull your stitches tight as you go, ensuring the bottom of the owl is flat so it can stand upright. This hand-sewing technique is essential for finishing stuffed toys and pillows professionally. Once the gap is closed, knot your thread securely and bury the tail inside the pincushion body.
To give your owl a more “nestled” look, you can add a small circle of felt to the base. This not only hides your closing stitches but also adds a layer of friction so the owl-shaped pincushion doesn’t slide around on your sewing table. It’s a simple addition that adds a lot of value to the tutorial.
Inspect your work for any loose threads or uneven stuffing. You can gently massage the pincushion to redistribute the filling if one side looks slightly larger than the other. This attention to detail is what separates a high-quality handmade gift from a quick craft project.
If you are feeling extra creative, you could even add a small ribbon loop to the top of the owl’s head. This allows you to hang the owl-shaped pincushion – tutorial project from a pegboard or a sewing machine hook, keeping your workspace clear and your pins within easy reach at all times.
Congratulations on completing your project! You now have a functional, adorable sewing companion that is ready to hold your pins and needles. This owl-themed craft is a wonderful way to brighten up your creative space while keeping your tools organized and safe.
Frequently Asked Questions (FAQ)
What is the best fabric for an owl-shaped pincushion – tutorial?
Woven cotton fabrics like quilting cotton are the best choice. They are easy to sew, come in endless patterns, and hold their shape well when stuffed. Avoid very stretchy fabrics like jersey, as they can become distorted during the stuffing process.
How do I keep my pins from rusting inside the pincushion?
Using a filling like crushed walnut shells or specialized emery sand can actually help keep your pins clean and sharp. If you use standard polyester fiberfill, just ensure your pins are dry before inserting them to prevent any moisture buildup.
Can I make this project without a sewing machine?
Absolutely! This owl-shaped pincushion – tutorial is small enough that it can be entirely hand-sewn. Use a backstitch for the main body seams for maximum strength, and a blanket stitch for the felt appliqués on the face.
What size should the finished pincushion be?
Typically, an owl pincushion stands about 4 to 5 inches tall. This size is large enough to hold a good amount of pins but small enough to not take up too much room on your sewing table. You can always scale the pattern up or down depending on your needs.
How do I clean my handmade pincushion?
Since most pincushions contain organic fillers or dense stuffing, it is best to spot clean them with a damp cloth and mild soap. Do not submerge the entire owl in water, as the stuffing may not dry properly, leading to mold or rusted pins.
Is this tutorial suitable for children?
Yes, with adult supervision for the cutting and sewing portions, this is a fantastic project for kids. It teaches basic geometry, fine motor skills, and the satisfaction of creating something functional from scratch.
Conclusion
In this owl-shaped pincushion – tutorial, we have covered everything from selecting the right cotton fabrics and cutting your patterns to the intricate details of facial appliqué and the final ladder stitch closure. We explored how different stuffing materials like walnut shells or fiberfill can change the weight and utility of your tool, and how simple embroidery techniques can add immense personality to your craft.
By following these steps, you’ve created a durable, charming, and highly useful sewing accessory that brings a touch of nature-inspired joy to your quilting or dressmaking sessions.