Finding the perfect Patchwork Butterfly – Pattern is like discovering a hidden treasure for quilters and sewing enthusiasts who want to bring a touch of nature’s elegance into their home decor. The art of patchwork allows us to take small, seemingly insignificant scraps of fabric and transform them into a vibrant, cohesive image that tells a story of color and texture. By following a dedicated Patchwork Butterfly – Pattern, you can master the intricate balance of symmetry and whimsy, creating a textile masterpiece that works beautifully as a quilt block, a decorative pillow, or even a framed piece of wall art.
When you dive into a project involving a Patchwork Butterfly – Pattern, you are engaging in a tradition that celebrates both precision and creativity. The “patchwork” element refers to the technique of sewing together different pieces of fabric—often in contrasting prints or solid tones—to create a larger design. The “butterfly” aspect provides the iconic silhouette of wings and a body, which requires a specific geometric arrangement to look realistic yet stylized. Using a professional Pattern ensures that every corner aligns and every curve is smooth, giving your finished butterfly a professional look that is difficult to achieve by free-handing alone.
In this comprehensive guide, we will explore the nuances of creating a Patchwork Butterfly – Pattern from start to finish, catering to both beginners and seasoned quilters. We will break down the essential components, such as the Patchwork Butterfly, which is the physical artistic result of your labor, and the Pattern, which acts as your technical roadmap and blueprint. Whether you are looking to bust your fabric stash or create a coordinated nursery quilt, understanding the structural logic of a Patchwork Butterfly – Pattern is the first step toward a successful and relaxing sewing journey that yields stunning results.
1. Choosing the Ideal Fabrics for Your Patchwork Butterfly – Pattern
The soul of a Patchwork Butterfly – Pattern lies in the selection of fabrics, as the wings offer a fantastic canvas for playing with color theory. Most quilters prefer using high-quality 100% quilting cotton because it holds its shape well, doesn’t fray excessively, and comes in an infinite array of patterns. When selecting your palette for the Patchwork Butterfly, consider using a “focal fabric” for the main wing sections and complementary “accent fabrics” for the smaller details, ensuring there is enough contrast to make the butterfly “pop” against your background.
Texture also plays a significant role in how your Patchwork Butterfly – Pattern ultimately feels and looks. You might consider incorporating a bit of linen or silk for the body of the butterfly to give it a different sheen or tactile quality. However, for those just starting out with a Patchwork Butterfly – Pattern, sticking to consistent weights of cotton is highly recommended to ensure the seams lay flat and the block remains square throughout the construction process.
Don’t overlook the importance of the background fabric when preparing your Patchwork Butterfly – Pattern. A neutral background, such as cream, light gray, or a subtle “low-volume” print, allows the vibrant colors of the Patchwork Butterfly to take center stage. If the background is too busy, the intricate patchwork lines of the wings might get lost, so choosing a fabric that provides a clean, high-contrast field is a key strategy for SEO-friendly and visually striking quilt designs.
The concept of “fussy cutting” is a popular technique used with a Patchwork Butterfly – Pattern. This involves cutting your fabric specifically to highlight a particular motif, like a small flower or a specific geometric shape, in the center of the butterfly’s wing. When you apply this to your Patchwork Butterfly – Pattern, it adds an extra layer of detail that makes the finished piece look incredibly intricate and thoughtful, turning a standard pattern into a unique work of art.
Before you begin cutting into your precious textiles for the Patchwork Butterfly – Pattern, it is wise to perform a “bleed test” on highly saturated colors like deep reds or purples. Since a Patchwork Butterfly often combines very light and very dark fabrics, you want to ensure the colors won’t run when the finished quilt is washed for the first time. Pre-washing your fabrics can also help stabilize the fibers, making the execution of your Patchwork Butterfly – Pattern much more precise and durable over time.
Lastly, remember that the Patchwork Butterfly – Pattern is an excellent way to use up “charms” or “fat quarters” from your collection. Because the wings are made of smaller segments, you can mix and match various scrap pieces to create a “scrappy” Patchwork Butterfly. This sustainable approach to sewing not only saves money but also gives your Patchwork Butterfly – Pattern a charming, vintage aesthetic that is highly sought after in the modern quilting community and DIY home decor markets.
2. Understanding the Geometry of the Patchwork Butterfly – Pattern
A successful Patchwork Butterfly – Pattern is built on the foundation of “Half-Square Triangles” (HSTs) and “Stitch-and-Flip” corners. These geometric building blocks are what create the angled appearance of the wings without requiring difficult “Y-seams.” When you look at a Pattern for a butterfly, you will see how squares and triangles are strategically placed to mimic the natural slope of a butterfly’s flight. Mastering these basic shapes is essential for anyone wanting to tackle a Patchwork Butterfly – Pattern with confidence.
Symmetry is perhaps the most important technical aspect of the Patchwork Butterfly – Pattern. To create a realistic look, the left wing and the right wing must be mirror images of each other. This means when you are following your Patchwork Butterfly – Pattern, you must pay close attention to the orientation of your fabric pieces. Cutting and sewing two identical left wings is a common mistake; a good Pattern will clearly label the “Mirror Image” pieces to prevent this frustration and ensure your Patchwork Butterfly is perfectly balanced.
The “body” of the butterfly in a Patchwork Butterfly – Pattern acts as the central anchor for the entire block. This is usually a long, thin rectangle or a series of small squares stacked vertically. The way the wings attach to this central strip determines the overall “span” of the Patchwork Butterfly. Some Pattern designs use a contrasting dark fabric for the body to provide a visual break between the colorful wings, giving the design a more grounded and anatomically correct appearance.
Scale is another factor to consider when selecting your Patchwork Butterfly – Pattern. Some patterns are designed as large 12-inch blocks, while others are miniature 4-inch blocks intended for more detailed work. The complexity of the Patchwork Butterfly increases as the size decreases, as handling tiny seam allowances requires more precision. Choosing a Pattern that matches your skill level and the intended use of the project is vital for a satisfying sewing experience.
Modern Patchwork Butterfly – Pattern designs often incorporate “negative space” to create a sense of movement. By placing the butterfly off-center or at an angle within the block, the Pattern suggests that the butterfly is in mid-flight. This artistic choice can make your quilt top look much more dynamic. When reading your Patchwork Butterfly – Pattern, look for these layout suggestions to see how you can arrange multiple blocks to create a fluttering effect across the entire surface of your fabric.
Finally, the Pattern should provide a clear guide for “pressing” your seams. In quilting, pressing seams to one side or opening them flat can change how the corners “nest” together. A high-quality Patchwork Butterfly – Pattern will include arrows or instructions on which direction to press each seam. This might seem like a small detail, but it is the secret to getting those perfectly sharp points on the wings of your Patchwork Butterfly, making the final product look truly professional.
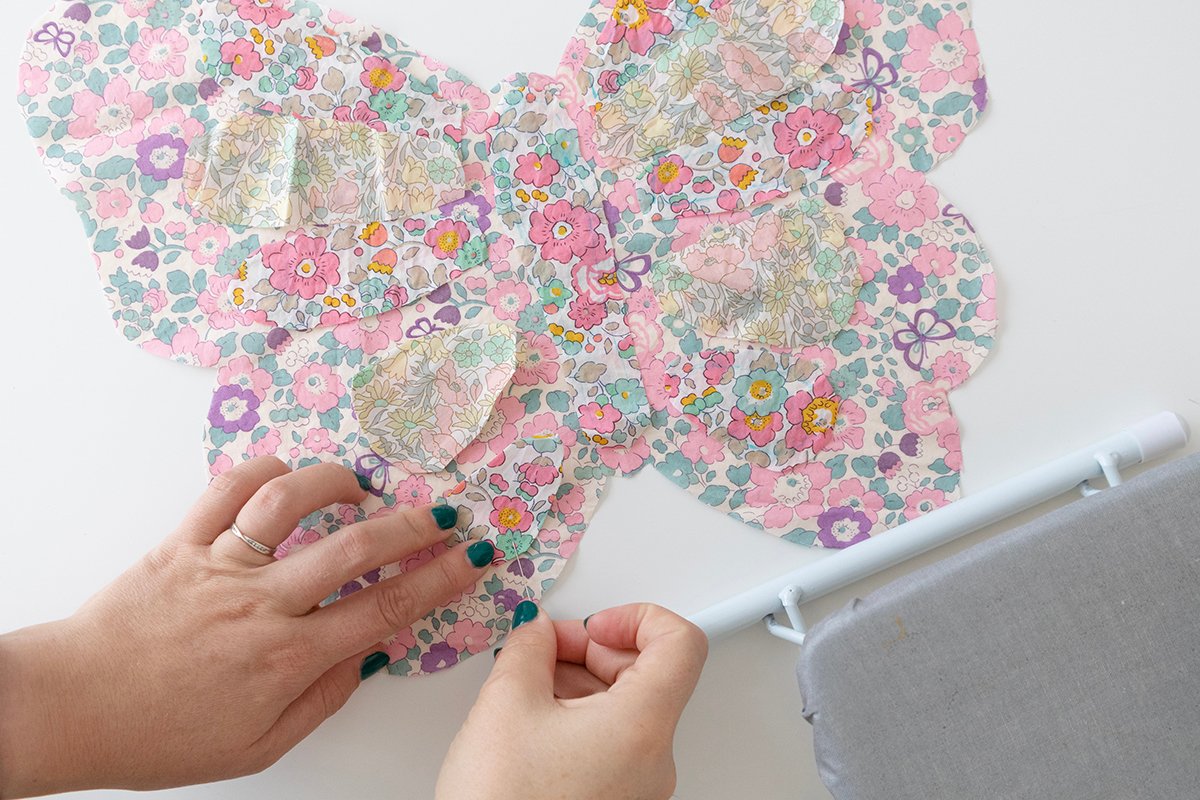
3. Step-by-Step Construction of the Patchwork Butterfly
The first phase of assembly for your Patchwork Butterfly – Pattern is the preparation of the wing units. You will typically start by creating the larger triangles that form the upper wings. Using the “two-at-a-time” HST method described in many Pattern guides, you can quickly produce the necessary pieces. Once these are sewn, it is crucial to trim them to the exact size specified in your Patchwork Butterfly – Pattern to ensure they fit perfectly with the other segments later on.
Once the upper wings are ready, you move on to the lower, smaller wings of the Patchwork Butterfly. These often involve smaller squares and more delicate angles. Following the Patchwork Butterfly – Pattern, you will sew these components together, being careful to maintain a consistent 1/4-inch seam allowance. This consistency is the hallmark of great patchwork; even a tiny variation can cause the wings of your Patchwork Butterfly to become misaligned or distorted.
After the four wing sections are completed, it is time to assemble the “body” unit according to your Patchwork Butterfly – Pattern. If your design includes antennae, these are often added at this stage using embroidery, fabric markers, or very thin strips of fabric. The body unit is the “spine” of the Patchwork Butterfly, and once it is ready, you will pin the left wings to one side and the right wings to the other, checking for symmetry before taking them to the sewing machine.
Pinning is a step you should never skip when working on a Patchwork Butterfly – Pattern. Because there are many intersecting seams where the wings meet the body, pins help keep everything from shifting. Align the “nesting seams” so that the fabric joins are crisp. As you sew the final vertical seams of your Patchwork Butterfly, go slowly over the bulkier areas where multiple layers of fabric meet, ensuring your needle stays straight and your tension remains even.
Once the main block is assembled, the Patchwork Butterfly – Pattern usually instructs you to add “border strips” or background squares to finish the block to its final size. This “framing” of the Patchwork Butterfly is what allows it to be easily sewn to other blocks in a larger quilt. Press the entire block thoroughly from the back first, then from the front, using a bit of fabric starch if you want the Patchwork Butterfly to be extra crisp and stable for the next steps.
The final inspection of your Patchwork Butterfly is a rewarding moment. Check that all the points of the wings are visible and haven’t been “chopped off” by the seams—a common challenge in any Patchwork Butterfly – Pattern. If a point is hidden, you can gently unpick that small section and resew it. With practice and a clear Pattern, you will find that creating these beautiful insects becomes a rhythmic and meditative process, resulting in a stunning collection of fabric butterflies.
4. Creative Ways to Use Your Finished Patchwork Butterfly
One of the most popular ways to utilize a Patchwork Butterfly – Pattern is to create a “sampler quilt.” You can make several butterflies, each with a different color scheme, and alternate them with plain fabric blocks or other floral patterns. This creates a garden-themed quilt that is both vibrant and organized. The Patchwork Butterfly serves as a recurring motif that ties the entire design together, making the Pattern a versatile tool in any quilter’s library.
Beyond large quilts, a single block from a Patchwork Butterfly – Pattern makes an excellent centerpiece for a decorative throw pillow. By adding a simple envelope closure on the back, you can create a high-end home accessory in just a few hours. The Patchwork Butterfly adds a handmade, artisanal touch to a living room or bedroom, and because you chose the fabrics yourself, you can ensure it perfectly matches your existing interior design and color palette.
For those who enjoy smaller projects, the Patchwork Butterfly – Pattern can be scaled down to create tote bag pockets or even “mug rugs” (large coasters). A small Patchwork Butterfly stitched onto the front of a plain canvas bag instantly elevates the item, making it a wonderful personalized gift for friends and family. The versatility of the Pattern means you can adapt it to almost any sewing project that requires a decorative fabric focal point.
You can also use the Patchwork Butterfly – Pattern as a base for appliqué work. Instead of sewing the pieces together in a traditional grid, you can finish the edges of the butterfly and stitch it onto a finished garment, like the back of a denim jacket or a child’s dress. This “hybrid” approach uses the geometry of the Patchwork Butterfly to create a patch that can be applied to surfaces that aren’t easily quilted, expanding the reach of your Pattern skills.
Wall art is another fantastic application for a finished Patchwork Butterfly. You can stretch your patchwork block over a wooden canvas frame or place it inside a deep shadow box. This protects the Patchwork Butterfly from wear and tear while allowing its intricate details and your hard work to be displayed as a permanent piece of art. It is a modern way to honor the tradition of the Patchwork Butterfly – Pattern without committing to a full-sized bed quilt.
Lastly, consider making seasonal versions of your Patchwork Butterfly – Pattern. Use bright neons for a summer vibe, muted earth tones for autumn, or even icy blues and whites for a “winter butterfly” look. The beauty of the Patchwork Butterfly is that it transcends seasons and styles. By experimenting with different interpretations of the same Pattern, you can constantly reinvent your craft and keep your sewing projects fresh, exciting, and highly personalized.
Frequently Asked Questions (FAQ)
Is the Patchwork Butterfly – Pattern suitable for absolute beginners?
Yes, many versions of the Patchwork Butterfly – Pattern are designed specifically for beginners. If you choose a pattern that uses squares and Half-Square Triangles without curved piecing, it is a very manageable project. It is a great way to learn about seam accuracy and fabric coordination while producing a beautiful Patchwork Butterfly as a result.
How much fabric do I need for a single butterfly block?
Generally, a single 12-inch Patchwork Butterfly block requires very little fabric—often just a few “scraps” or 5-inch squares for the wings and a small strip for the body. This makes the Patchwork Butterfly – Pattern a favorite “scrap-buster” project. You will also need about a fat quarter of background fabric to finish the block.
Can I hand-sew a Patchwork Butterfly – Pattern?
Absolutely. While a sewing machine is faster, many people enjoy the process of “English Paper Piecing” or traditional hand-sewing for a Patchwork Butterfly. Hand-sewing allows for extreme precision in the corners of the wings and is a portable way to work on your Patchwork Butterfly – Pattern while traveling or watching TV.
How do I make the butterfly wings look more realistic?
To add realism to your Patchwork Butterfly, try to use “gradient” fabrics that go from dark to light as they move away from the body. You can also use a Pattern that includes smaller “spots” or secondary colors within the wing units. Adding embroidered antennae at the very end is the final touch that brings the Patchwork Butterfly to life.
What is the best way to scale the Pattern up or down?
The easiest way to scale a Patchwork Butterfly – Pattern is to use a printer with a “scale” setting (e.g., printing at 50% for a mini version). However, keep in mind that the seam allowance remains a constant 1/4 inch regardless of the size of the block. If you are drafting it yourself, you will need to adjust the starting square sizes accordingly.
How should I quilt the finished butterfly block?
When quilting over a Patchwork Butterfly, many artists prefer “stitch-in-the-ditch” to hide the quilting lines, or “echo quilting” where you sew lines that follow the shape of the wings about 1/4 inch away. This makes the Patchwork Butterfly stand out and gives the wings a sense of dimension and “lift” from the background.
Conclusion
In this article, we have explored the wonderful world of the Patchwork Butterfly – Pattern, a project that combines technical quilting skills with artistic expression. We began by discussing how to select the best cotton fabrics and contrasting backgrounds to make your design shine.
We then delved into the geometry of the Patchwork Butterfly, emphasizing the importance of symmetry and the use of Half-Square Triangles. From the step-by-step assembly of the wings and body to the creative ways you can use your finished block—whether in a quilt, a pillow, or as wall art—it is clear that the Patchwork Butterfly – Pattern is a versatile and rewarding endeavor for any maker.