The Patchwork Maple Leaf – Tutorial is a timeless project that captures the essence of nature’s beauty through the art of quilting. Whether you are a seasoned quilter or a curious beginner, creating a Patchwork Maple Leaf offers a wonderful opportunity to play with warm hues, geometric shapes, and creative textures. This classic block is a staple in traditional quilting, symbolizing the changing seasons and the cozy warmth of a handmade home.
Mastering the Patchwork Maple Leaf – Tutorial involves understanding how simple squares and triangles come together to form an iconic silhouette. By focusing on precision cutting and consistent seam allowances, you can transform fabric scraps into a stunning masterpiece that looks far more complex than it actually is. In this guide, we will walk through every step of the process, ensuring your points are sharp and your colors are vibrant.
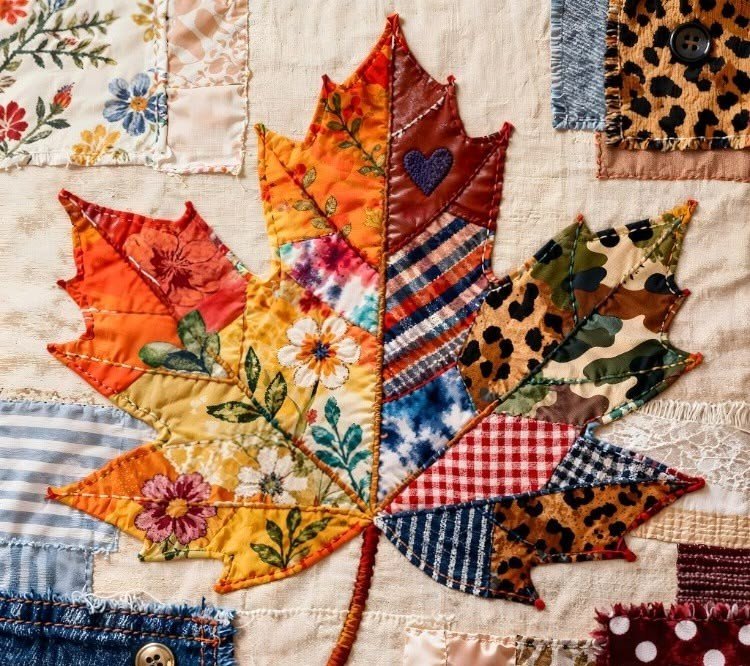
Embarking on this Patchwork Maple Leaf – Tutorial journey allows you to express your personal style through fabric selection. From deep burgundies and burnt oranges to modern teals and neutrals, the Patchwork Maple Leaf adapts to any aesthetic. As we dive into the technical aspects of this craft, remember that the goal is not just to finish a quilt block, but to enjoy the meditative process of piecing together a story, one stitch at a time.
1. Essential Materials and Fabric Selection for Your Patchwork Maple Leaf
To begin your Patchwork Maple Leaf – Tutorial, you first need to gather high-quality quilting cotton. This fabric is preferred because it holds its shape well and comes in an endless array of autumn-inspired prints. You will need a background fabric (usually a light neutral like cream or white) and leaf fabrics in various shades of red, orange, or yellow to create contrast.
The accuracy of your Patchwork Maple Leaf depends heavily on your tools. Ensure you have a rotary cutter, a self-healing cutting mat, and a quilt ruler with clear markings. Having these professional tools ensures that your Half-Square Triangles (HSTs) are perfectly sized, which is the secret to a professional-looking finish.
Don’t forget the small but vital supplies like high-quality thread, sharp sewing pins, and a reliable sewing machine. Using a 1/4 inch presser foot can be a game-changer for this Patchwork Maple Leaf – Tutorial, as it helps maintain the consistent seam allowance required for geometric blocks. A good iron and pressing mat are also non-negotiable for crisp seams.
When choosing your colors for the Patchwork Maple Leaf, think about the “value” of the fabric. You want enough contrast between the leaf tips and the background so the shape doesn’t get lost. Mixing solids with small-scale prints can add depth and a “scrappy” charm to your Patchwork Maple Leaf – Tutorial project, making it uniquely yours.
Pre-washing your fabric is a personal choice, but for a Patchwork Maple Leaf, it can prevent colors from bleeding later. If you choose not to pre-wash, using color catchers during the first laundry cycle is a smart alternative. Starching your fabric before cutting can also provide extra stability, making the bias edges of the triangles easier to handle.
Finally, prepare your workspace. A clean, well-lit table will make the Patchwork Maple Leaf – Tutorial much more enjoyable. Organize your scraps and pieces by color and size before you start sewing. This preparation phase sets the foundation for a successful Patchwork Maple Leaf block that you will be proud to display or gift.
2. Cutting Instructions and Geometry of the Patchwork Maple Leaf
The heart of the Patchwork Maple Leaf – Tutorial lies in its geometric construction, which consists of squares, a stem unit, and Half-Square Triangles. To create a standard 12-inch block, you will need to cut specific sizes. Accuracy in this stage of the Patchwork Maple Leaf is critical; even a 1/8 inch error can throw off the entire alignment of the leaf.
For the background units, you typically need two large squares for the HSTs and three smaller squares for the corners. For the leaf units, you will need two large squares (to match the background ones), three smaller squares for the center and sides, and one rectangular strip for the stem unit. This mix of shapes creates the multi-dimensional look of the Patchwork Maple Leaf.
When cutting for your Patchwork Maple Leaf – Tutorial, always “measure twice and cut once.” Use your quilt ruler to square up the fabric edges before making your primary cuts. If you are making multiple Patchwork Maple Leaf blocks, you can stack layers of fabric to speed up the process, but be careful not to let the layers shift.
The Half-Square Triangles are the most important part of the Patchwork Maple Leaf. Most quilters prefer to cut their initial squares slightly larger than needed and then trim down the HSTs to the exact size. This “oversizing” technique ensures that every unit in your Patchwork Maple Leaf – Tutorial is perfectly square and ready for assembly.
The stem unit adds a touch of realism to the Patchwork Maple Leaf. This is usually made by sewing a thin strip of leaf fabric between two triangles of background fabric. While it might seem intimidating, following the Patchwork Maple Leaf – Tutorial steps for the stem will show you it’s just a matter of careful positioning and straight stitching.
Once all your pieces are cut, lay them out on a design board or your table. Seeing the Patchwork Maple Leaf take shape before you sew helps prevent mistakes, such as accidentally flipping a triangle the wrong way. This visual check is a staple step in any Patchwork Maple Leaf – Tutorial to ensure the “leaf” actually looks like a leaf.
3. Step-by-Step Assembly and Sewing Techniques
Now we move to the sewing phase of the Patchwork Maple Leaf – Tutorial. Start by creating your Half-Square Triangles. Place a background square and a leaf square right sides together, draw a diagonal line, and sew 1/4 inch away from both sides of that line. Cutting along the line gives you two identical units for your Patchwork Maple Leaf.
Pressing is a skill often overlooked in a Patchwork Maple Leaf – Tutorial. Always press your seams toward the darker fabric to prevent them from “shadowing” through the light background. For the Patchwork Maple Leaf, pressing seams open can also help reduce bulk where multiple points meet, resulting in a flatter, more professional quilt block.
Next, assemble the stem unit. Sew the background triangles to the sides of your stem strip, then trim it to match the size of your other squares. This unit acts as the “anchor” for the bottom of your Patchwork Maple Leaf. Keeping your stitches small and consistent will ensure the stem remains sturdy throughout the life of the Patchwork Maple Leaf.
Follow the grid layout: the Patchwork Maple Leaf is essentially a 3×3 grid. Sew the pieces into three horizontal rows first. Pay close attention to the orientation of the leaf tips (the HSTs). In this Patchwork Maple Leaf – Tutorial, the direction of the triangles determines whether the leaf looks like it’s “blooming” or just a random collection of shapes.
Once your rows are finished, it’s time to join them together. To get perfect intersections in your Patchwork Maple Leaf, use the nesting seams technique. This involves pressing the seams of Row 1 in the opposite direction of Row 2. When you put them together, the seams “lock” into place, giving the Patchwork Maple Leaf – Tutorial a crisp, aligned finish.
Finish the block by sewing the three rows together and giving the entire Patchwork Maple Leaf a final press with steam. Check the dimensions of your finished block; it should be exactly the size intended plus a 1/2 inch for seam allowances. Congratulations, the main assembly of your Patchwork Maple Leaf – Tutorial is complete!
4. Creative Variations and Finishing Your Project
Once you have mastered the basic Patchwork Maple Leaf – Tutorial, you can explore creative variations. Try using batik fabrics for a variegated, organic look that mimics the natural color shifts of real leaves. You can also change the scale of the Patchwork Maple Leaf to create tiny blocks for pillows or giant blocks for a modern wall hanging.
Consider adding appliqué details to your Patchwork Maple Leaf. Some quilters like to embroider “veins” onto the leaf surface after the piecing is done to add texture. This Patchwork Maple Leaf – Tutorial can be the base for an entire autumn-themed quilt, alternating leaf blocks with plain squares for a “falling leaves” effect.
The Patchwork Maple Leaf also works beautifully in a monochrome palette. Imagine a leaf made of various shades of blue or grey for a sophisticated, wintry feel. This Patchwork Maple Leaf – Tutorial doesn’t have to be restricted to fall colors; it’s a versatile pattern that looks great in bright florals or even patriotic red, white, and blue.
If you are making a table runner, line up several Patchwork Maple Leaf blocks in a row. You can vary the orientation of each leaf—tilting some left and some right—to create a sense of movement. Using this Patchwork Maple Leaf – Tutorial method makes the finished piece feel dynamic and artisanal rather than rigid and manufactured.
For the final finishing, choose a quilting pattern that complements the leaf shape. “Echo quilting,” where you sew lines that follow the silhouette of the Patchwork Maple Leaf, is a popular choice. Alternatively, a simple “stitch in the ditch” method ensures the focus remains entirely on your beautiful Patchwork Maple Leaf – Tutorial handiwork.
Finally, bind your project with a contrasting fabric to frame the Patchwork Maple Leaf. Whether it becomes a pot holder, a cushion, or part of a large heirloom quilt, your Patchwork Maple Leaf is a testament to your skill and creativity. We hope this Patchwork Maple Leaf – Tutorial inspires you to keep exploring the wonderful world of patchwork.
FAQ: Frequently Asked Questions about the Patchwork Maple Leaf
What is the best fabric for a Patchwork Maple Leaf?
High-quality 100% cotton is the best choice. It is easy to cut, doesn’t stretch excessively, and handles the heat of an iron well, which is vital for the many seams in a Patchwork Maple Leaf.
How do I make my leaf points stay sharp?
To keep your points sharp in a Patchwork Maple Leaf – Tutorial, ensure you are using an accurate 1/4 inch seam. When sewing the rows together, look for the “X” created by the previous seams and sew exactly through it to avoid cutting off the triangle tips.
Can a beginner try the Patchwork Maple Leaf – Tutorial?
Yes! While it looks intricate, it is made of basic units like squares and triangles. If you take your time with the cutting and follow the grid layout, it is a very achievable project for a beginner quilter.
What size should I make my Patchwork Maple Leaf block?
A 12-inch block is the most common because the math is easy (each unit in the 3×3 grid is 4 inches finished). However, you can scale it up or down depending on your project needs.
How can I make the stem look more natural?
In this Patchwork Maple Leaf – Tutorial, we suggest a pieced stem. For a more “natural” look, you could also use a bias tape maker to create a thin fabric vine and appliqué it onto the corner square instead of piecing it.
Conclusion
In this Patchwork Maple Leaf – Tutorial, we have explored the journey from selecting the perfect autumn fabrics to the final pressing of a beautiful quilt block.
We covered the essential materials, the geometric precision required for cutting, the step-by-step assembly of the 3×3 grid, and creative ways to make the pattern your own. The Patchwork Maple Leaf is more than just a design; it is a celebration of craftsmanship and the changing seasons. By mastering the Half-Square Triangle and the stem unit, you now have the skills to create stunning quilts that bring a touch of the outdoors inside.