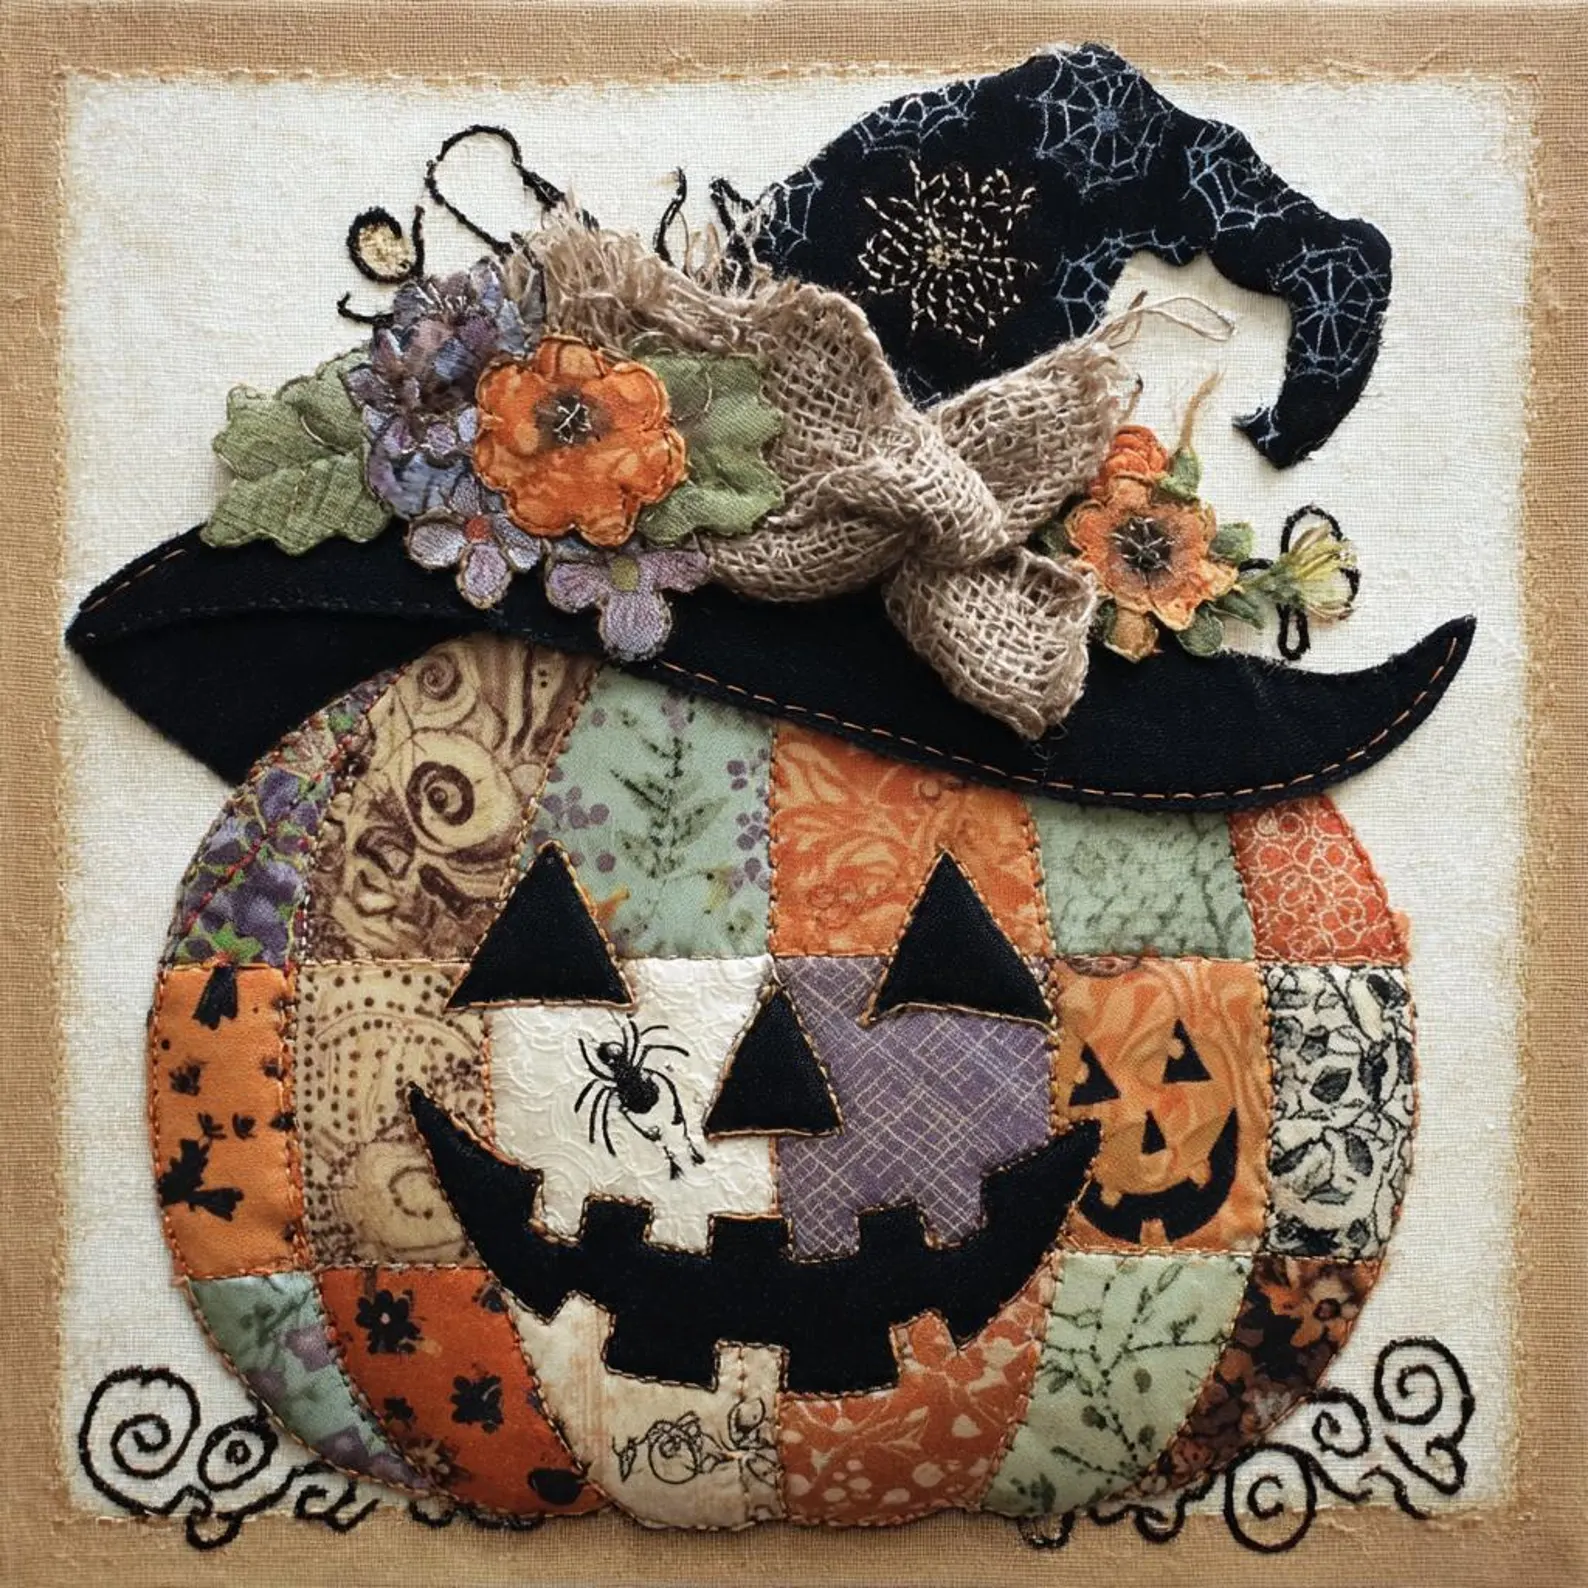
As autumn leaves begin to fall and the air grows crisp, there’s no better time to dive into a fun, creative sewing project like the Patchwork pumpkin, Halloween decoration, witch hat art – Pattern. This delightful combination of seasonal motifs captures the playful and spooky spirit of Halloween while letting you explore your crafting skills. Whether you’re decorating your home or looking for a unique gift idea, this pattern blends classic quilting charm with whimsical Halloween magic.
Making your own Patchwork pumpkin, Halloween decoration, witch hat art – Pattern is a fun and fulfilling project suitable for both beginners and seasoned crafters. It involves basic sewing techniques, fabric selection, and a bit of imaginative flair. From vibrant pumpkin panels to stylish witch hats made from scraps, this craft celebrates everything we love about Halloween and handmade décor.
In this article, we’ll guide you through every step of creating your own Patchwork pumpkin, Halloween decoration, witch hat art – Pattern. You’ll learn how to choose fabrics, cut your pieces, assemble the shapes, and add finishing touches that make your decorations stand out. Following best practices for SEO and Google AdSense policy, this article is structured to offer useful, safe, and original content designed to inspire and educate.
1. Selecting Materials and Planning Your Project
Starting your Patchwork pumpkin, Halloween decoration, witch hat art – Pattern begins with selecting the right materials. For the patchwork pumpkin, choose a mix of orange-toned quilting cottons—look for different shades and prints to give your pumpkin a textured, three-dimensional appearance. Add a touch of green for the stem and a bit of brown for added contrast.
For the witch hat, black fabric is a must, but you can also include purples, deep blues, or even metallic accents for extra flair. Scraps from old sewing projects are perfect for this part. The patchwork design allows for mixing and matching without the need for large fabric pieces, making this project eco-friendly and budget-friendly.
You’ll need basic sewing tools: sharp scissors or a rotary cutter, quilting ruler, cutting mat, pins or clips, sewing machine (or hand sewing supplies), thread, and an iron. A hot glue gun or craft glue might also be useful for attaching embellishments. Polyester fiberfill or cotton stuffing will help give your pumpkin its round, plump shape.
A printable or drawn pattern for the pumpkin panels and witch hat shapes will help keep your project accurate and consistent. You can either draw your own or use a downloadable Patchwork pumpkin, Halloween decoration, witch hat art – Pattern from a reputable sewing site. Make sure your templates are symmetrical and scaled for the size of decoration you want.
In addition to fabric and tools, consider embellishments like buttons, felt cutouts, ribbons, or even small artificial leaves and berries. These can be used to dress up your pumpkin or decorate the witch hat. Glitter fabric paint or embroidery can also add fine details for a custom look.
Planning your color scheme before you start cutting is important. Lay out your fabric choices and decide on the placement of each color. This helps maintain balance and avoid repetition in the final piece. Halloween themes often feature bold contrasts, so feel free to be dramatic with your choices.
2. Cutting, Piecing, and Stitching the Patchwork Pumpkin
Once you’ve selected your fabrics, it’s time to begin assembling the Patchwork pumpkin, Halloween decoration, witch hat art – Pattern by working on the pumpkin itself. Start by printing or tracing a basic pumpkin panel shape. You’ll typically need six to eight identical panels for a rounded pumpkin. Adjust the size based on your desired final dimensions.
Using your rotary cutter or scissors, carefully cut out your chosen fabrics according to the pattern. Mix the fabrics randomly or follow a sequence to achieve the look you want. Each panel will contribute to the full pumpkin shape, so variety adds interest and dimension.
With right sides together, start sewing the panels together one by one. Use a ¼” seam allowance and backstitch at the beginning and end of each seam. Continue joining the panels until all are connected in a circle, forming the pumpkin body. Press the seams flat after each join to keep your shape neat and professional.
Before closing the final seam, leave a gap at the top or bottom for turning and stuffing. After the panels are joined, turn the pumpkin right-side out. Use your fingers or a blunt tool to gently shape the curves and smooth out the seams.
Stuff the pumpkin firmly but evenly, ensuring it retains its round shape. Polyester fiberfill works well, but you can also use fabric scraps or cotton stuffing. Once filled, close the opening with a ladder stitch or hidden hand stitch.
To add definition, use a long needle and embroidery thread or strong twine to cinch the pumpkin vertically. Insert the needle from top to bottom and pull tightly, dividing the pumpkin into segments like a real one. Repeat several times around the pumpkin until it has a sculpted, natural look.
3. Crafting the Witch Hat and Halloween Details
Now that your pumpkin is complete, it’s time to work on the witch hat portion of the Patchwork pumpkin, Halloween decoration, witch hat art – Pattern. This is where creativity shines. You can create a flat witch hat for display or a 3D version that sits atop your pumpkin like a spooky topper.
Begin with a triangle template for the cone and a circle for the brim. Patch together small pieces of black and dark-colored fabrics to form the cone. Sew these patches together, then cut your triangle from the pieced fabric. Add interfacing for structure if you want the hat to stand up on its own.
Sew the triangle into a cone by joining the two long edges. Then, cut a small circle for the top of the cone and sew it in place. Attach the cone to the brim either by hand stitching or gluing. If you’re making a display-only decoration, glue is quick and effective. If you want durability, stitch it securely.
Decorate the hat with ribbon bands, small faux flowers, felt stars, or even a buckle made from gold fabric. These little touches turn your basic hat into a piece of Halloween art. Adding a crooked twist or tilting the hat gives it more character and a spooky, whimsical vibe.
Attach the hat to the pumpkin using hand stitches or glue, depending on how permanent you want it to be. Some crafters prefer to leave the hat removable so they can switch decorations or wash the fabric if needed.
You can further embellish your Patchwork pumpkin, Halloween decoration, witch hat art – Pattern with spooky add-ons like mini bats, spider webs, or even LED fairy lights. These bring your handmade décor to life and are perfect for mantle displays, Halloween tables, or even front porch setups.
The final result is a magical blend of fabric art and holiday spirit. Whether it’s playful, eerie, or elegant, your witch-hat-topped patchwork pumpkin is sure to steal the spotlight.
4. Display, Gift Ideas, and Customization Tips
Once your Patchwork pumpkin, Halloween decoration, witch hat art – Pattern is complete, you can start thinking about how and where to showcase it. These handmade decorations are perfect for tabletops, shelves, mantels, or entryways. Combine them with candles, faux leaves, and other Halloween trinkets for a full festive setup.
Another great idea is to use them as centerpieces for Halloween parties or autumn dinners. Add name tags and you’ve got a spooky place setting guests will remember. You can even scale down the pattern to create mini pumpkins for party favors or giveaways.
This project also makes a fantastic gift. Friends, family members, and coworkers will appreciate a handmade Halloween decoration that’s both cute and practical. Wrap it in cellophane with some candy or attach a spooky note for a personal touch.
Customizing your Patchwork pumpkin, Halloween decoration, witch hat art – Pattern is easy. Try using glow-in-the-dark fabrics, vintage Halloween prints, or even old flannel shirts for a cozy farmhouse feel. Embroider names, Halloween phrases, or spooky designs to make your decoration one-of-a-kind.
If you’re selling at craft fairs or on platforms like Etsy, these items can become bestsellers. They’re seasonal, handmade, and easily customizable—three key elements that buyers love. Be sure to price your items based on time, materials, and creativity involved.
Lastly, consider storing your decoration carefully after the season ends. Keep it in a dry, cool place, preferably in a sealed container with moth repellents if using natural stuffing. That way, your handmade masterpiece can return next year, looking as magical as ever.
FAQ
What type of fabric works best for the Patchwork pumpkin, Halloween decoration, witch hat art – Pattern?
Quilting cotton is ideal because it’s easy to sew and comes in a wide range of prints. You can also use linen, flannel, or fabric scraps from past projects.
Do I need a sewing machine for this project?
While a sewing machine speeds things up, this pattern can absolutely be sewn by hand, especially if you enjoy slow stitching or don’t have a machine.
How do I make the witch hat stand up?
Use interfacing or stiff fabric like felt to give your witch hat structure. You can also lightly stuff it or use wire around the brim for shape.
Can I resize the pattern?
Yes! Simply enlarge or shrink your templates to create pumpkins and hats of different sizes. This is great for making a coordinated set for display.
Is this project beginner-friendly?
Definitely. Basic sewing skills like stitching seams and turning fabric are all that’s required. It’s a great introduction to patchwork and soft sculpture.
Can I wash the finished decoration?
Spot cleaning is recommended. If your decoration is stuffed and stitched shut, full washing may damage the shape or embellishments.
Conclusion
Crafting
your own Patchwork pumpkin, Halloween decoration, witch hat art – Pattern is a fun, creative way to celebrate the spooky season. From selecting fabrics and piecing your pumpkin to designing a whimsical witch hat, this project is packed with personality and charm.
Not only does it offer a unique handmade decoration for your home, but it’s also a thoughtful gift idea, a perfect craft fair item, or a new family tradition. Every stitch and fabric choice adds to the story you’re creating, making it as special as the season itself.
We’d love to hear your thoughts! Leave a sincere opinion and share your suggestions below. What fabrics did you use? Did you add any unique touches? Your feedback helps others and encourages more creative adventures.