A Picnic blanket with a cherry on top – Pattern is more than just a functional outdoor accessory; it is a whimsical invitation to enjoy the great outdoors with a touch of vintage flair. Whether you are planning a romantic afternoon in the park or a fun-filled family gathering, having a handmade picnic blanket sets the stage for comfort and style. The cherry on top motif adds a playful, nostalgic aesthetic that stands out against the green grass, making your setup the envy of every passerby while providing a durable surface for your favorite snacks.
Creating your own Picnic blanket with a cherry on top – Pattern allows for complete customization in terms of size, fabric choice, and insulation. Many store-bought options lack the personality and heavy-duty quality required for frequent use, but a DIY sewing project ensures you have a water-resistant backing and a soft, breathable top layer. By following a structured quilt pattern or a simple appliqué technique, you can transform basic materials into a high-quality heirloom piece that celebrates the joy of summer living and creative expression.
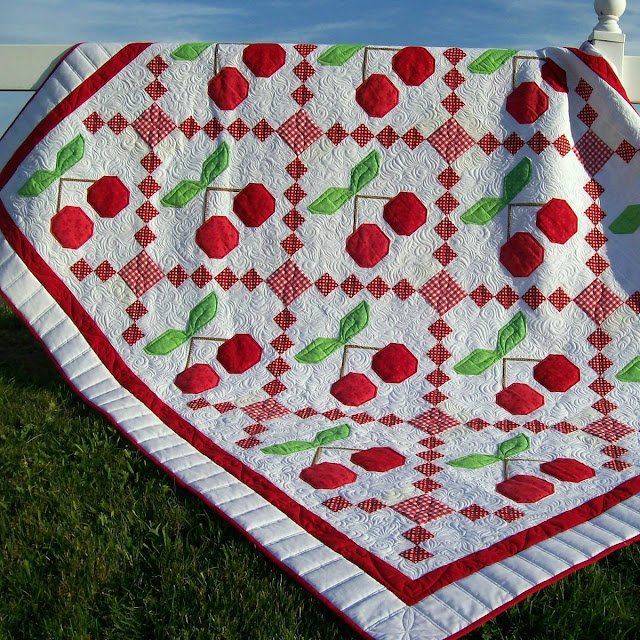
In the world of outdoor crafts, the Picnic blanket with a cherry on top – Pattern represents a perfect blend of utility and art. This specific design pattern focuses on bold colors—typically reds, whites, and greens—to create a vibrant visual impact that complements the natural environment. Beyond the visual appeal, understanding the technical aspects of the pattern construction ensures that your blanket is easy to fold, wash, and carry. In the following sections, we will dive deep into the essential terms and steps needed to bring this charming picnic accessory to life.
1 Understanding the Picnic blanket with a cherry on top – Pattern basics
The Picnic blanket with a cherry on top – Pattern serves as the foundational blueprint for your project, detailing every measurement and stitch required. This specific pattern is characterized by its central cherry motif, which can be achieved through embroidery, fabric appliqué, or even crochet patches. When you follow a professional sewing pattern, you ensure that the proportions are correct and the finish is polished.
Choosing the right fabric weight is the first step in mastering this pattern. Most enthusiasts prefer a heavyweight cotton or canvas for the top layer to provide stability. The cherry on top elements are often made from scrap fabric, making this an eco-friendly way to use up leftover materials. A well-drafted pattern will guide you on how to arrange these pieces for maximum visual symmetry.
The “cherry on top” isn’t just a phrase; it’s a specific design element within the pattern that requires precision. You will typically find instructions for circular stitching to create the fruit and satin stitching for the stems. This detail is what elevates a standard outdoor mat into a themed picnic blanket. Using a template included in the pattern ensures every cherry looks uniform across the fabric.
Durability is a core component of the Picnic blanket with a cherry on top – Pattern. Because these blankets face soil, moisture, and friction, the pattern usually recommends reinforced borders or double-stitched seams. This prevents the edges from fraying after multiple trips to the beach or the park. High-quality thread choice is also highlighted to maintain the integrity of the cherry design.
For beginners, the Picnic blanket with a cherry on top – Pattern often includes a step-by-step tutorial on layering. A standard picnic quilt consists of a top decorative layer, a middle batting for cushion, and a bottom protective layer. The pattern explains how to “sandwich” these layers together so they don’t shift during use. This structural integrity is vital for a long-lasting outdoor textile.
Lastly, this pattern is highly adaptable for different skill levels. If you are advanced, you might incorporate intricate quilting around the cherries to create texture. If you are a novice, the pattern allows for a simple topstitch approach. No matter your experience, the Picnic blanket with a cherry on top – Pattern provides a clear roadmap to a beautiful, functional finished product.
2 Selecting Materials for your Picnic blanket with a cherry on top
When executing the Picnic blanket with a cherry on top – Pattern, the choice of textile materials is the most critical factor for success. You want a top fabric that feels soft against the skin but is tight-knit enough to keep out sand and dirt. Gingham fabric is a popular choice for this pattern because it provides a classic “picnic” look that perfectly frames the red cherry accents.
The waterproof backing is an essential feature often emphasized in the Picnic blanket with a cherry on top – Pattern. Using materials like polyester ripstop or treated nylon ensures that damp grass won’t ruin your lunch. Integrating this into your sewing project requires a universal needle and sometimes a walking foot to handle the slippery texture of the moisture-proof layer.
For the cherry on top decorations, many crafters opt for felt or cotton poplin. These fabrics are easy to cut and don’t fray excessively, making them ideal for the appliqué process. The pattern might suggest using a fusible web (heat-activated adhesive) to temporarily bond the cherries to the blanket before the final decorative stitching is applied.
Padding or batting is what makes your picnic blanket comfortable for long hours of lounging. The Picnic blanket with a cherry on top – Pattern usually suggests a low-loft cotton batting or a fleece layer. This provides just enough cushion without making the blanket too bulky to fold and carry in a picnic basket or backpack.
Color selection plays a huge role in the aesthetic appeal of the Picnic blanket with a cherry on top – Pattern. Bright cherry red, deep leaf green, and a neutral creme or white background create a high-contrast look that is photogenic and cheery. Ensure your fabric dyes are colorfast so the vibrant cherry pattern doesn’t bleed into the white sections during the first wash.
Finally, don’t forget the notions required by the pattern. You will need heavy-duty thread, fabric shears, and perhaps some bias tape for a clean edge finish. Following the Picnic blanket with a cherry on top – Pattern requirements for high-quality notions will save you from the frustration of broken needles or snapped threads during the construction phase.
3 Step-by-Step Construction of the Pattern
The actual assembly of the Picnic blanket with a cherry on top – Pattern begins with the preparation of your fabric panels. You must pre-wash your materials to prevent fabric shrinkage later on. Once dried and ironed, use your measuring tape to cut the top and bottom layers according to the pattern dimensions, usually a standard 60×60 inch square.
Applying the cherry motif is the next exciting phase of the Picnic blanket with a cherry on top – Pattern. Position your cherry cut-outs in the corners or in a repeating grid across the top panel. Use the pattern’s placement guide to ensure they are spaced evenly. Pinning or using temporary fabric glue helps keep the cherries in place before you head to the sewing machine.
Once the cherries are secured, you will perform the topstitching. Using a zigzag stitch or a blanket stitch around the edges of the cherries adds a professional touch and prevents peeling. This part of the Picnic blanket with a cherry on top – Pattern is where your creativity shines, as you can choose contrasting thread colors to make the cherry design pop.
After the decorative top is finished, it’s time for the layering process. Lay your waterproof base face down, place the batting on top, and finally, place your cherry-patterned top face up. This “quilt sandwich” is a staple technique in the Picnic blanket with a cherry on top – Pattern. Use curved safety pins to hold all three layers together securely.
The edging and binding step gives the blanket its final shape. You can either sew the layers right sides together and flip them (the “pillowcase method”) or use binding tape around the perimeter. The Picnic blanket with a cherry on top – Pattern often recommends binding for a more durable, rugged outdoor finish that can withstand being dragged across various terrains.
The final touch in the Picnic blanket with a cherry on top – Pattern is the quilting lines. By sewing straight lines or a diamond grid across the entire blanket, you secure the batting so it doesn’t bunch up after washing. This ensures your Picnic blanket with a cherry on top remains flat, comfortable, and beautiful for many summer seasons to come.
4 Maintenance and Care for Your Picnic Blanket
To keep your Picnic blanket with a cherry on top – Pattern looking brand new, proper cleaning techniques are essential. Most handmade blankets should be washed on a gentle cycle with cold water to protect the appliqué cherries. Avoid harsh bleaches which can fade the vibrant red pigment of the cherry design and weaken the fabric fibers.
Drying your picnic blanket requires care, especially if you used a waterproof backing. It is often best to air dry the blanket by laying it flat or hanging it in a shaded area. High heat from a dryer can melt or warp the synthetic moisture barrier, potentially ruining the functional integrity of the Picnic blanket with a cherry on top – Pattern.
Storage is another factor in the longevity of your pattern-made blanket. Instead of folding it the same way every time, which can cause permanent creases and wear down the cherry embroidery, try rolling it. Many Picnic blanket with a cherry on top – Pattern designs even include instructions for a matching carry strap or a built-in handle for easy transport.
Spot cleaning is your best friend during a picnic. If a spill occurs, blot it immediately with a damp cloth rather than rubbing it into the fabric grain. Because the Picnic blanket with a cherry on top – Pattern uses multiple layers, preventing liquids from soaking through to the batting will make deep cleaning much easier later on.
Over time, you may notice small threads coming loose from the cherry appliqué. A quick repair stitch will keep the pattern intact. Keeping a small sewing kit handy allows you to maintain the Picnic blanket with a cherry on top – Pattern beauty even while you are out in the field, ensuring a small snag doesn’t become a large tear.
Finally, consider applying a fabric protector spray once the blanket is finished and cleaned. This adds an extra layer of stain resistance to the cotton top, helping the Picnic blanket with a cherry on top – Pattern repel dirt and spills. With these simple maintenance steps, your custom-made blanket will remain a centerpiece of your outdoor adventures for years.
FAQ: Frequently Asked Questions
What is the best size for a Picnic blanket with a cherry on top – Pattern?
Most experts suggest a size of at least 60×60 inches for two people, or 80×80 inches for families. The pattern can usually be scaled up or down depending on your specific needs and the amount of fabric you have available.
Can I make this blanket without a sewing machine?
While a sewing machine is much faster and provides more durable seams, you can certainly create a Picnic blanket with a cherry on top – Pattern by hand using a backstitch for the seams and a blanket stitch for the cherry appliqué. It simply requires more time and patience.
Is the Picnic blanket with a cherry on top – Pattern suitable for the beach?
Yes, provided you use a sand-resistant top fabric and a waterproof bottom. The cherry motif looks fantastic in beach photos, and the multi-layer construction helps keep the hot sand from burning those sitting on the blanket.
What fabrics are best for the cherry appliqué?
Cotton solids are the most popular because they are easy to handle. However, for a unique look, you can use red gingham, polka dot fabric, or even red denim to give the cherry on top a bit of texture and character.
How do I make the blanket easy to carry?
Many patterns include a “roll-up” design. You can sew ribbon ties or webbing straps directly onto the back of the blanket. When you are done with your picnic, simply roll it up and secure the straps for a portable outdoor mat.
Conclusion
In this article, we have explored the wonderful world of the Picnic blanket with a cherry on top – Pattern, covering everything from the initial design concept to the final care instructions. We discussed the importance of choosing durable fabrics, the technical steps of layering and quilting, and how the iconic cherry motif adds a unique, personalized touch to your outdoor gear.
By following these SEO-optimized tips and sewing techniques, you can create a high-quality, water-resistant picnic blanket that combines functionality with undeniable charm.