The Poinsettia Table Topper – Pattern is a beautiful and festive quilting project that brings warmth and elegance to any holiday table setting. Inspired by the vibrant red and green hues of poinsettias, this table topper adds a touch of handcrafted charm that captures the essence of the season. Whether you’re hosting a Christmas dinner or simply want to bring holiday cheer to your home decor, this pattern is a perfect choice.
For quilting enthusiasts and beginners alike, the Poinsettia Table Topper – Pattern offers a rewarding experience. It’s an intermediate-level project that introduces exciting piecing techniques while allowing plenty of creative freedom in fabric selection and design. The result is a striking piece of decor that becomes the focal point of your dining or coffee table during the holidays.
In this article, we’ll explore everything you need to know to successfully create your own Poinsettia Table Topper – Pattern, including fabric tips, assembly instructions, design variations, and creative uses. We’ve also included a comprehensive FAQ section and a thoughtful conclusion to ensure you’re confident and inspired to begin this festive quilting journey.
1. What Is the Poinsettia Table Topper – Pattern?
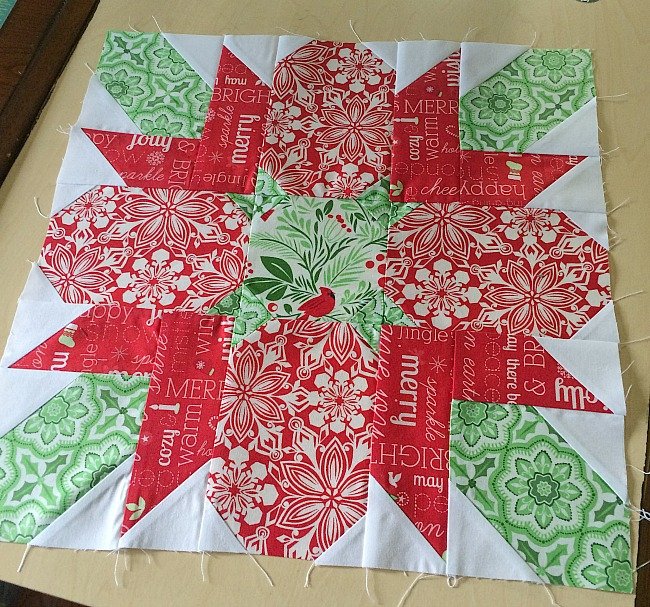
The Poinsettia Table Topper – Pattern is a decorative quilted piece usually designed in a circular, hexagonal, or star-shaped layout. Its design mimics the appearance of poinsettia petals radiating from a central point, making it an ideal centerpiece during the winter holidays.
This pattern typically measures between 20 to 30 inches across and is placed in the center of a dining table, sideboard, or coffee table. With rich reds, deep greens, and touches of gold or white, it reflects the traditional colors of Christmas while providing a cozy, handmade accent to any room.
The pattern often includes petal-shaped fabric pieces, either appliquéd or pieced together, forming a flower-like design. Some versions even incorporate three-dimensional petals, giving the topper a layered, lifelike appearance that truly stands out.
What makes this pattern special is its blend of classic quilting methods with modern holiday aesthetics. It offers quilters a chance to play with symmetry, color contrast, and texture—making each finished topper uniquely beautiful.
Despite its intricate look, the Poinsettia Table Topper – Pattern can be simplified for beginners by using pre-cut fabric shapes or opting for fewer petals. Advanced quilters, on the other hand, can add embellishments like metallic thread, beads, or embroidery to elevate the design.
The topper is not only functional but also sentimental. Many crafters make one each year as a family tradition, or as gifts for loved ones, turning this festive pattern into a cherished holiday memory.
2. Choosing Fabrics and Colors for the Perfect Look
Selecting the right fabrics is a key step when creating your Poinsettia Table Topper – Pattern. Since the pattern is centered around the poinsettia flower, your choice of color and texture will greatly influence the final visual impact.
Start with a strong base of red fabrics—these represent the poinsettia petals. Look for deep, rich tones like crimson, scarlet, or burgundy. Choose solids for a clean look or small floral prints for added texture and visual interest.
Next, incorporate green fabrics for the leaves or background sections. Emerald, moss, and forest green work beautifully to balance the red and give the topper its festive appeal. Blenders and batiks are ideal because they provide variation without overwhelming the design.
For contrast and highlights, add touches of gold, ivory, or white. These colors can be used for the center of the flower or the outer edges of the topper. Metallic fabrics or shimmer-infused cottons can add sparkle that enhances the holiday mood.
Pay attention to fabric weight and quality. Quilting cotton is the most commonly used material because it’s easy to work with, durable, and available in a wide variety of prints and colors. Avoid heavy fabrics like denim or velvet as they can be bulky and difficult to sew.
Before cutting, always pre-wash and press your fabrics to avoid shrinkage and to remove any chemicals or creases. This step helps your final project lay flat and look professional.
Finally, consider creating a color mock-up or layout before sewing. Use paper or fabric swatches to visualize how the colors will work together. This saves time and helps ensure that your Poinsettia Table Topper – Pattern turns out just the way you imagined.
3. How to Assemble the Poinsettia Table Topper
Once your fabrics are selected, it’s time to bring your Poinsettia Table Topper – Pattern to life. While patterns may vary slightly, most follow a similar process that combines cutting, piecing, quilting, and finishing.
Begin by printing or tracing your template. Many versions of this pattern include petal shapes, triangles, or diamond pieces. Carefully cut your fabric using a rotary cutter and quilting ruler for clean, accurate edges.
Start by assembling the center of the poinsettia, usually formed by several red fabric pieces joined in a circular or star formation. Pay close attention to alignment here, as it sets the tone for the rest of your project.
Add surrounding petal or leaf pieces, building outward from the center. If your pattern includes layered petals, sew the top layer first, then attach it to the base with appliqué or topstitching techniques. This creates a dimensional, floral effect.
After the top is complete, create your quilt “sandwich” by layering the topper with batting and backing fabric. Secure it with safety pins or basting spray to keep the layers aligned during quilting.
Quilting can be done with straight lines that follow the petal shapes, or with free-motion quilting that mimics the veins of the flower. Use red, green, or gold thread to match or contrast with your fabric for added flair.
Finally, trim the edges and apply bias binding. You can make your own binding from coordinating fabric or use pre-made binding for convenience. Be sure to finish with a clean, even edge so your Poinsettia Table Topper – Pattern looks polished and ready to display.
4. Creative Ways to Use and Personalize Your Topper
Your Poinsettia Table Topper – Pattern isn’t just for the center of your table—it’s a versatile project that can be adapted in many fun and creative ways for the holiday season and beyond.
Use the topper as a tree skirt alternative for small tabletop Christmas trees. Its floral design adds a decorative flair and is the perfect scale for mini trees or decorative arrangements.
Turn your topper into a wall hanging by adding corner sleeves to the back and inserting a dowel. Hang it in the entryway, above the fireplace, or in your craft room for a festive accent.
For a thoughtful holiday gift, pair your Poinsettia Table Topper – Pattern with a set of matching napkins or coasters made from leftover fabric. This makes a beautiful handmade gift set that friends and family will treasure.
Customize your topper by adding names or dates with embroidery. This is especially meaningful if you’re gifting it or using it as part of a yearly holiday tradition.
You can also adjust the size to make smaller items like placemats, mug rugs, or pot holders using the same poinsettia theme. This allows you to create a full matching holiday kitchen set.
Finally, consider using non-traditional holiday colors like icy blue, silver, or soft pinks for a modern twist. The poinsettia motif is strong enough to carry the design, even with unexpected color schemes.
FAQ: Poinsettia Table Topper – Pattern
Q1: Is the Poinsettia Table Topper – Pattern beginner-friendly?
It depends on the version you choose. Some patterns are more advanced, involving complex piecing or appliqué, but simplified templates are available for beginners.
Q2: What size should my table topper be?
A standard size ranges from 20 to 30 inches across. However, you can scale it up or down depending on your table size and desired visual impact.
Q3: Can I use a sewing machine for the whole project?
Yes, most of the Poinsettia Table Topper – Pattern can be completed using a sewing machine, including piecing and quilting. Hand-stitching is optional for decorative touches.
Q4: What kind of batting should I use?
A low-loft cotton or cotton-blend batting works best for table toppers. It provides enough structure without making the topper too thick.
Q5: Where can I find the Poinsettia Table Topper – Pattern?
Patterns are available through quilting magazines, crafting blogs, Etsy shops, and major fabric retailers. Some offer downloadable PDFs with step-by-step instructions.
Q6: How do I care for my finished topper?
Spot cleaning or gentle machine washing with cold water is recommended. Always air dry and avoid harsh detergents to preserve color and shape.
Conclusion
The Poinsettia Table Topper – Pattern is more than just a seasonal quilting project—it’s a beautiful and creative way to celebrate the holidays with a personal touch. From selecting festive fabrics to assembling the flower-inspired design, every step is a chance to express your style and love for handmade decor.
Whether you’re making it for yourself, giving it asa gift, or starting a new holiday tradition, this pattern is a joyful and rewarding project that captures the magic of the season. If you’ve tried this pattern or plan to, we’d love to hear from you. Please leave a sincere opinion and share your suggestions or variations in the comments. Happy quilting and happy holidays!