Creating a cozy and inviting home for the fall season starts with thoughtful handmade touches, and the Pumpkin Run table runner – pattern is one of the most charming ways to welcome autumn. This delightful quilting project combines seasonal themes, simple piecing techniques, and creative design to bring warmth and personality to any dining table. Whether you’re an experienced quilter or just starting out, this pattern is a festive project that’s both fun and functional.
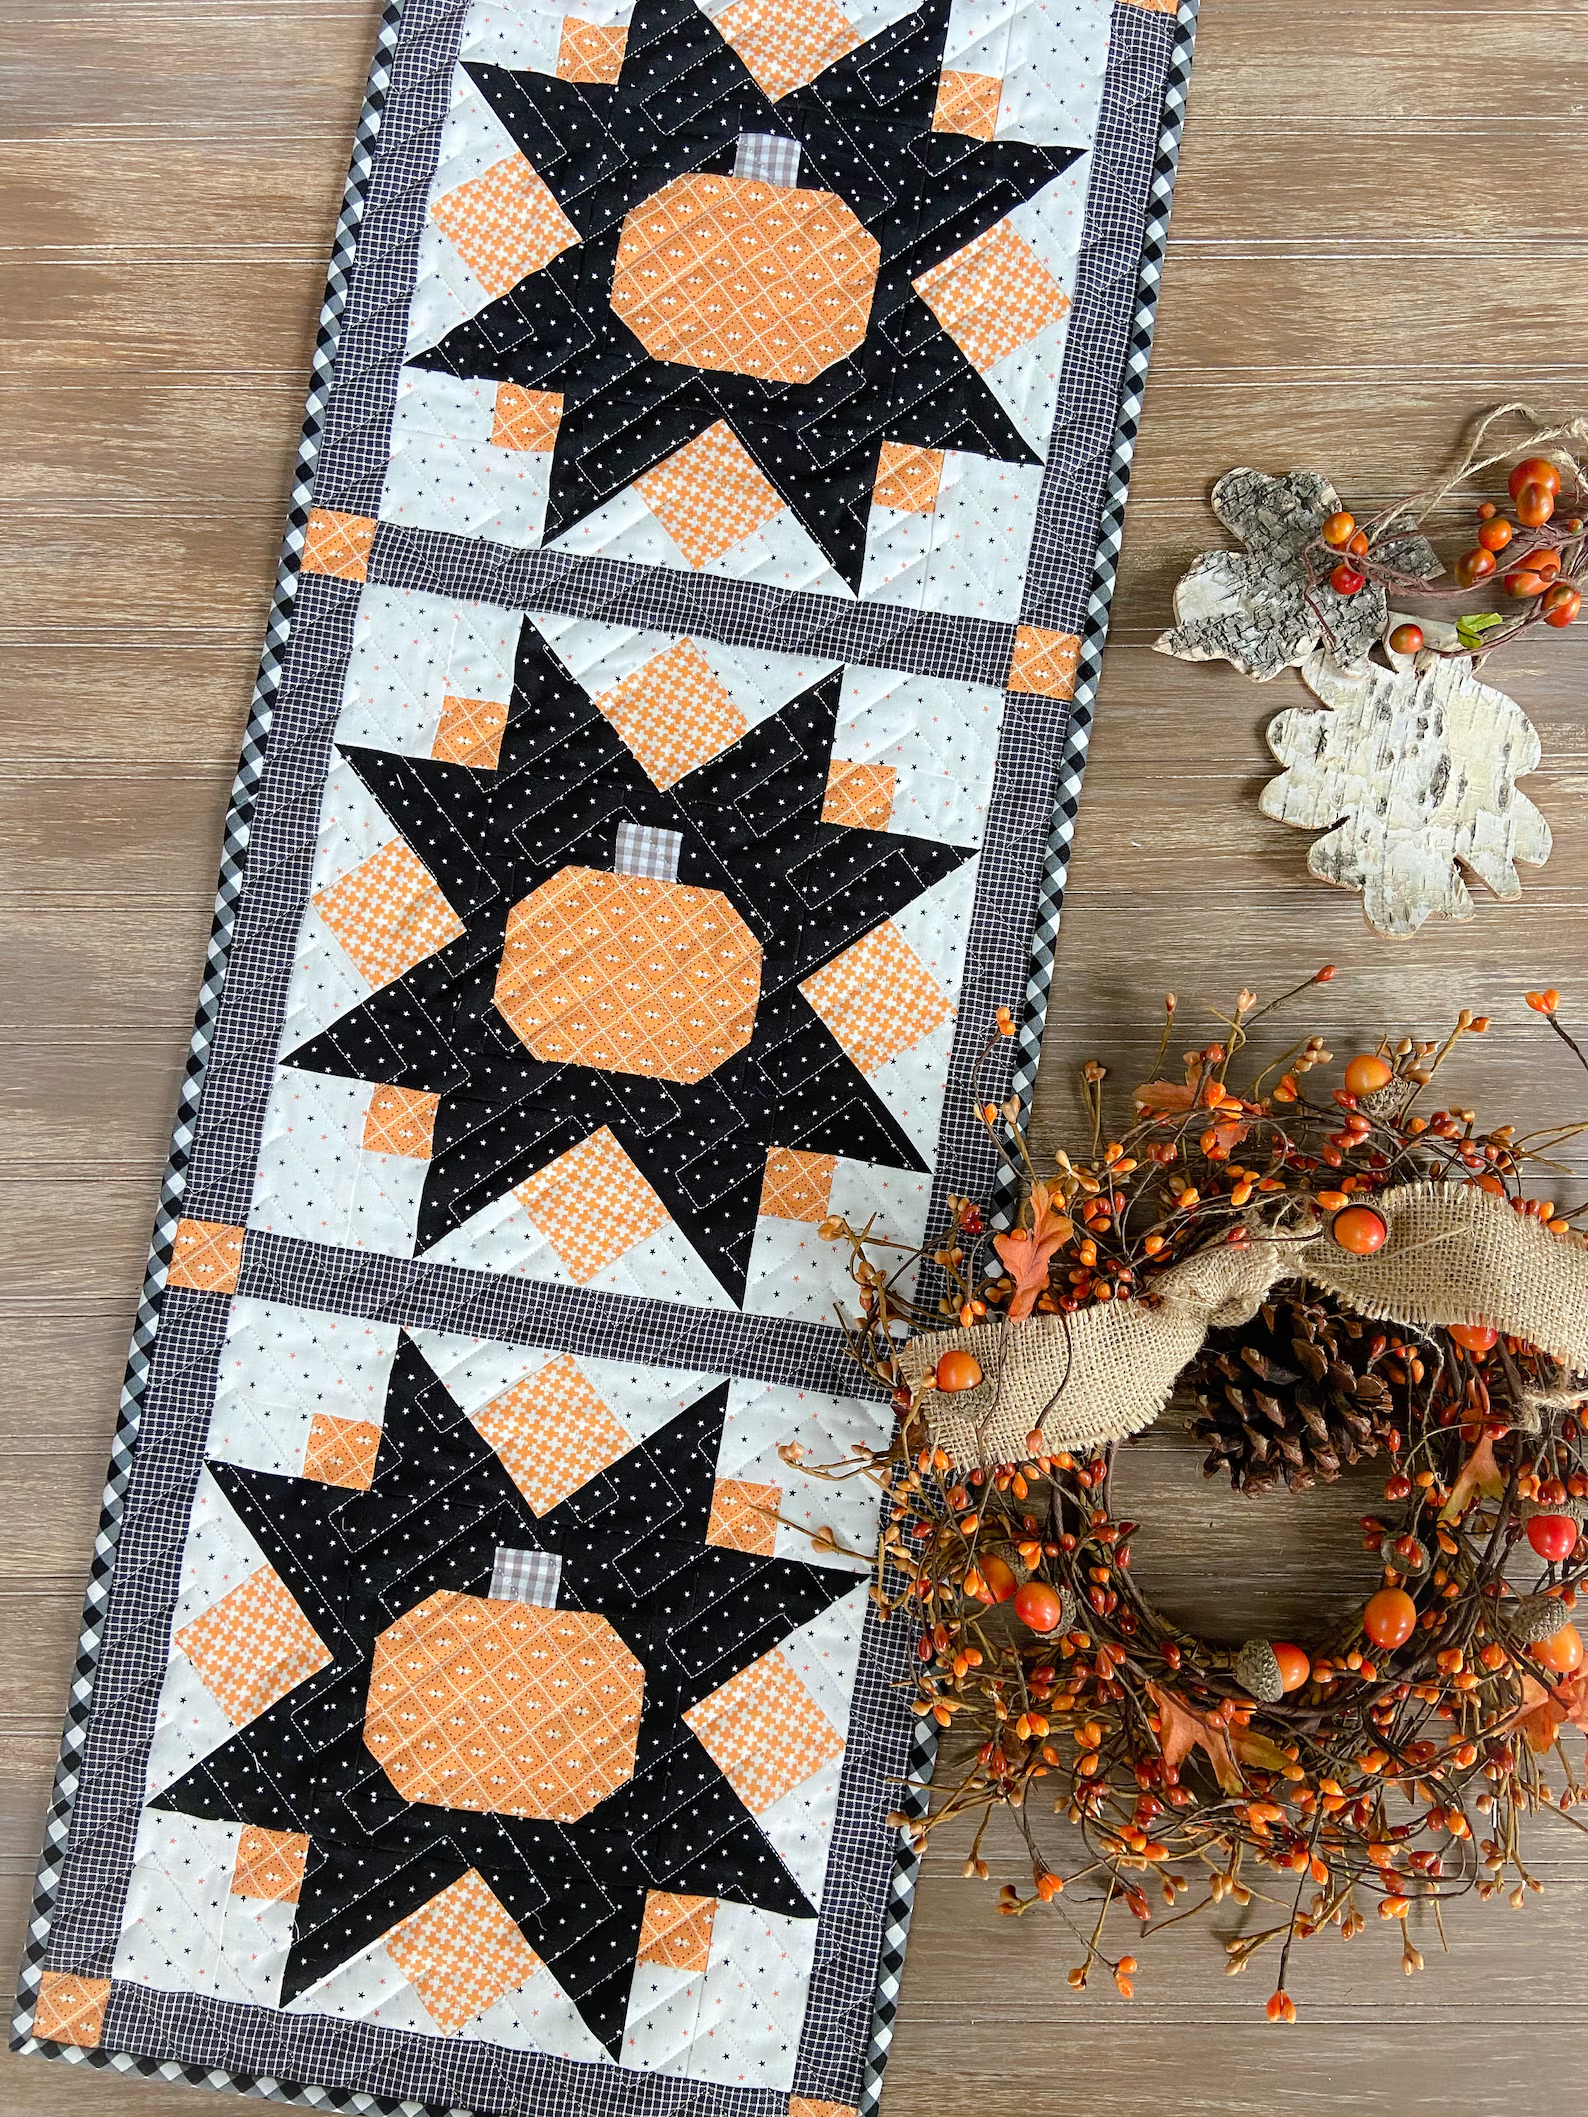
The Pumpkin Run table runner – pattern typically features a series of pumpkin motifs aligned in a row, paired with fall-inspired fabrics like oranges, browns, creams, and even deep greens or golds. Its elongated shape makes it perfect for kitchen tables, buffets, or sideboards, instantly turning any space into a harvest-themed display. While the design looks impressive, it’s easy enough for beginners with basic sewing knowledge and can be completed in a weekend.
In this article, we’ll explore everything you need to know to make your own Pumpkin Run table runner – pattern. From choosing fabrics and cutting pieces to assembling and finishing your runner, you’ll get a complete, step-by-step overview. You’ll also discover tips for customizing your design and answers to frequently asked questions to help guide your creative process. Let’s dive into this autumn-inspired project and bring a little handmade magic to your table.
1. What Makes the Pumpkin Run Table Runner – Pattern Special
The Pumpkin Run table runner – pattern stands out for its festive charm and versatility. Its design typically includes a series of patchwork pumpkins stitched into a long rectangular shape, evoking the spirit of fall and Thanksgiving gatherings. This makes it a popular choice for seasonal decor and handmade gifts.
Unlike full-sized quilts, table runners are smaller and quicker to complete, making them ideal for those who want to create something beautiful without a long-term time commitment. The Pumpkin Run table runner – pattern is a fantastic project for weekend sewing or holiday prep, and it’s a great way to use up scrap fabric in fall colors.
The structure of the pattern is simple: blocks or panels featuring pumpkin motifs are sewn together in a row, often with sashing, borders, or accent blocks to add variety. The pumpkins can be created using traditional patchwork methods, appliqué, or a combination of both, depending on your skill level and preferences.
Another reason this project is so beloved is its adaptability. You can keep the design classic with traditional fall tones or give it a modern twist with bold prints and unexpected color combinations. The block-based format also allows you to adjust the length to fit your specific table or space.
This pattern is beginner-friendly but still offers enough creative freedom for advanced quilters to experiment with textures, quilting techniques, and embellishments. Embroidery, fabric paint, or decorative stitching can be added to give each pumpkin more personality.
Finally, the Pumpkin Run table runner – pattern is more than just a decor item—it’s a conversation starter, a symbol of changing seasons, and a representation of handmade love that becomes part of your home’s tradition year after year.
2. Materials and Fabric Choices for Your Table Runner
To start your Pumpkin Run table runner – pattern, gathering the right materials is key. Choosing autumn-themed fabrics and high-quality supplies will help your project not only look beautiful but also last for many seasons.
The primary material needed is 100% quilting cotton. Look for fabrics in shades of orange for pumpkins, greens for stems and leaves, and creams or browns for backgrounds. You can also include subtle prints like plaids, leaves, or polka dots to add texture without overwhelming the design.
You’ll also need a backing fabric that complements the front. Many quilters use a coordinating neutral or a festive fall print. Batting is essential to give your runner structure and softness. A thin, low-loft cotton or cotton-poly blend is recommended for a flat, table-friendly finish.
Thread choice is often overlooked but plays an important role. Use matching or coordinating thread to piece the blocks together and consider a slightly contrasting thread for quilting if you want the stitches to stand out. Good-quality thread ensures durability and smooth stitching.
Additional supplies include a rotary cutter, quilting ruler, cutting mat, sewing machine, iron, and pins or clips. For appliqué versions of the pattern, you may also need fusible web, a lightbox (optional), and appliqué scissors for precision cutting.
Some quilters like to pre-wash their fabrics to prevent shrinkage and color bleeding. While this is optional, it’s especially recommended when working with strong reds, oranges, or dark browns that may bleed onto lighter fabrics during washing.
Finally, consider whether you want to embellish your Pumpkin Run table runner – pattern. Buttons for pumpkin stems, hand embroidery for added details, or even decorative trims can give your project a custom, personal touch that makes it truly unique.
3. How to Piece and Sew the Pumpkin Run Table Runner – Pattern
The construction of the Pumpkin Run table runner – pattern is straightforward and enjoyable. It typically begins with creating pumpkin blocks that are then sewn into a row with sashing or borders. Each pumpkin block can be made using squares, rectangles, and half-square triangles.
Start by cutting all your pieces according to the pattern instructions or measurements. Most pumpkin blocks consist of a large central body with smaller pieces added for corners, stems, and leaves. Arrange your cut pieces into block layouts before you begin stitching to ensure you like the fabric placement.
Use a quarter-inch seam allowance for all piecing. Start by assembling each pumpkin block one at a time. Sew the body sections together, then attach the corners, stem, and leaf if included. Press each block flat after sewing to keep seams crisp and accurate.
Once all your pumpkin blocks are complete, lay them out in a row and decide if you want to add sashing or small accent blocks between them. These extra elements add dimension and help frame each pumpkin, making the design more polished.
Sew your blocks and sashing into one long strip to form the top of the runner. After piecing, measure and cut borders if you want to frame the entire design. Borders in a coordinating print or neutral tone help finish the edges and provide balance.
Next, create a quilt sandwich by layering your backing fabric (right side down), batting, and the pieced top (right side up). Baste the layers together using safety pins or temporary spray adhesive, making sure everything lies flat with no wrinkles.
Quilt as desired. Straight-line quilting along the seams works well, or you can try free-motion quilting for a more artistic look. After quilting, trim the excess batting and backing, then bind the edges using double-fold binding sewn around the perimeter.
4. Customization Ideas and Display Tips
One of the joys of working with the Pumpkin Run table runner – pattern is the ability to customize it to match your personal style and home decor. While traditional fall tones are classic, don’t be afraid to try something different.
If you’re aiming for a modern aesthetic, try using solid colors or abstract prints for your pumpkins. Black-and-white prints paired with orange can add a Halloween vibe, while muted earth tones lend a rustic farmhouse feel.
Personalize your pumpkins by adding embroidered initials, family names, or even short seasonal phrases like “Give Thanks” or “Harvest Home.” This turns your table runner into a keepsake that holds more meaning and charm.
You can also vary the shape and size of the pumpkins. While square blocks are common, try elongating some or adding curves using appliqué techniques. Each pumpkin becomes a character in your autumn story.
Display your table runner not only on dining tables but also on fireplace mantels, entryway tables, or dressers. You can even hang it vertically on a wall using a quilt rod or clips to enjoy it as part of your seasonal decor.
If gifting, consider pairing the runner with matching cloth napkins or coasters made from the same fabric scraps. This adds a thoughtful, coordinated touch and makes the gift even more special.
The Pumpkin Run table runner – pattern isn’t just for fall—adapt it for other seasons by changing the motifs. Swap pumpkins for trees in winter, flowers in spring, or stars in summer. The basic format remains, but the theme can shift with the calendar.
FAQ: Pumpkin Run Table Runner – Pattern
Q1: Is the Pumpkin Run table runner – pattern beginner-friendly?
Yes, it’s a great project for beginners. The blocks are simple to construct, and the size of the project is manageable for learning basic quilting techniques.
Q2: What is the typical size of a completed table runner?
Most Pumpkin Run table runner – pattern projects measure around 12 to 18 inches wide and 40 to 60 inches long, but you can adjust based on your table size.
Q3: Can I use appliqué instead of patchwork for the pumpkins?
Absolutely. Appliqué is a fun alternative that allows for more shape flexibility. You can use fusible web and raw edge or turned edge techniques.
Q4: What kind of batting is best for table runners?
A thin cotton or cotton blend batting is best. It lies flat and allows your runner to sit nicely on the table without too much puffiness.
Q5: Can I machine wash the table runner after finishing it?
Yes, if you used pre-washed cotton fabrics and quality thread, it should be safe to machine wash. Use a gentle cycle and lay flat or hang to dry.
Q6: How long does it take to make the Pumpkin Run table runner?
Most people can complete it in a weekend. Cutting and piecing may take a few hours, with additional time for quilting and binding.
Conclusion
The Pumpkin Run table runner – pattern is more than just a seasonal craft—it’s an opportunity to express your
creativity, add handmade charm to your home, and enjoy the satisfaction of finishing a meaningful project. From fabric selection to final stitches, this project brings together everything quilters love: warmth, tradition, and beauty.
We hope this article has given you the guidance and inspiration to create your own festive table runner. If you’ve made one or plan to, please leave a sincere opinion below and share your experience or suggestions. Your input not only helps us improve but also encourages others to embrace the joy of seasonal quilting.