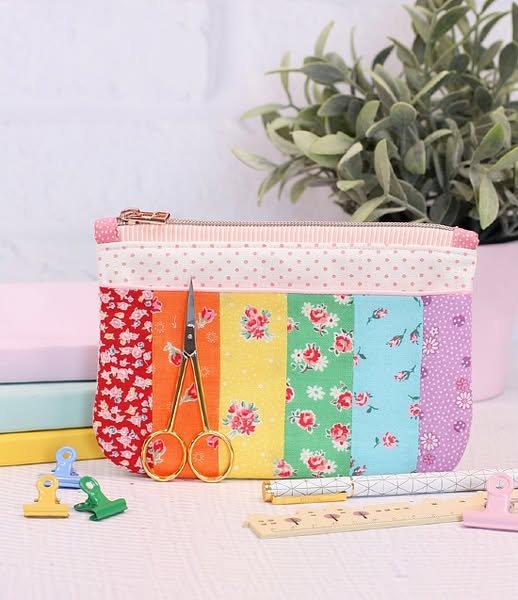
If you’re looking for a colorful, creative, and functional sewing project, then the Rainbow Flower Bag Sewing Pattern is exactly what you need. Combining bright rainbow tones with floral shapes, this sewing project lets you create a stunning handmade bag that’s both fashionable and practical. Whether you’re a beginner or a seasoned sewist, this pattern offers something joyful and rewarding for everyone.
The appeal of the rainbow flower bag lies not only in its aesthetic charm but also in the endless customization possibilities. You can choose your favorite fabrics, adjust the bag size, and add personal touches like buttons, embroidery, or lining. It’s a great way to use leftover fabric scraps and transform them into something truly eye-catching.
In this guide, you’ll learn everything from choosing the right materials to sewing techniques and assembly tips. We’ll walk you step-by-step through the process of bringing your Rainbow Flower Bag Sewing Pattern to life so you can carry your creation with pride or give it as a beautiful handmade gift.
1. What Is a Rainbow Flower Bag Sewing Pattern?
A Rainbow Flower Bag Sewing Pattern is a sewing template that allows you to create a handbag shaped like a flower, with petals crafted from multicolored fabric. The bag is typically structured with a round base and overlapping petal pieces that open up like a blooming flower, giving it a 3D look that’s vibrant and playful.
The “rainbow” in the name refers to the colorful variety of fabric pieces used. Instead of sewing the entire bag with one fabric type, you’ll use a mix of colorful fabrics to make each petal unique. This adds a cheerful, whimsical effect that sets your creation apart from standard bag designs.
Most Rainbow Flower Bag Sewing Patterns include templates for cutting the petals, the base circle, the handles, and lining. Some advanced versions may also include closures such as zippers or magnetic snaps, giving the bag more functionality while keeping its unique shape.
These bags are often medium-sized and perfect for light shopping, carrying books, or as a casual accessory for a day out. Their floral shape and bright colors also make them popular for spring and summer fashion.
One of the great things about this pattern is that it works well with cotton, quilting fabrics, felt, or canvas. Choosing different textures can enhance the flower’s look and add durability to your bag.
Whether you’re creating this for fun, to sell at craft fairs, or to gift to a friend, the Rainbow Flower Bag Sewing Pattern delivers a unique handmade product that’s both beautiful and useful.
2. Choosing Fabrics and Materials for Your Bag
The success of your Rainbow Flower Bag Sewing Pattern project depends heavily on your choice of materials. Because this bag thrives on color and shape, it’s important to use fabrics that hold structure and showcase bright tones effectively.
Cotton is a go-to choice because it’s easy to sew, lightweight, and available in a huge variety of colors and patterns. Quilting cotton is particularly popular for this kind of project due to its stiffness, which helps the petals stand up and retain their shape.
If you want a sturdier bag, canvas or denim is a great option for the base. These fabrics offer more durability and are ideal if the bag will be used frequently or carry heavier items. Just make sure your sewing machine can handle thicker layers if you choose heavy materials.
For a truly eye-catching effect, choose contrasting colors for each petal. Think red, orange, yellow, green, blue, and purple—the full rainbow! You can also use ombre gradients or floral prints to match the flower theme. Solids mixed with prints can also create an interesting visual balance.
Don’t forget interfacing. Using medium-weight fusible interfacing for the petals and base will help your bag hold its shape better. This is especially important if you’re using softer fabrics or want the petals to look crisp and defined.
Other materials to consider include coordinating thread, magnetic snaps or buttons for closure, a lining fabric (like cotton or polyester), and webbing or reinforced fabric for the handles. Some people like to add inner pockets as well for extra functionality.
Always pre-wash and iron your fabric before cutting. This prevents shrinkage later and helps your fabric lay flat for more accurate cutting and sewing. Prepping your materials is a simple but essential step to ensure your finished bag looks its best.
3. Step-by-Step Instructions to Sew the Rainbow Flower Bag
Once you’ve gathered your materials and printed your Rainbow Flower Bag Sewing Pattern, it’s time to start sewing. Here’s a basic breakdown of how to bring your floral bag to life.
Begin by cutting out all the necessary pieces from your fabric. This usually includes 6 to 12 petals, a circular base, a lining piece for each section, and handle strips. Carefully trace the template pieces onto your fabric and interfacing, and then cut with sharp fabric scissors.
Next, fuse the interfacing to the wrong side of each petal. If you’re using fusible interfacing, follow the manufacturer’s instructions for heat and time settings. This will add stiffness and help the petals stand up once assembled.
Sew each petal with its lining, right sides together, leaving the base open. Turn them right side out, press flat with an iron, and topstitch along the edges if desired. Topstitching adds a polished finish and extra structure.
Once all petals are sewn, begin assembling them in a circular formation by sewing the sides of each petal together. Overlap them slightly for a fuller flower shape. Pin the petals together first to ensure alignment before stitching.
Attach the circular base to the bottom of the assembled petals. This step can be a bit tricky due to the curves, so go slowly and pin generously. Use a ¼” to ½” seam allowance depending on your pattern instructions.
Add your lining and handles last. Insert the lining inside the outer bag (wrong sides together), and attach the handles between the layers. Sew around the top edge of the bag to secure everything. Add your closure—like a magnetic snap or button—and your Rainbow Flower Bag is complete!
4. Customization and Creative Variations
One of the joys of working with a Rainbow Flower Bag Sewing Pattern is how easily it can be customized to reflect your style or match a specific theme. From fabric choice to embellishments, the possibilities are endless.
Try changing the number of petals to alter the overall shape and size of the bag. Fewer, larger petals give a bold, minimal look, while more, smaller petals create a fuller, more intricate flower shape.
Embellishments like beads, embroidery, or fabric paint can be added to each petal for extra detail. You could even applique smaller flowers, butterflies, or your initials onto the petals to make it truly unique.
For a seasonal twist, use holiday-themed fabrics. Reds and greens work beautifully for a Christmas version, while pastels and florals make the perfect spring or Easter accessory. Autumn tones with leaf-shaped petals can also be a creative variation.
Experiment with handle styles—swap fabric handles for wooden rings, braided rope, or leather straps to create different aesthetics. You can even make a drawstring version by adding a fabric casing around the top of the bag.
If you’re comfortable with zippers, consider adding a zippered pocket on the inside or outside for better organization. This adds function while still maintaining the decorative charm of the bag.
Finally, this project is a great opportunity to teach kids to sew or enjoy a crafting day with friends. Each person can create their own version using the same pattern, making it a fun and bonding activity.
FAQ – Rainbow Flower Bag Sewing Pattern
Q1: Is the Rainbow Flower Bag Sewing Pattern suitable for beginners?
Yes! Many patterns are beginner-friendly, especially those with simple shapes and step-by-step instructions. Start with basic cotton fabric and work your way up.
Q2: How many petals should my bag have?
Most patterns include 6 to 12 petals. More petals give a fuller flower look, but also increase sewing time. Choose based on your desired aesthetic and skill level.
Q3: What’s the best fabric for this project?
Quilting cotton is ideal for structure and color variety. Canvas or felt can add durability, especially for the base. Always use interfacing for better shape retention.
Q4: Can I wash the rainbow flower bag?
Yes, if all materials are washable. Machine wash on gentle or hand wash. Avoid heat drying to preserve the shape and structure of the petals.
Q5: Where can I find a printable Rainbow Flower Bag Sewing Pattern?
You can find patterns on sewing blogs, Etsy, or craft forums. Look for downloadable PDFs with clear templates and instructions.
Q6: Can I sell bags made from this pattern?
If the pattern is marked for commercial use or gives permission, yes. Always credit the pattern designer and check usage rights.
Conclusion
Creating a Rainbow Flower Bag Sewing Pattern project is a delightful journey into the world of colorful, functional crafting. Whether you’re making it for yourself, a friend, or as part of your handmade shop, this flower-inspired bag is guaranteed to bring smiles and compliments.
We’ve covered everything from what this pattern involves, how to choose the best fabrics, the steps to sew it, and ways to personalize it. Now it’s your turn to bring your own version to life.
If you found this guide helpful, please leave a sincere opinion or suggestions in the comments. Your feedback helps us
create even better content for creative minds like yours. Happy sewing! 🌸