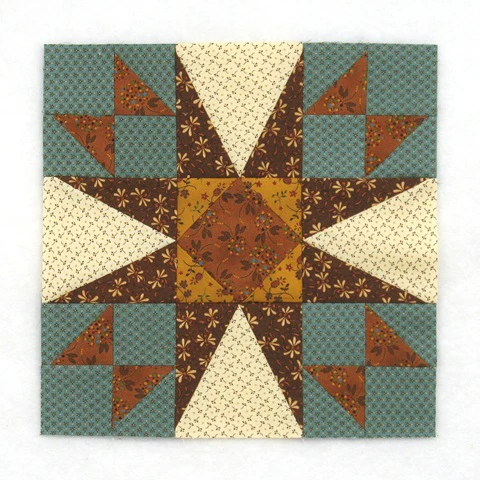
The Rose Mosaic Quilt Block – Pattern is a timeless and elegant design that brings the beauty of nature into your quilting projects. Inspired by the delicate petals and intricate shapes of roses, this pattern combines geometric precision with artistic expression. It’s a favorite among quilters who enjoy combining traditional craftsmanship with a modern flair. Whether you’re making a full quilt, a wall hanging, or a decorative pillow, this block will instantly add a touch of sophistication and charm.
Creating a Rose Mosaic Quilt Block is like painting with fabric. By carefully choosing colors and piecing together small segments, you can form a stunning mosaic that captures the essence of a blooming rose. This project not only enhances your sewing skills but also allows you to explore the artistic side of quilting through color blending and layout design.
In this article, we’ll explore everything you need to know to make a Rose Mosaic Quilt Block – Pattern, including fabric selection, cutting and assembly techniques, creative variations, and essential finishing tips. With a bit of patience and creativity, you can transform simple fabric pieces into a captivating floral work of art that looks just as breathtaking as a real rose.
1. Materials and Fabric Selection
When creating a Rose Mosaic Quilt Block – Pattern, the right fabric choices play a major role in the overall outcome. Because this block relies heavily on color contrast and shading, you’ll need fabrics in various tones to create depth and dimension.
Start by choosing a palette inspired by real roses—think deep reds, soft pinks, coral hues, or even bold purples. You’ll need at least three to four shades within your chosen color family: a light tone for highlights, medium tones for the main petals, and a darker shade for shadows. These variations will help you achieve the mosaic look that defines the pattern.
For the background, consider using a neutral color such as cream, light gray, or pale green to make the rose design stand out. If you want a more modern look, you can even use a dark background like navy or charcoal for a dramatic contrast.
When selecting fabric, solid colors often work best because they allow the mosaic details to stand out clearly. However, small-scale prints or tonal batiks can add subtle texture that enhances the visual depth of the block.
Aside from fabric, you’ll need standard quilting supplies: a rotary cutter, ruler, cutting mat, sewing machine, pins, and thread that matches your fabric colors. Using high-quality cotton fabric will make cutting and stitching smoother and ensure that your quilt block maintains its shape.
Before cutting, wash and press your fabric to remove any sizing or wrinkles. This step ensures more precise cuts and prevents distortion during piecing. For extra crispness, use a bit of spray starch—it makes handling small mosaic pieces much easier.
2. Cutting and Assembling the Rose Mosaic Quilt Block
The Rose Mosaic Quilt Block – Pattern may look complex, but when broken down into smaller units, it becomes much more manageable. The design typically consists of a combination of triangles, squares, and rectangles arranged to form the petals of a rose.
Begin by cutting your chosen fabrics into small pieces according to your pattern template. It’s important to label your pieces, especially if you’re using multiple shades of the same color. Keeping your work organized will save time and reduce errors during assembly.
Once you’ve prepared all your pieces, start assembling the petals. Sew the smallest sections first—these will form the center of your rose. Gradually work your way outward, adding larger pieces to build the layers of petals. Use a consistent ¼-inch seam allowance throughout to maintain precision and alignment.
As you piece your mosaic together, pay close attention to color placement. The lighter tones should form the highlights, while darker shades create shadow and depth. This contrast gives the block a lifelike, dimensional appearance.
Press your seams carefully after each section. Pressing toward the darker fabric helps prevent shadows from showing through lighter fabrics and ensures a smoother finish. You can also press seams open if you prefer a flatter look.
Once your rose design is complete, sew the block’s outer edges to create a square. Trim the block carefully to ensure it’s the correct size and perfectly squared off. Accuracy at this stage will make it easier to join your blocks later if you’re making a larger quilt.
3. Creative Design Variations
One of the joys of the Rose Mosaic Quilt Block – Pattern is its versatility. You can interpret this pattern in many ways, depending on your style and color preferences. Whether you prefer traditional elegance or modern flair, this design adapts beautifully to any aesthetic.
For a classic look, use shades of red, pink, and green to mimic a realistic rose. Combine it with cream or beige backgrounds for a timeless, romantic feel. This version is perfect for vintage-inspired quilts or as a centerpiece block in a floral-themed project.
If you’re aiming for a contemporary vibe, experiment with unexpected color combinations. Try blue and purple tones for a cool, abstract look, or even use a monochromatic palette such as varying shades of gray. The geometric arrangement of the mosaic will still resemble a rose, but with a fresh modern twist.
You can also play with scale. Make larger blocks for bold visual impact, or create smaller ones for a delicate, intricate effect. Smaller blocks work beautifully in wall hangings, while larger ones are ideal for full quilts.
Another fun variation is to create a mosaic of multiple rose blocks in different colors, forming a vibrant “garden” quilt. By combining several Rose Mosaic Quilt Blocks, you can produce a stunning patchwork that resembles a field of blooming roses.
Don’t forget about creative quilting! Once your top is assembled, you can enhance the rose design with free-motion quilting that follows the curves of the petals. Using a slightly contrasting thread color can help highlight the mosaic’s beautiful structure.
4. Finishing and Quilting Tips
Finishing your Rose Mosaic Quilt Block – Pattern properly ensures that your project looks professional and lasts for years. After completing your quilt top, it’s time to layer, quilt, and bind your piece.
Lay your quilt top on a flat surface and smooth it out. Place a layer of batting underneath, followed by your chosen backing fabric. Pin or baste the layers together carefully, making sure there are no wrinkles or folds.
When it comes to quilting, consider how your stitching can enhance the rose design. You can outline the petals with free-motion quilting to give them more dimension, or use straight-line quilting for a clean, structured appearance.
If you want a more intricate finish, try echo quilting around the rose pattern. This technique creates rippling lines that draw the viewer’s eye toward the center of the design. It’s a great way to emphasize the mosaic effect and add visual movement to your quilt.
Once your quilting is done, trim the edges neatly and prepare your binding. You can use a coordinating color for a seamless finish or a contrasting shade to frame your design. Take your time sewing the binding—this final step ties the whole project together beautifully.
Finally, press your completed quilt block or quilt gently to set the seams and smooth out any wrinkles. Your Rose Mosaic Quilt Block is now ready to display, gift, or incorporate into a larger quilting project.
FAQ – Rose Mosaic Quilt Block – Pattern
1. Is the Rose Mosaic Quilt Block difficult for beginners?
This pattern is best for confident beginners or intermediate quilters. It requires attention to detail and accurate cutting, but with patience and careful organization, it’s very achievable.
2. What is the best fabric type to use for this pattern?
100% cotton is the best choice for quilting projects like this. It’s easy to sew, durable, and holds its shape well when pieced together.
3. How can I make the rose design look more realistic?
Use fabrics in a range of shades within the same color family—light, medium, and dark—to create depth. The proper placement of these tones mimics the way light falls on real rose petals.
4. Can I make this quilt block in different sizes?
Yes! You can easily scale the pattern up or down depending on your project. Larger blocks are ideal for quilts, while smaller ones are perfect for pillows or table runners.
5. What quilting technique enhances this design the most?
Free-motion or echo quilting works beautifully. These methods accentuate the curves and texture of the rose, enhancing its natural beauty.
Conclusion
The Rose Mosaic Quilt Block – Pattern is more than just a quilting project—it’s an artistic expression that captures the timeless elegance of a rose in fabric form. Through thoughtful fabric selection, precise piecing, and creative color choices, you can create a block that radiates beauty and craftsmanship.
Whether you’re crafting a single decorative piece or building a full quilt, this pattern offers endless opportunities for customization. From traditional rose tones to modern abstract interpretations, each Rose Mosaic Quilt Block tells its own story of creativity and passion.
We hope this guide has inspired you to start your own project. If you enjoyed it, please share your honest opinions and suggestions in the comments below. We’d love to hear how your Rose Mosaic Quilt Block – Pattern turned out and what colors you chose for your blooming masterpiece!