The Santa Claus Quilt – Pattern is a joyful and festive way to bring the magic of Christmas into your home. Combining timeless holiday imagery with the warmth of handmade quilting, this pattern offers a heartwarming project that you can treasure for many seasons to come. Whether you’re making a keepsake for your family or a heartfelt gift for someone special, this pattern is the perfect way to celebrate the most wonderful time of the year.
Crafting a quilt with a Santa Claus Quilt – Pattern gives you endless creative freedom. From bold reds and snowy whites to intricate appliqué and embroidered details, each block can tell a different story of Santa’s journey. This type of quilt is perfect for those who love detailed work and enjoy seasonal sewing projects that add joy and charm to any space.
In this article, we’ll walk you through everything you need to know about creating your own Santa Claus Quilt – Pattern, including choosing fabrics, constructing blocks, assembling the quilt, and ideas for personalization. Whether you’re new to quilting or a seasoned stitcher, this guide will help you bring St. Nick to life—one block at a time.
1. Choosing the Right Fabrics and Supplies for a Santa Claus Quilt
Starting your Santa Claus Quilt – Pattern begins with gathering the right fabrics and materials. The success of any quilt lies in its fabric choices, and this is especially true when creating something as detailed and colorful as a Santa-themed quilt. Begin by selecting a high-quality 100% cotton quilting fabric. It is soft, durable, and perfect for showcasing detailed piecing and appliqué.
You’ll want to gather a variety of reds, whites, blacks, and skin tones to represent Santa’s classic look. Red is the most dominant color in a Santa Claus Quilt – Pattern, so be sure to select different shades and textures—perhaps even a print with holly or candy canes for extra holiday flair. White-on-white prints are also great for adding depth to Santa’s beard or snow backgrounds.
In addition to your main fabrics, consider using felt, flannel, or plush fabric for small details like Santa’s hat brim or coat trim. These materials add a tactile element to the quilt that children (and adults) will love. However, if you’re going for a more traditional patchwork style, stick to all cottons to maintain consistency.
You’ll also need batting and backing fabric. Cotton or cotton-poly blend batting is a great choice for a quilt that will be displayed or lightly used. For the backing, consider a festive holiday print or a solid color that complements your quilt front. This creates a polished, cohesive finish.
Thread choice matters as well. Match your thread color to the fabric for piecing, and feel free to use metallic or decorative threads for topstitching or embroidery. These can really elevate the visual appeal of your Santa Claus Quilt – Pattern, especially when outlining features like Santa’s suit, hat, or belt.
Finally, gather the basic quilting tools: a rotary cutter, quilting ruler, cutting mat, pins or clips, an iron, and a sewing machine or hand-quilting supplies. Optional embellishments like buttons for Santa’s coat or tiny bells can add a playful, three-dimensional element to your finished quilt.
2. Designing Your Santa Claus Quilt Blocks
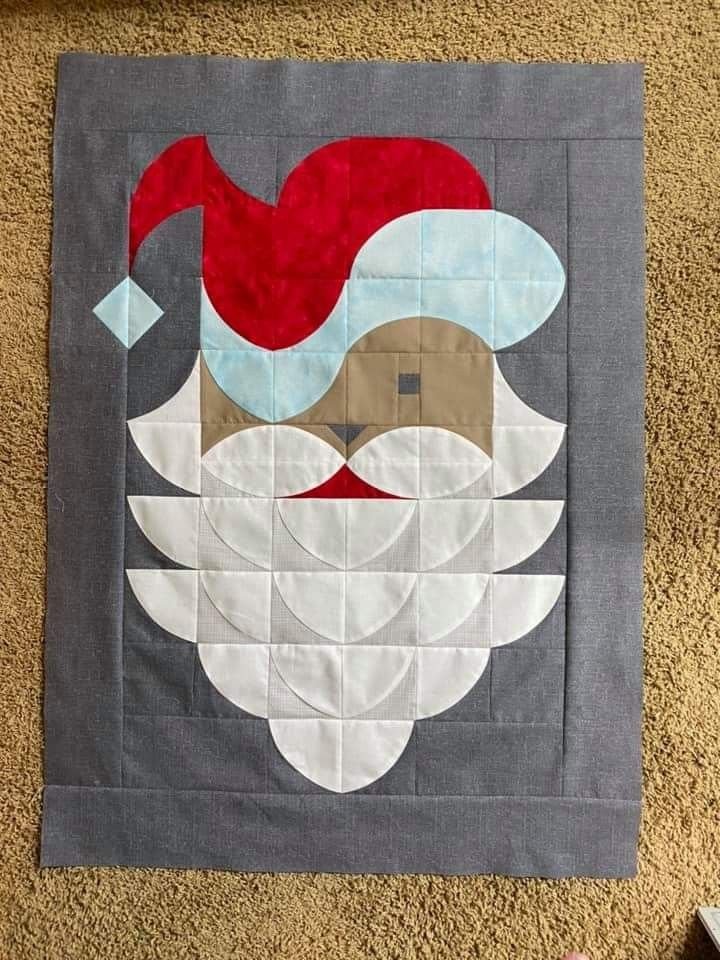
When working with a Santa Claus Quilt – Pattern, the block design is where your creativity truly shines. Each block can be a different depiction of Santa—perhaps a full-body Santa, a close-up of his cheerful face, or even scenes of him placing gifts under the tree. Start by choosing whether your quilt will be pieced, appliquéd, or a combination of both.
Pieced blocks are built by sewing geometric shapes together to form the image. These can be more abstract and modern in style, but they are great for beginners who are not ready to dive into more detailed appliqué work. Use triangle and square units to form Santa’s hat, face, and beard in a simplified, artistic way.
Appliqué blocks, on the other hand, allow for more detail and realism. Using fusible web or hand-appliqué methods, you can create expressive Santa faces, sleighs, or even reindeer flying overhead. These blocks are perfect if you want your Santa Claus Quilt – Pattern to be a bit whimsical and storybook-like.
Consider planning your quilt on graph paper or a digital quilt planner. This helps you visualize your blocks and determine how many you’ll need to reach your desired quilt size. A lap quilt may include 9 to 12 blocks, while a full bed quilt might require 20 or more, depending on block size.
For added variety, alternate your Santa blocks with complementary designs like snowflakes, gifts, or Christmas trees. This not only makes your quilt more dynamic but also gives you breathing room between detailed blocks.
Don’t forget the sashing and borders. Use holiday-themed prints or simple stripes to frame your blocks. This pulls the entire quilt together and allows the individual Santas to stand out more clearly against the overall design.
Finally, label or number your blocks before sewing them together. Organization is key when handling multiple block designs, and labeling ensures your layout stays as planned during the quilting process.
3. Assembling and Quilting the Santa Claus Quilt
Once your blocks are completed, it’s time to assemble your Santa Claus Quilt – Pattern into a full quilt top. Begin by laying out your blocks on a large surface or design wall. Step back and adjust the arrangement to make sure the quilt flows well visually. Pay attention to the color distribution and block variety so no section feels too heavy or repetitive.
When sewing the blocks together, start with horizontal rows, carefully pressing seams between each block. Alternate the seam direction in each row to reduce bulk where blocks meet. Once rows are assembled, sew them together vertically to form the full quilt top. Use a quarter-inch seam allowance to keep everything uniform.
Next comes the quilt sandwich—layering your quilt top, batting, and backing fabric. Tape or pin the backing down on a flat surface, then layer the batting and quilt top on top, smoothing out any wrinkles. Baste the layers together using pins, spray adhesive, or hand stitching.
When it comes to quilting, you have several options. A simple stitch-in-the-ditch method works well for letting your Santa blocks shine, while free-motion quilting can add swirling snow, stars, or twinkling lights to your design. You can also outline each Santa for added definition.
For hand quilting, use embroidery floss or pearl cotton to add charming detail. Outline Santa’s coat, add twinkling eyes, or trace the shape of gift boxes. Hand-quilting may take longer, but it adds a personal, heirloom touch to your Santa Claus Quilt – Pattern.
After quilting, trim the edges and prepare your binding. Use red or white binding to frame the quilt or choose a fun holiday print for a more playful effect. Attach the binding using your preferred method—machine, hand, or a combination of both.
To finish, add a quilt label to the back with the date, your name, and a short message if you’re giving it as a gift. A label adds a meaningful finishing touch and helps preserve the quilt’s story for future generations.
4. Personalizing Your Santa Claus Quilt and Displaying It
What makes the Santa Claus Quilt – Pattern truly special is the ability to personalize it. You can adapt the pattern to reflect your family traditions or tailor it for the person receiving it. For example, include initials, family names, or embroidered messages on individual blocks for a personal touch.
If you’re gifting the quilt to a child, consider incorporating their favorite holiday elements—maybe Santa with their favorite toy or block backgrounds in their favorite colors. For adults, go with a more elegant design using rich reds and vintage-inspired prints.
You can also add small interactive elements to the quilt, like pockets in Santa’s coat or a lift-the-flap present. These can make the quilt a fun and engaging piece for children during the holidays, doubling as both decoration and play.
Display options are equally fun to explore. Use your quilt as a wall hanging, drape it over the back of a couch, or fold it at the foot of a bed. During December, it becomes an instant centerpiece for your holiday décor.
If you’re planning to store your quilt, be sure to keep it in a cool, dry place and avoid plastic bins that can trap moisture. Use a cotton pillowcase or fabric bag for breathability and preservation.
Lastly, take a photo of your finished quilt to share on social media or with your quilting community. Quilts are meant to be admired and shared, and the Santa Claus Quilt – Pattern is a charming conversation starter wherever it’s seen.
FAQ – Santa Claus Quilt – Pattern
Q1: What size should a Santa Claus Quilt be?
A: It depends on your preference. A lap quilt is usually around 50″ x 60″, while a full-size bed quilt can be 70″ x 90″ or larger. Adjust your block count and size to meet your desired dimensions.
Q2: Is the Santa Claus Quilt pattern suitable for beginners?
A: Yes! You can keep the design simple with pieced blocks or go more advanced with appliqué. The pattern can be customized for any skill level.
Q3: What fabrics are best for a Santa quilt?
A: 100% cotton quilting fabric is ideal. Choose vibrant reds, snowy whites, and rich blacks for Santa’s outfit, and add in fun holiday prints for extra flair.
Q4: Can I wash my Santa Claus Quilt?
A: Absolutely. Machine wash on a gentle cycle with cold water and tumble dry on low or air dry. Pre-washing your fabric can prevent bleeding or shrinking.
Q5: How long does it take to complete a Santa quilt?
A: Depending on complexity, it can take anywhere from a few days to several weeks. A simple quilt can be done in a weekend, while a detailed appliqué version may take longer.
Q6: Can I sell quilts made from this pattern?
A: Check the pattern’s licensing. If it’s your original design or a free-use pattern, selling is generally allowed. Always credit the pattern designer if required.
Conclusion
Creating a Santa Claus Quilt – Pattern is a beautiful way to embrace the holiday spirit and share it with others. From choosing cozy fabrics to crafting expressive Santa blocks, this quilt becomes more than just décor—it’s a memory in the making. Whether for your own home or a treasured gift, this project offers joy, creativity, and the magic of Christmas in every stitch.
If this guide helped you, we’d love to hear your sincere opinion. Leave a comment with your thoughts or share your finished quilt. Got ideas or tips to add? Feel free to drop your suggestions as well. Happy quilting—and may your Santa bring smiles to everyone he visits!