Small Fabric Bag – Pattern projects are some of the most delightful sewing creations for beginners and experienced crafters alike. Right from the start, the charm of the Small Fabric Bag – Pattern lies in its simplicity, versatility, and endless customization options. Whether you want a compact everyday bag, a thoughtful handmade gift, or a practical organizer pouch, this pattern gives you the creative freedom to achieve it. Sewing a small fabric bag is a great way to practice essential skills like straight stitching, pressing seams, attaching linings, and adding closures.
Another advantage of working with the Small Fabric Bag – Pattern is that it requires very little fabric and only basic materials. This makes it budget-friendly and perfect for using up your favorite fabric scraps. Its approachable structure also helps beginners build confidence while allowing skilled sewists to enjoy a quick, satisfying project. The finished result is always functional and charming, making it one of the most rewarding sewing patterns to explore.
This tutorial-style guide will walk you through how to choose fabrics, prepare your pieces, assemble the bag, and add finishing details that elevate the design. By the end of this article, you’ll understand not only how to create a small bag but also how to personalize it using the versatile Small Fabric Bag – Pattern. Before we move into step-by-step techniques, let’s first look at how to prepare your materials and fabric choices for best results.
1. Choosing Fabrics and Materials for the Small Fabric Bag – Pattern
When starting a Small Fabric Bag – Pattern, selecting the right fabrics is crucial. Cotton fabrics are the most recommended choice for beginners because they are easy to sew, durable, and widely available. Cotton also maintains structure well, which helps the bag keep its shape even after frequent use. For those wanting a more polished look, canvas, linen, or upholstery fabrics are fantastic alternatives.
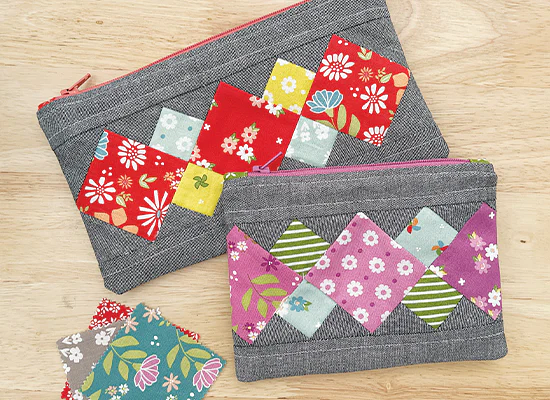
The bag typically consists of an exterior fabric, a lining fabric, and optional interfacing for added firmness. Using contrasting fabrics for the exterior and lining creates a visually appealing design. You can choose playful prints, minimalist solids, or coordinating collections depending on your style. The versatility of the Small Fabric Bag – Pattern lets you experiment freely.
If you want your bag to stand upright or hold heavier items, using medium- to heavy-weight interfacing is helpful. Fusible interfacing is particularly convenient because it bonds to the fabric and enhances stability without adding extra seams. Beginners often feel more confident working with bags reinforced this way.
Small fabric bags can also include closures such as zippers, buttons, magnetic snaps, or drawstring cords. The type of closure you choose depends on your intended use. For example, a zipper is ideal for organizing makeup or craft supplies, while a drawstring is perfect for casual storage, children’s items, or travel pouches.
You may also want to personalize your bag by adding embellishments. Lace, embroidery, decorative stitching, or patchwork elements can turn a simple bag into a unique handcrafted creation. The Small Fabric Bag – Pattern is adaptable to all these custom touches.
Before cutting your fabric, always wash and press it to prevent shrinking or distortion later on. Preparing your materials properly ensures smoother sewing and more accurate results.
2. Cutting and Preparing the Fabric Pieces
Once your fabrics are chosen, the next step in the Small Fabric Bag – Pattern is preparing and cutting the pieces. Most small fabric bag patterns follow a simple rectangular format. However, variations may include rounded corners, boxed bottoms, or shaped flaps. No matter the style, careful cutting is essential.
Spread your fabric on a flat surface and smooth out any wrinkles. Use a sharp rotary cutter and a clear quilting ruler for the most accurate cuts. Measured cuts help all pieces fit together neatly during assembly, especially when adding closures or boxed corners.
The pattern will typically require you to cut two pieces of exterior fabric, two pieces of lining, and optional interfacing. If you’re making handles or straps, you’ll also need long strips of fabric. Most straps are folded and stitched to create strong, comfortable handles.
After cutting, attach interfacing to the wrong side of the exterior pieces. Press the interfacing carefully, following the manufacturer’s instructions. When using fusible interfacing, avoid sliding the iron to prevent shifting. Instead, press firmly and lift.
If your Small Fabric Bag – Pattern includes pockets, this is the stage to prepare them. Pockets can be made from small fabric squares or rectangles. Fold and stitch the top edge first, then press and attach the pocket piece to the lining fabric. Topstitching around the sides and bottom keeps it secure.
Once all pieces are cut and prepared, organize them in the order they will be sewn. Keeping everything grouped prevents mistakes and saves time later. Preparation is key, especially for beginners who are still getting comfortable with sewing techniques.
3. Assembling the Bag Step by Step
This is where the fun really begins. The assembly process of the Small Fabric Bag – Pattern is straightforward and satisfying. Start by placing the exterior fabric pieces right sides together and stitching along the sides and bottom. Use a consistent seam allowance, usually 1/4 or 1/2 inch depending on the pattern.
If the design includes boxed corners, mark small squares on each bottom corner and cut them out. Then pinch the openings together so the side seam meets the bottom seam. Stitch across to form a flat, structured base. Boxed corners give the bag added depth and help it stand upright.
Next, assemble the lining pieces in the same way. However, remember to leave an opening at the bottom to turn the bag right side out later. Many beginners forget this step, so it’s helpful to place a pin reminder at the section that must remain open.
If you’re adding a zipper, attach it before sewing the lining and exterior together. Place the zipper face down on the top edge of the exterior piece, then align the lining piece on top. Stitch through all layers. Repeat with the other side of the zipper. When done, press the fabric away from the zipper teeth and topstitch for a professional finish.
Now it’s time to join the exterior and lining. Place the assembled exterior bag inside the lining, right sides facing each other. Match seams and edges carefully. Stitch around the top opening to connect both layers. Once stitched, turn the bag right side out through the opening in the lining.
Press the top edge neatly and topstitch if desired. This step adds strength and creates a polished look. Finally, sew the opening in the lining closed and tuck the lining inside the bag. Your small bag is now fully assembled.
4. Adding Handles, Closures, and Decorative Details
Finishing touches are what make the Small Fabric Bag – Pattern truly personal. If your design includes handles, sew them before attaching them to the bag. Handles are made by folding long strips of fabric, pressing them inwards, and stitching along the edges for strength.
Position the handles evenly on the top of the bag. Make sure they match in length and are symmetrically aligned. Stitch them securely so the bag can carry weight without stress on the seams. Some sewists reinforce handles with rectangles or X-shaped stitches.
Closures are another important detail. A zipper offers security, while magnetic snaps provide a simple, elegant closure. Buttons and loops add a charming handmade feel. Each closure enhances functionality, so choose the one best suited to your use.
Decorative elements can transform your bag into something special. Consider adding appliqués, lace trim, patchwork panels, or embroidery. Even simple decorative stitching can enhance the look significantly. The Small Fabric Bag – Pattern accommodates endless creativity.
You can also personalize your bag by adjusting its shape or size. Making the bag taller, wider, or rounder is easy with slight pattern modifications. Because the structure is simple, experimenting with variations is low-risk and enjoyable.
Finally, consider adding a keyring loop, interior pocket, or reinforced base. These optional details elevate the bag from basic to beautifully functional.
FAQ – Small Fabric Bag – Pattern
1. Is a small fabric bag difficult for beginners to sew?
Not at all. It is one of the easiest sewing projects and perfect for practicing basic skills.
2. How much fabric do I need?
Most patterns require small cuts—often less than half a yard for each fabric.
3. Can I use scraps?
Yes! This pattern is ideal for scrap busting and mixing prints.
4. Do I need interfacing?
Interfacing is optional but recommended if you want the bag to be sturdy.
5. Can I add a zipper even if the pattern doesn’t include one?
Yes, zippers are easy to incorporate with minor adjustments.
6. How long does it take to make a small fabric bag?
Many sewists finish one in under an hour once they understand the steps.
Conclusion
The Small Fabric Bag – Pattern is a wonderfully accessible and customizable sewing project that delivers both practicality and charm.
From choosing fabrics to adding creative details, this pattern helps you build essential sewing skills while producing something useful and beautiful. I hope this guide has inspired you to create your own versio.