Square patchwork block within a square – Pattern is one of the most timeless and versatile designs in quilting. This classic pattern is loved by beginners and advanced quilters alike for its clean geometry and endless creative possibilities. The idea is simple: a square inside another square, often made up of smaller fabric pieces that come together in beautiful symmetry. Whether you want to create a quilt, a cushion cover, or a decorative wall piece, using a Square patchwork block within a square – Pattern allows you to combine colors, textures, and patterns in a visually striking way.
What makes this design so appealing is its balance between simplicity and sophistication. The Square patchwork block within a square – Pattern can be made from just two contrasting fabrics for a minimalist look or from a rainbow of prints for a more vibrant result. This adaptability makes it ideal for anyone who loves fabric art but also values structure and precision in their projects. Each square can tell its own story, yet together, they form a harmonious whole.
In this article, we’ll walk through how to understand, plan, and assemble your own square block pattern. You’ll learn about the materials needed, cutting and piecing techniques, and how to achieve perfect alignment for a professional finish. By the end, you’ll have all the knowledge to create a stunning Square patchwork block within a square – Pattern project that reflects your creativity and skill.
1. Understanding the Square Patchwork Block Within a Square – Pattern
Before you start cutting fabric, it’s important to understand the fundamentals of the Square patchwork block within a square – Pattern. At its core, this pattern is built around layers of squares. The innermost square forms the focal point, while each outer layer frames it, creating depth and visual interest. The pattern’s precision and repetition make it one of the most recognizable motifs in quilting.
Patterns may vary in size and number of layers. Some designs feature just two or three squares, while others stack several layers for a more intricate appearance. Choosing the right version depends on your project size and the look you want to achieve. For example, a baby quilt might use larger blocks with fewer layers, while a wall hanging could include smaller, detailed squares.
Color and fabric choice are key. A traditional Square patchwork block within a square – Pattern often uses contrasting colors to make each square pop, such as a light center framed by darker borders. Modern variations might play with gradients, solids, or patterned fabrics for a more dynamic look. The contrast between colors and textures gives the pattern its visual rhythm.
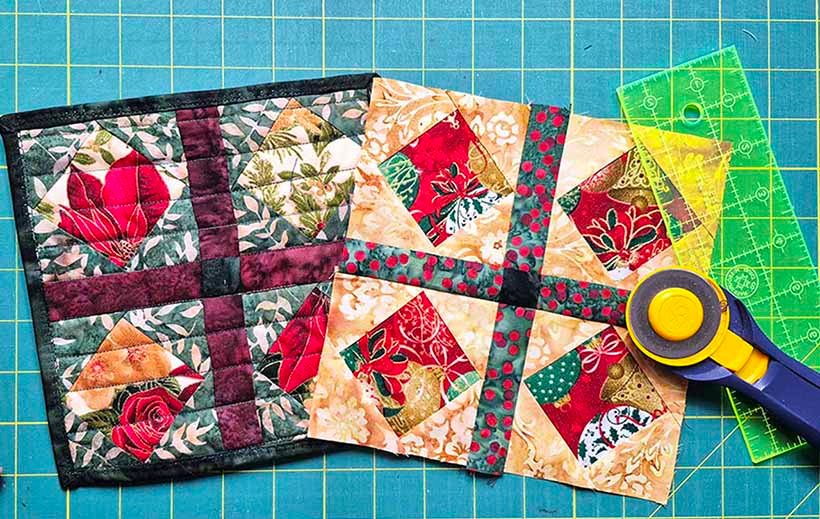
The accuracy of your cuts and seams determines the success of this design. Because the block relies on clean geometry, even a small deviation in measurements can affect the final symmetry. Using a rotary cutter, ruler, and cutting mat will help ensure precise edges.
Another great feature of this pattern is its flexibility in scale. You can make each block any size, from small 4-inch squares for intricate quilts to large 12-inch or 16-inch blocks for quick projects. The Square patchwork block within a square – Pattern adapts easily to your needs and available time.
Lastly, remember that practice is key. Start with a few test blocks before diving into your final project. Experiment with color combinations and fabric textures until you find a layout that speaks to your style. Understanding the structure of the pattern is the foundation for creating beautiful, well-balanced results.
2. Choosing Fabrics and Preparing to Sew
Selecting fabrics for your Square patchwork block within a square – Pattern is one of the most enjoyable steps. The right fabric choices can completely transform your design. Start by picking a color palette—either classic, like red and white, or modern, like soft pastels or jewel tones. Think about contrast, as it helps each square stand out from the others.
Choose high-quality cotton fabrics designed for quilting. These fabrics are easy to cut and sew and maintain their shape through multiple washings. Avoid stretchy or slippery fabrics, as they can distort the straight lines essential for this pattern. Pre-washing your fabric is a good idea to prevent shrinking later on.
Once your fabrics are selected, it’s time to cut your pieces. Use your pattern’s measurements and a rotary cutter for precision. Label each piece by size and color—this helps keep everything organized as you sew. A simple sticky note or fabric clip works great for labeling.
Pay attention to grain lines when cutting your fabric. Aligning pieces with the grain helps prevent stretching and ensures that your blocks stay square after sewing. This detail might seem small but makes a big difference in your final results.
Before sewing, arrange your fabric pieces on a flat surface to preview the layout. This “mock assembly” helps you visualize how the colors and patterns interact. You can make adjustments before committing to your design. Many quilters take photos of their layout for reference while sewing.
Finally, make sure your sewing machine is ready. Use a sharp needle and matching thread. Set your stitch length to medium and test on a scrap piece of fabric. Proper preparation ensures that your Square patchwork block within a square – Pattern will come together smoothly and accurately.
3. Sewing and Assembling the Patchwork Block
Now comes the exciting part—assembling your Square patchwork block within a square – Pattern. Begin by joining the smallest squares in the center. These will form the focal point of your design. Sew with a consistent ¼-inch seam allowance, which is the quilting standard. This consistency is key to achieving a precise final shape.
After sewing the center, add the next layer of squares. Most patterns will guide you to sew strips or triangles around the center block to form each new “frame.” Align edges carefully, pin if necessary, and press seams after each addition. Ironing after every step helps your block lie flat and keeps it looking professional.
Check the alignment of your seams frequently. Because the Square patchwork block within a square – Pattern relies on geometric precision, even slight misalignment can become noticeable as layers build up. Trimming excess fabric or squaring up each layer ensures everything fits perfectly.
If you’re creating multiple blocks for a quilt, it’s helpful to make one block completely before cutting fabric for the rest. This “test block” helps confirm your measurements and technique before you commit to the full set. It also allows you to refine color placement and adjust if needed.
As you continue adding layers, maintain a rhythm: sew, press, and trim. Taking your time through these steps guarantees crisp edges and perfect corners. A square ruler can be very useful here to ensure that each layer maintains symmetry.
Once your block is complete, give it a final press with your iron. Lay it flat on your workspace and admire your work—you’ve just completed a Square patchwork block within a square – Pattern that can be used on its own or joined with others for a larger piece.
4. Finishing Touches and Creative Uses
Your Square patchwork block within a square – Pattern is now complete, but the fun doesn’t stop there. Finishing touches add polish and personality to your work. If you’re making a quilt, sew several blocks together using sashing or borders. This creates a cohesive design while giving each square space to stand out.
You can also use individual blocks for smaller projects. Turn them into pillow covers, pot holders, tote bags, or table runners. These smaller creations make excellent gifts and allow you to experiment with different color combinations.
Adding quilting stitches enhances both texture and durability. You can quilt along the seams for a clean, classic look, or use free-motion quilting for something more artistic. Contrasting thread can make the stitches part of the design, while matching thread keeps the focus on the fabric.
Consider adding embellishments for extra flair. Small embroidery details or fabric paint can personalize your Square patchwork block within a square – Pattern and make it unique. However, keep embellishments minimal if you want to maintain the crisp geometric look of the squares.
Don’t forget to label your finished work, especially if it’s a quilt. Adding your name, date, and project title gives it a personal touch and marks it as a handmade treasure. This is particularly meaningful for quilts meant to be gifts or family heirlooms.
Finally, care for your creation properly. Wash it gently in cold water and dry it flat to preserve colors and shape. Proper maintenance will keep your Square patchwork block within a square – Pattern looking beautiful for years to come.
FAQ
Q: What is a Square patchwork block within a square – Pattern?
A: It’s a quilting design featuring concentric squares, where each layer frames the one inside. It’s a classic and versatile pattern used in many quilting projects.
Q: Is this pattern good for beginners?
A: Yes! The Square patchwork block within a square – Pattern is an excellent starting point for beginners because it teaches precision, color coordination, and basic sewing techniques.
Q: What fabrics work best?
A: Quilting cotton is ideal. It’s durable, easy to handle, and available in countless colors and prints.
Q: How do I keep my blocks perfectly square?
A: Use accurate measurements, a consistent seam allowance, and press your seams carefully. Trim each layer as you go to maintain symmetry.
Q: Can I make this pattern by hand?
A: Absolutely. While machine sewing is faster, hand stitching gives a more traditional, textured look that many quilters love.
Q: What can I make with this pattern?
A: You can use it for quilts, cushions, table runners, bags, and decorative wall hangings. It’s extremely versatile and adapts to various project sizes.
Conclusion
Creating a Square patchwork block within a square – Pattern is both relaxing and rewarding. You’ve learned how to select fabrics, cut with precision, assemble your block step by step, and finish it beautifully. This pattern’s elegance lies in its simplicity—it’s easy to learn but endlessly customizable.
Whether you’re crafting a single decorative piece or a full quilt, your project will reflect your creativity and attention to detail. I hope this guide has inspired you to start your own patchwork project. Please share your honest opinion and suggestions—I’d love to hear how your square block design turned out!